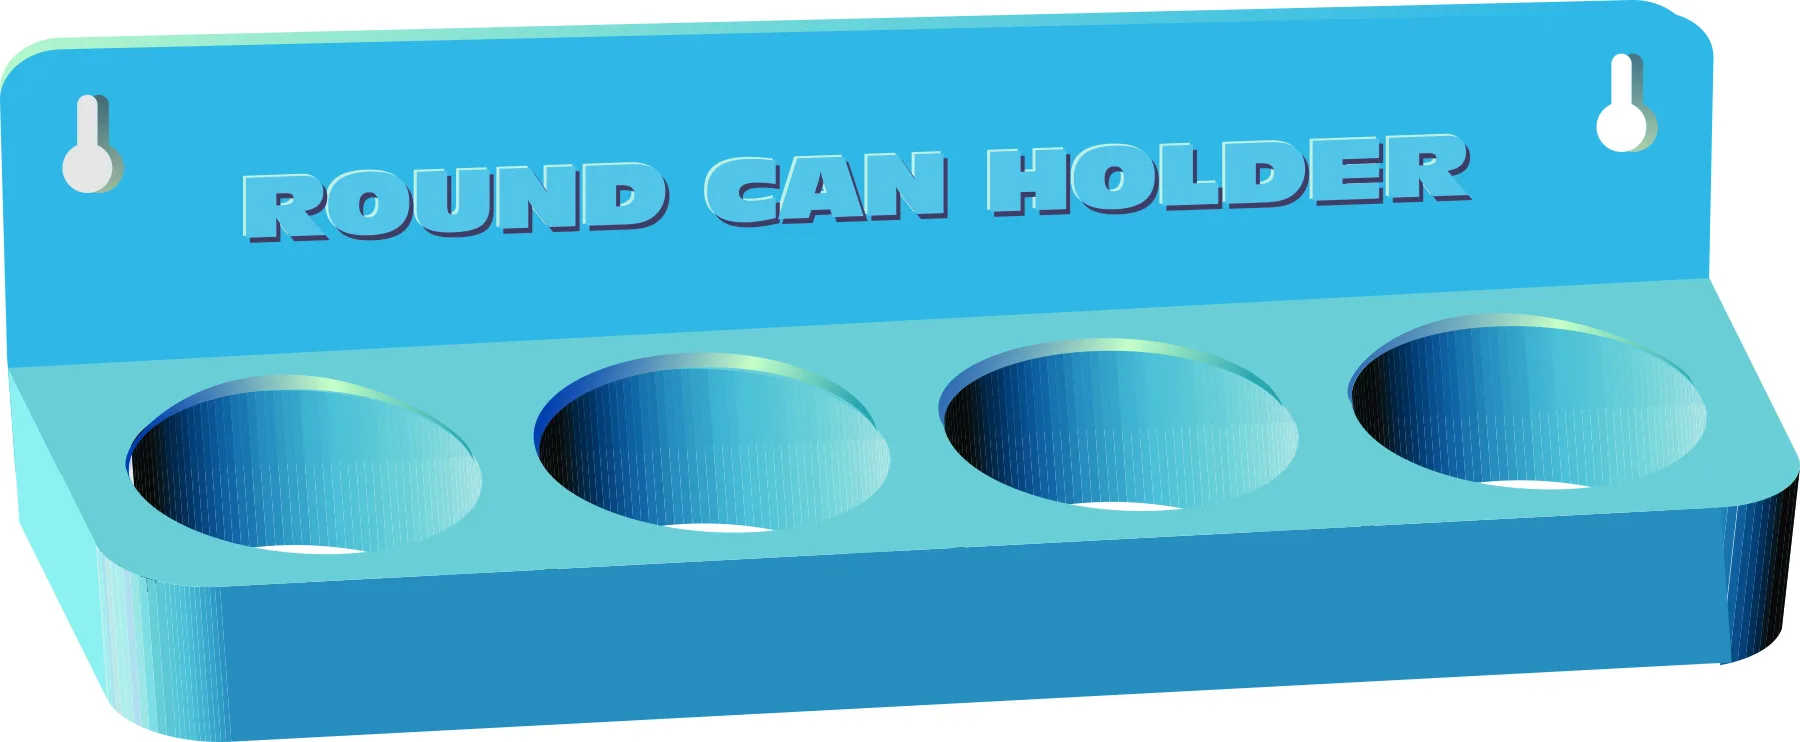
I was recently asked by a potential customer to create a drawing of a possible product. He gave me a simple sketch of his idea that had been drawn on a bar napkin and asked me to create a more refined drawing to use in acquiring investor funds to produce the potential product. At this point, the entire thing was purely a speculation. He explained to me that this potential product was intended to be a way to organize and store various kinds of round cans, like spray paint, lubricants, insecticides and more. Since most of these products are the same physical size (2 5/8” in diameter), this product could easily accommodate them all, and he hoped to market it as a molded plastic storage tray.

I will attempt to show, step-by-step, how I created the image in Figure 1. The first thing was to create a circle using the ellipse tool with the Control key held down. This circle was then duplicated and moved to the right extensively. With both circles selected, I chose the blend tool and chose two steps, which resulted in four equally spaced circles, as shown in Figure 2. The blend group was broken apart, and the two center circles ungrouped. Then, all four circles were selected and grouped together. This group was then duplicated and nudged down slightly. I used the duplicated group to trim the other group. The resulting crescent-shaped objects were ungrouped, and I added a fountain fill to one of them and copied it to the remaining three. Then, a rectangle was created to encompass all the circles. The bottom two corners of the rectangle were given a half-inch radius. Then, the group of four circles was combined with the rectangle. Figure 3 shows the drawing at this point.


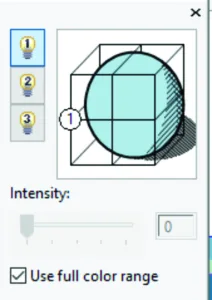
The next step was to select all objects and skew the image as seen in Figure 4. Also, this image was made a bit more narrow by pushing it up a bit. Next, I selected the compound rectangle and chose the extrude tool to create a 3D look for my object. Figure 5 shows the result I achieved. Note that I had chosen extrusion color and extrusion lighting as shown in Figure 6.
The next thing was to add some perspective to give the image a somewhat realistic look. To do that, I selected all the objects, the entire image, and grouped them. I then chose Effects > Add Perspective and added a perspective effect. (Note: this is somewhat subtle and should not be over-exaggerated.) One of the things I noticed after applying the various effects was that some flaws occurred in the visual appearance of the image. To correct these, I ungrouped everything and manipulated nodes on individual objects to get the appearance I wanted for the project. At this point, all that remained was to draw the back panel, which was a simple rectangle, and then add the details: the mounting holes, raised lettering, and a slight perspective angle for realism.

This type of drawing is intended only to be a visual representation and may lack the dimensional data required in an isometric drawing, which can later be provided when it is required by the client for a manufacturing company. The whole premise was initially to be a visual image for marketing purposes. An interesting side note is that this potential product was never produced nor marketed because my client was unable to get the needed financial investment capital to fund the project.
Getting back to our drawing, note that many of my examples do not show the actual images I used in the original image, but are a rough duplication of the original image, so some variations can be expected. Trying to duplicate a previous image is always a challenge.
I have tried to show how this project can be produced using the tools available in all previous versions of CorelDRAW, but I also tried to do it using the new Perspective Drawing tool in the 2022 version. I found that controlling the look of perspective shapes is a bit of a challenge in this feature. Though fairly good with objects that contain sharp corners, an object with rounded corners is not possible without a lot of manipulation. I am persuaded to believe that pretty much anything you want to do can easily be done with almost any version of the program. The newest “enhancements” are just not all that necessary for many projects, but are a nice addition for those who find them beneficial and useful, and that can increase their workflow with the use of the newer features.
Now, onto the subject of ethics and business practices. This client was engaged in a speculative venture and asked me to create the design for free, on speculation, with the promise that I would receive financial rewards when the product went to market. I insisted that my time was valuable and that I must be paid accordingly. I charged him my standard hourly rate for this design. If I had not done so, since the product ultimately failed to go to market, I would have never gotten paid. In a similar situation, I once accepted a stock option instead of direct payment for numerous airbrush illustrations of potential products. It turned out that I had 750,000 shares of worthless stock since these products also failed to be marketed.
The fact is that many folks will try to take advantage of your artistic abilities and ask of you some unreasonable things. It is never wrong to question their motives. I would encourage you to use discernment and logic if confronted with something similar to the things I have described. Our world consists of design and imagery, not speculation.
As always, I like to hear questions, comments, and insights at dezender1@gmail.com, and questions will be answered as soon as possible.