One of the many features of CorelDRAW is its ability to be customized. Tailoring the art system itself for your individual ‘Print-House’ will massively increase productivity, as well as support your business’ growth. CorelDRAW can quickly bounce between several workspace options, each set up to best assist your particular production necessities, all while maintaining the art on-screen, which can help instantly move between multiple production processes.
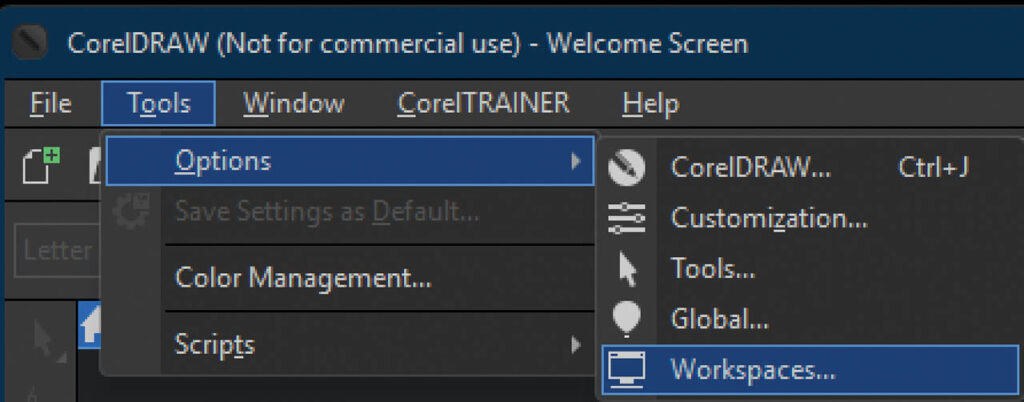
Let’s get specific. Under the Tool menu in CorelDRAW, select the Options flyout, choose Workspaces. Here is where you’ll find the “layout” of your Corel currently. I recommend selecting, if it isn’t already, “Default” from the list on the left and clicking on the “Duplicate…” button. This will maintain the original from when Corel was first installed, but now you can rename the Workspace that you are about to adjust per your preference or production process.
From now on, you can find this newly created workspace and the adjustments that you’re about to make to it on the list on the left, and also from the green Workspace option when CorelDRAW first opens its Welcome Screen (the little house icon in the upper left) You’ll notice a couple of other workspaces already programmed there, too, such as one ideal for a touchscreen PC, or to make Corel look and feel more like its competitor, Adobe Illustrator.
Let me give you some recommendations for personalizing your Corel specifically for our industry. Once in the Workspaces menu, you can toggle via the icons in the upper right to the other features and/or adjustments you’ll want to make. You don’t necessarily have to choose “OK” with each change and then go back up to the Tools menu, Customization, and so on.
CorelDRAW sub-menu
- General: You may want to increase or decrease the “Undo levels”
from 150.- Increasing will require your computer to remember more steps and can slow things down, but allow you to go back in time farther when you mess up.
- Decreasing will lessen the number of mistakes you can undo, but may help keep your computer humming when it doesn’t have to remember as much.
- Nodes and handles
- It can be much easier to grab and pull, select and delete, etc. for each individual node (usually in an ungrouped vector graphic) if you choose “Node size: Large.”
- You can change the colors of them here, too.
- PowerTRACE: Not only do I think this is the very best bitmap-to-vector tracing tool out there (I’d be happy to take the Pepsi Challenge), but you can adjust what its shortcut function does. The Quick Trace method is set by default to “Last used” — though we recommend “Low quality image” for almost every trace.
- Snapping will allow you to change how close objects need to be for CorelDRAW to assume that you want them aligned, centered, etc. Adjust “Snapping radius.” Personally, I leave this function turned off as a default, knowing that a quick (Alt+Z) can turn it back on if needed.
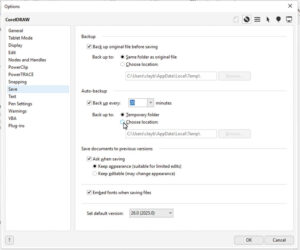
- Save: This submenu includes a couple of adjustments you may want to make, each under its own sub-subcategory.
 Backup allows you to choose a new location (if you want) for the “original file before saving” to go. This is where Corel looks for a backup if you have not yet saved a file or if it is still titled just “Untitled-1,” etc.
- Auto-backup will allow you to choose a new location for a file after you have saved it. You can also change how often these backups occur. This is useful if your computer is getting older or prone to crashing.
- I often recommend placing a new folder right on the desktop for all backups to go when I’m working with a client on older, more crash-prone computers. There are many other things that you can do to stabilize things, but this will at least help you get right back up and running if something kicks you out.
- Text sub-category
- Under the “Display” tab, you may want to change the “Default text units” to prefer points, inches, or millimeters (think kerning, letter height adjustments, etc.)
- Under the “Fonts” tab at the top, a number of the most recently used fonts are displayed. These will appear at the top of your Fonts drop-down menu, at the top/Property bar area in your CorelDRAW. (*Note that you may need to then stretch the drop-down menu to allow you to scroll after the “recently used” fonts are displayed.)
 Backup allows you to choose a new location (if you want) for the “original file before saving” to go. This is where Corel looks for a backup if you have not yet saved a file or if it is still titled just “Untitled-1,” etc.
Customization sub-menu from Corel’s Options/upper right icons
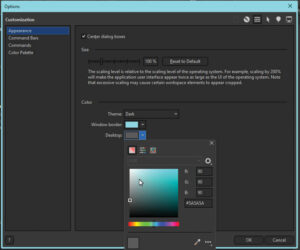
- Appearance – This is where you can choose:
- Size: Spend a minute adjusting the size of Corel’s menus, buttons, options, etc., with this simple toggle bar to maximize your view of CorelDRAW per your screen(s) size.
- An easier-on-the-eye “Dark” theme.
- Your favorite color for Corel’s Window borders.
- A color other than white for your Desktop/off-page work area (I highly recommend this.)
- Command Bars: These are the toolbars around the edge of your design/work area in CorelDRAW.
- Choose which menus you may want to add to your Workspace, per the design process.
- Choose your “Button properties” size.
 Appearance – This is where you can choose:
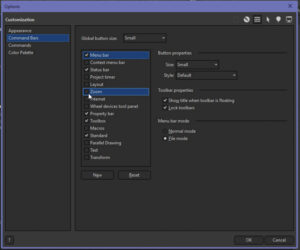
All the above, and so much more, can be adjusted to your preferences and your production process. You may end up with quite a few different workspaces, and you may toggle from one to another (even with the same art on screen) depending on your mood and what equipment you’re sending your graphics to at the moment.