Moving to Water-Based Inks
The process of moving away from plastisol: what to know, what to expect, and the learning curve
There are several reasons why a screen printing business would want to convert to being a primarily water-based ink print shop:
- You can upcharge for the process
- Ink and screen clean up is more manageable
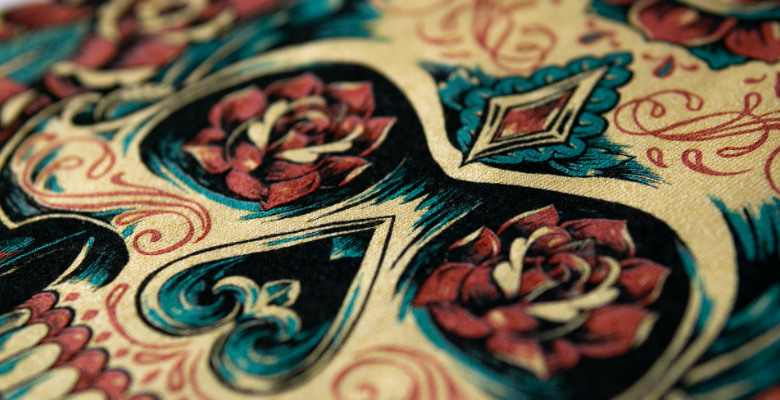
- The print is softer and in demand
- It’s more eco-conscious
- It’s what all the cool kids are doing
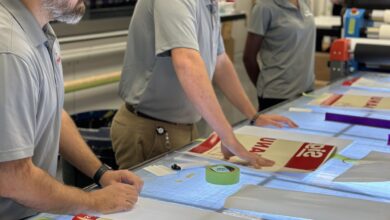
But for a shop that has primarily printed plastisol, it is not a simple transition. Bringing in water-based (WB) inks will show shops where they’ve been cutting corners in workflow and force them to make improvements in their shop processes and habits. Because of this adjustment, here’s a short list of things to look at within your shop.
There are three main areas to focus on:
- Screen creation: This includes coating the screen, drying the emulsion, and proper exposure. An improperly made screen will lead to disaster on the press.
- On the press: Printing processes and things in your environment to be aware of-evaporation!
- Cure: Because who wants to buy a shirt and then have the print wash off?
Darkroom
First up is our dark room and creating our screens. While you don’t have to use a water-resistant emulsion, it is HIGHLY encouraged that you do so. If you haven’t settled on an emulsion yet, you can pick up a reclaimable screen hardener to give your emulsion some short-run water resistance. When coating your screens, you don’t need the same stencil thickness as you do for plastisol. You can coat your screens a little thinner. One over one with the sharp side of a scoop coater should do the trick. Depending on the solids content of your emulsion, you may find you need to coat 1 X 2 or 2 X 1. Test what works best for you.
Next up is your screen drying environment. You want to create an enclosed space (a dry box or small room will work) where you can control the heat, humidity, and air flow. You will want to maintain temperatures between 65 and 85 degrees F and keep the humidity level between 30% and 40%. To achieve this, get yourself a good dehumidifier and put it in the same space as your screens. The dehumidifier, as it pulls water from the air, will create a small amount of heat. In my testing, I found temps never got much above the low 80s (this was in a large drying cabinet). You will also want to use a couple of fans to circulate the warm, dry air, creating airflow over and under the emulsion, promoting evaporation and drying your screens faster. This cirulation will give your screens the proper environment to reach necessary moisture levels.
Use a hygrometer to measure the humidity level in your screen room and wherever you will be storing screens for any amount of time. Your screens will homogenize to their environment. When they do this, they can quickly soak up extra moisture in the air, causing your emulsion to become gummy and not crosslink properly. On that note, a screen that is below 30% moisture can become brittle and flake off during rinse out.
Once you have a screen between 30% and 40% moisture, you need to expose the screen properly. This process necessitates the use of a 21-Step exposure calculator. Make sure you get a solid Step 7. If you can get a solid or semi-solid Step 8 and still keep all of the detail needed in your design, go ahead and do so. If your screen is underexposed, you will experience emulsion breakdown on the press, leading to ink getting on the shirt where you don’t want it. This emulsion issue directly translates to ruined shirts, lost profit, reduced margins, and maybe even lost money. At best, it means taking the screen or screens down, reshooting, and setting the job up. And this directly translates to lost money.
So, once your screen is exposed correctly, you can either apply your reclaimable stencil hardener or go through the steps of post-exposing your screen. Post-exposure is always recommended, especially if you have a longer print run. To properly post-expose your screen, put it back in the drying rack and get the moisture levels back to where it was before exposing. Then place the screen in your exposure unit. If you can turn off the vacuum on the unit, place your screen squeegee side down and expose for 2-3 times the initial exposure time. If you cannot turn off the vacuum, place the screen as usual and post-expose for 3-5 times the initial exposure. If you live in a sunny place, you can also leave your screens in the sun. It produces some fantastic UV light. Post exposing allows emulsion resins a chance to create new chemical bonds that will create a more water and solvent resistant stencil. If you chose to apply the stencil hardener, then place it back in the drying rack until fully dry. Follow any further direction of the bottle of reclaimable hardener.
On press
Next up is your print environment and printing with WB inks. You will find that the dryer in your shop is, the more difficult it is to print WB inks. Once you get below 40% humidity in the shop, the inks start evaporating far faster. Even with a thicker flood, the screen image will start to clog up in a short amount of time. If you are unable to get an ultrasonic humidifier in your shop (these are the big smoky looking machines pumping moisture into the air), then make sure to have a spray bottle on hand to add moisture back into your inks as needed. Please note that it may be easiest to pull a little ink out of the screen to add the water, stir it together, then place it back in your screen.
You also need to be highly aware of your work speed. The faster you can move, the fewer ink drying issues you will encounter. Plastisol has allowed us to be far more relaxed with our printing habits. WB inks will make you change those habits. If you don’t, you will encounter production issues.
One step that is not talked about as much is flash drying WB inks. Flashing only applies to HSA WB inks. HSA stands for high solids acrylic. These inks have quickly become the norm compared to traditional WB and Discharge. These inks print like plastisol, where you can build a bright white base and print your colors on top. But there are some fundamental differences. With plastisol, you don’t want to flash the ink too long and get the ink layer completely dry as you run the risk of over flashing and having adhesion issues. With HSA WB inks you want to flash until the ink is dry to the touch, any remaining moisture will lead to a tacky ink when printing over it (because of pigment properties, some inks will have an inherent low tack). This drying can take longer than with plastisol, so a flash unit with air movement is strongly recommended. Like with plastisol, you want your platens to be warm/hot to make flashing faster, but with WB inks this heat will help with evaporation of the ink as well, decreasing your flash times. So run hot when you can. Because of running your platens hot, you will find that the ink lays down smooth and crisp and your halftones lay down clean and sharp. You will find your WB prints will become sharper and cleaner than your plastisol inks.
Cure
Lastly, you need to look at your dryer. Water-based inks cure by first evaporating ALL the water in your ink deposit. After this, the ink layer can start to climb, getting hotter, and reach cure temperature. Cure temperature with WB is not an exact temp like it is with plastisol. With WB it’s about maintaining a temperature range and holding in that range. In the U.S. we tend to look at 320 degrees F since it pairs up with traditional plastisol temps. The WB ink layer needs to reach and hold at approximately 320 degrees F for as long as possible. Thirty seconds is a good target time at temp. While ink companies state cure is 320 degrees F for 2-3 minutes, this is simply to ensure that you keep the garment in the dryer long enough to reach and hold at cure temps.
If the tunnel of your dryer is on the short side, typically 6 foot in length or under, and you do not have forced air, we recommend adding a low cure additive to the ink like Warp Drive. Warp Drive will chemically cure your ink once the water has evaporated. So, if needed, you can hang the shirt up to dry and then cure, or you can run the garment through your dryer long enough to evaporate the water, carefully stack them at the end of the dryer, wait up to 48 hours and the ink will be fully cured.