Let’s start with the obvious. Engraving is a fairly unforgiving process, and if we make a mistake, we’ve pretty much just lost a piece. There are some workarounds that can save you, but I think that, for the most part, it’s time to look for a new workpiece or substrate when we realize we have made a mistake.
First, the most important thing is to remember there is a difference between using your own inventory and using a special piece supplied by the customer. A mistake with your inventory is bad enough, but a mistake with a customer-supplied piece can be very expensive and can damage your reputation. Most of the more expensive machines will come with an index of suggested settings. In some cases, the suggested settings will be fine. In others, they won’t be close. Only experience will get you to the point where you can enter the settings for your machine without a thought. If you have a graphic that includes text, it’s always worthwhile having someone proofread the graphic before starting the job.
Remember the adage: bad results come from a lack of experience. Sufficient experience comes from making mistakes! Don’t worry about making mistakes — as long as you don’t keep making them. Have enough material to practice on if you’re uncertain.
Wood
Different woods are going to behave differently, but the potential setbacks are going to be similar. Excessive power settings will cause burning, and insufficient settings will result in poor engraving and an incomplete cut. If a piece burns, there’s nothing you can do. If the setting is too high for a cut and the edge burns, it may be possible to clean up some of the charring with the judicious use of some fine sandpaper.
With a finished surface, however, it may not be possible to clean it enough. When cutting, be very careful and hold the substrate to avoid changing position. Gently try to remove the piece (or one of the pieces if making multiples) to check if the piece will separate. If the cut didn’t go all the way through, adjust the power and repeat the cut.
Another issue that can arise with cutting is a result of the natural variations in wood. Sometimes, the piece will separate almost completely but tear the last little bit on the obverse side. If the tear leaves a scar on the finished piece, use your own discretion and see if you can clean it up with fine sandpaper. If the tear extends from the finished piece into the substrate, gently remove the jagged piece with a razor and finish the edge by hand.
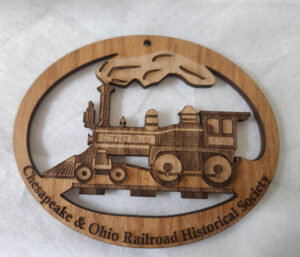
If you have created the graphic yourself, the only adjustments you will probably have to make will be adjusting the grayscale to maximize the contrast between segments. If you create a bitmap, you can adjust the tone curve to alter the contrast or brightness (if that feature or something similar is provided with your software). Another way to improve the appearance of the graphic is to adjust the lens height on your machine — different people have different ideas about how to do this. I am generally pretty happy with changing the height by about .05″ closer to the lens.
Now, having said that, a mistake will generally ruin a piece, but there is one workaround if you do make a mistake. Sometimes this will work with a graphic, but sometimes it won’t. Draw a dark-shaded rectangle around the portion of the job where the mistake lies and run two passes (one pass may be enough). Then, run a piece using microsurface plastic or foil and create an inlay. I’d check with the customer first and make sure that
is acceptable.
A point to remember is that the engraving and cutting process releases oils from the wood onto the surface. That can be cleaned with a mild cleanser or even soapy water. I usually give the piece a gentle application of furniture oil to brighten up the finished piece.
Bamboo
Although bamboo is treated like a hardwood (as far as settings are concerned), the substrate is made by cementing shredded bamboo strands. The combination of the inconsistencies of the bamboo and the cement creates variations in the material which affect the graphic. One tip for improving the result is to raise the bed about .01″ out of focus and run the piece. I usually add a second pass by raising the bed by another .005″.
Glass
Some material indexes offer two settings: one for glass and one for crystal. I have found that, as far as my jobs are concerned, using the crystal setting works better for all glass. In almost every instance of a mistake happening with glass, you’re stuck. A second pass with different settings is not generally going to help, although you might be able to run a second pass if you used insufficient power. Otherwise, the only hope you might have is if you are working with a flat piece, in which case you might be able to make an overlay to conceal the problem.
Most of my glass work involves rotary work. There are several things that can go wrong with using a rotary adaptor for glasses, tankards, or mugs. Unfortunately, they’re all “terminal.” Too much pressure from the rotary adaptor can cause the piece to crack or even shatter.
An incorrect focal length setting will spoil the engraving. I always recommend using wet masking with wet paper when working with glass. If the mask dries out too quickly, the paper may lift and interfere with the beam, causing a defect in the engraving. On a rotary job, if you’re using a wet mask and the glass isn’t secure, it may slip and spoil the image. If the glass is crooked on the adaptor, the same thing can occur.
Microsurface plastic/acrylic substrates
Mistakes with plastics almost exclusively arise from too much power. Too much power will burn the plastic. Insufficient power generally doesn’t ruin a job because a careful second pass will recover the graphic. You may need to repeat engraving passes, particularly if you’re working with bicolored substrates for jobs such as name tags. I have found that two passes at a lower power pass get me a better finish than one high-power pass.
Cutting creates smoke, which will stain the plastic — which you can usually remove with a gentle rub of an alcohol-soaked soft cloth. The single best way to avoid smoke damage is to use a good adhesive masking paper. I’ll run the cloth around the cut edges before removing the mask to try and avoid smudging. Be careful and try to keep your hands clean and avoid smudging the finished piece.
Leather/paper
In a general sense, you use the same philosophy with these materials as you do with wood. Careful testing at various powers and speeds will get you to the point where you can cut and engrave these more delicate materials with confidence. I recommend using an adhesive masking paper on leather, but you need to be more careful when cleaning off the residue because leather is more fibrous and more liable to staining.
Metals
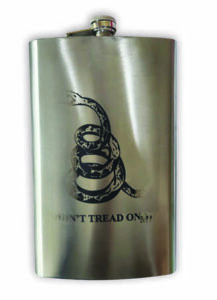
We can pretty much expect to be able to mark pewter, stainless steel, and anodized metals. Hard anodized material can present some challenges and may be beyond the capabilities of some lower-power machines. It is possible to work with some other metals, but consult with your machine’s manufacturer first. You will probably not be able to work with metals that have been finished with a clear coat, but again, consult with your machine manufacturer. There are two primary methods of working with metal: engraving compound and direct engraving.
Engraving compound: Used on ceramics, stone, or selected metals is definitely a one-or-done process. This is one application where I have found the factory index for settings to work fine. Focus height, power, and speed settings are critical, particularly with stone or ceramics. If you’re going to err with power, err on the high side, and I always use a commercial water sealer with ceramics and stone to help preserve the marking.
Direct engraving: Some manufacturers have offered lenses that allow some degree of “mechanical” engraving on metals with lower-power machines. I have not personally tried these, so again, you should discuss this with your manufacturer.
When working with metals, there are a couple of things to remember — again, focus and power are very important. If you don’t get that right, you’ll definitely get a poor image, and you might even remove the marking along with the excess when you clean off the compound. If you reapply the compound to try and fix a problem, you are likely to take away the good part of the graphic.
When applying the compound, which can come in an aerosol spray, tape, or a powder that can be reconstituted into a light paste, don’t use too much. I personally have never had much luck with the paste or the tape, but I have spoken with engravers who prefer them. Lastly, make sure you don’t overspray and be sure to put your piece where the coating will dry uniformly so you don’t have “thick” or “thin” spots. Either will affect the finished graphic.
Other than getting settings right, the two biggest issues will arise from not first cleaning the metal thoroughly. Some pieces come with adhesive labels which leave residue when removed, and some cast, turned, or spun metals have release agents or lubricating material left on the surfaces. A thorough cleaning — I prefer rubbing alcohol — is essential, or the compound will not adhere properly.
Color fill
Color fill on wood, some plastics, and leather is a great way to add value to a piece. Always mask carefully and be very careful with clean up.
Whatever you work with, learn as you go and try not to waste material. After all, it’s not just a substrate — it’s money!

