Let’s Talk Shop: Removing Vinyl Graphics
Some helpful tips on removing adhesive and vinyl, from simple jobs to extreme cases.


I can only imagine the involuntary grimace that comes over my face when a customer asks about graphic removal. For simple removals, we suggest the customer tries it themselves and we give them a few tips.
When we do it, we give the customer an hourly rate, estimate how long we think it will take, but let them know that it may be a slightly more depending on the vehicle. Usually our estimates are pretty close. We write down our start and end times for the customer’s peace of mind.
There are really two parts to any vinyl graphics removal-removal of the vinyl itself, and removal of any leftover adhesive. A few tools and tips make the process easier.
LIABILITY
Anytime you remove graphics from a customer’s vehicle, window or sign you should discuss possible issues and liability with the customer. Over the last 16 years we’ve had two notable situations that caused us time and money.
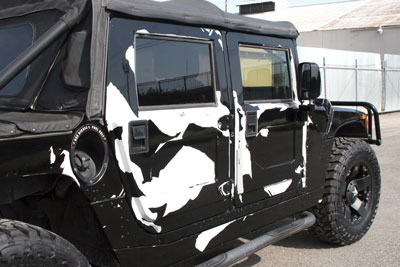
When we had to remove a full wrap off of a black Hummer, quite a bit of paint came off as well. Fortunately we noted the poor paint job when we initially wrapped the Hummer and we discussed paint removal with the customer prior to starting the removal process, but we made one mistake by not having the customer sign off on a disclaimer.
I had photos of us pointing out the paint issues prior to wrapping, as well as documentation during the subsequent removal, but the customer hoped to make a quick buck to cover his repaint and took us to small claims court. Fortunately, despite not having his signature on the disclaimer, we had enough other documentation that showed our efforts to caution the customer and the judge ruled in our favor.
Another instance involved removing graphics from the front glass windows of a jewelry store. We sent out our employee with a razor blade and Windex and he got the graphics off, but managed to scratch up the window as well. We had to pay to have the entire window replaced.
The customer should be cautioned about possible damage to the vehicle, glass or sign substrate. You should also point out that there may be shadowing or discoloration visible underneath-the difference between the vehicle or substrate paint fading around the letters. On tinted windows, the tint can fade around the lettering. The use of solvents and heat should also be mentioned to the customer.
Warning the customer about paint damage before removal, and noting the failing factory paint job prior to initially wrapping it, helped release us from liability for the paint loss.
Above all else, get that signature. Create a simple form that lists possible issues and chemicals you may use and have the customer sign it. A line above the signature should note that the customer understands what you have cautioned them about and their release of liability against you.
VINYL REMOVAL
Removal of vinyl from glass is a little different than vehicle or substrate vinyl removal. Heat is one of the main tools with vinyl removal, but should not be used on glass.
You can look for a more scientific explanation online, but the short answer is that glass does not expand and contract evenly when heat is applied. Unless the glass is specially treated, like with some cookware, it can break when heated.
Applying heat to a vehicle window or large pane of glass on a storefront can cause the entire window to shatter. The easiest way to remove graphics from glass is by scraping up a corner and peeling by hand.
For smaller lettering or graphics, you can carefully scrape the window by spraying it down with Windex first and laying your razor blade as flat to the window as possible. Avoid lifting the back end of the blade while scraping, which can cause scratches in the window.
When removing vinyl from a vehicle or substrate, heat is an important tool. Only apply heat to a small section at a time, heating just what you can remove in a minute or so for maximum effectiveness. Be careful to not overheat the vinyl as it can burn onto the vehicle and mar the surface.
Portable propane torches are a very handy tool. We’ve used heat guns in the past but messing with extension cords and bulky guns were always a pain. With propane torches we don’t need to worry about having an electrical hook-up nearby, especially when working on-site. The small propane tanks last a long time, can be refilled from a larger tank and are lightweight.
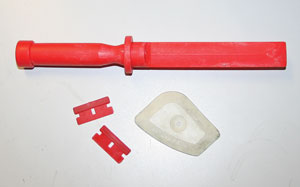
Avoiding damage to the background is the main concern while getting the vinyl off. Use a Lil Chisler, your fingernails or a plastic scraper to start the edge of the vinyl.
Heat a small section and peel. The longer the vinyl has been on there, generally the harder it is to get off. The more vinyl you can peel off in one piece and the less scraping you have to do with the plastic tools, the better.
CHEMICALS
We use some type of chemical to remove the adhesive left behind on all of our removals. You should always check the package for compatibility with different materials.
When we started our business we planned to reuse some old Lexan sign faces when we moved into our first shop. Unfortunately the adhesive remover we sprayed on the entire sign after removal ate into the surface of the plastic and ruined our money-saving plan.
Spray chemicals on a paper towel or rag first and rub in an inconspicuous area before spraying onto the vehicle or substrate. If you have any paint transfer or discoloration, clean the area thoroughly with Windex or soap and water and switch to a different adhesive remover.
ADHESIVE REMOVAL
Taking the adhesive off of glass, or on recently installed graphics, is fairly simple. Goo Gone is a great citrus-based adhesive remover. Put a little on a towel; rub across the adhesive until it balls up and then finish with a final wipe down with Windex or alcohol.
Most of our removals require a little more elbow grease and a stronger chemical. We’ve tried a few chemicals over the years, but have found that Rapid Remover is the best adhesive remover for our applications.
Read the labels of chemicals prior to use. Rapid Remover recommends the use of a respirator and gloves when using. Try to work in a well-ventilated area as well. Also avoid spraying Rapid Remover on plastic areas as it may cause spotting and discoloration.
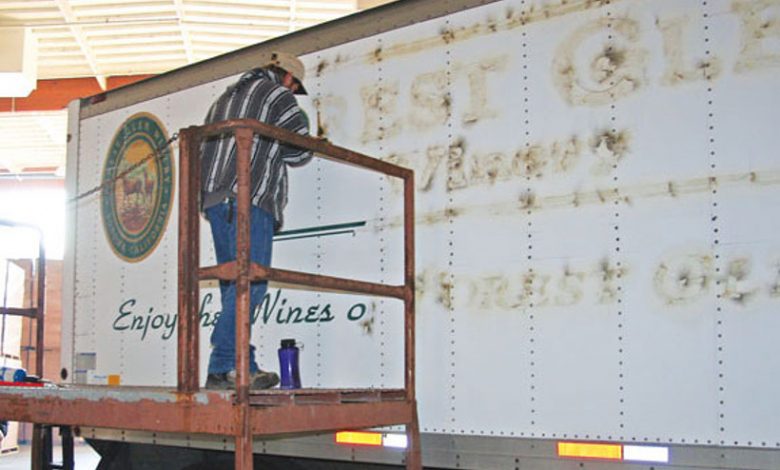
We are currently working on cleaning up the removal of graphics on a fleet of buses. We installed large graphics that were intended to be a temporary application, but were left on the buses for about three years. Fortunately we had in writing that the graphics may cause damage to the vinyl lettering and paint underneath and we could not be held liable.
The buses had an existing burgundy stripe with vinyl lettering. The graphics we installed protected the stripe, and the area surrounding the graphic had faded. There was also damage to the vinyl logo.
The customer plans to repaint the buses, but in the meantime, we are cleaning off the glue residue left behind from the graphic removal. On some buses there was minimal residue, on other buses we were left with an area of glue the same size as the initial graphic.
To tackle this removal we spray down the entire section of adhesive with a light coat of Rapid Remover and let it sit on there for a few minutes. Plastic razor blades work great for scraping off adhesive, but are a little too flimsy for effective vinyl removal.
Using the plastic razor blade we spray down a small section with a little more Rapid Remover and scrape the adhesive into small wads. This can be a messy process; lay down cardboard, newspaper or leftover backing paper to catch drips and balls of glue.
We typically work a small section and then go back with Windex, before the glue dries, to wipe up the balls of glue. Follow this up with a wipe down of Goo Gone or an additional spray of Rapid Remover to get any leftover spots. We then move onto the next section. When all of the glue is removed we follow it with a final wipe down of Windex.
If we plan to install new graphics right away we also wipe down the surface with Denatured Alcohol. This helps to remove any leftover greasy film that could cause graphic failure.
EXTREME REMOVAL
We have a removal process that works in extreme cases. It is an effective way to get off adhesive, but the customer should be warned that it may also remove paint.
If the customer does not want to invest in a paint job on a vehicle and plans to have the area completely covered with new graphics, this may be a good option to remove old, baked on vinyl.
The removal of the graphics is still the same-lots of heat and scraping. When the graphics are really old there will typically be a lot of leftover adhesive.
Tackle this by spraying down the entire area of adhesive with Easy-Off Oven Cleaner. The use of a respirator and gloves is highly recommended. Lay a thin layer of Saran Wrap over sprayed areas. This is an optional step, but does seem to help.
Wait about 10 minutes or more, but don’t allow the oven cleaner to dry, and then start scraping with a large plastic scraper. The adhesive should scrape right off. Because this is an aggressive approach, the chances of getting some paint removal are pretty high.
Easy-Off oven cleaner is also a handy trick for removing enamel-painted lettering. We removed painted lettering from a hot dog cart in a manner of minutes.
Be very careful to test an area prior to use. Avoid letting the chemical run onto other parts of the vehicle, like metals, door handles or rubber seals as it may cause discoloration.
Follow up the scraping with a wipe down of Rapid Remover or Goo Gone to remove any small sections of adhesive. Windex and then alcohol should also be used to remove any film left behind prior to graphic application.