Let’s Talk Shop: Installing Perforated Window Film
Perforated window films are a great thing to add to your list of product offerings, but there are some things you need to know about how it is different than vinyl film.
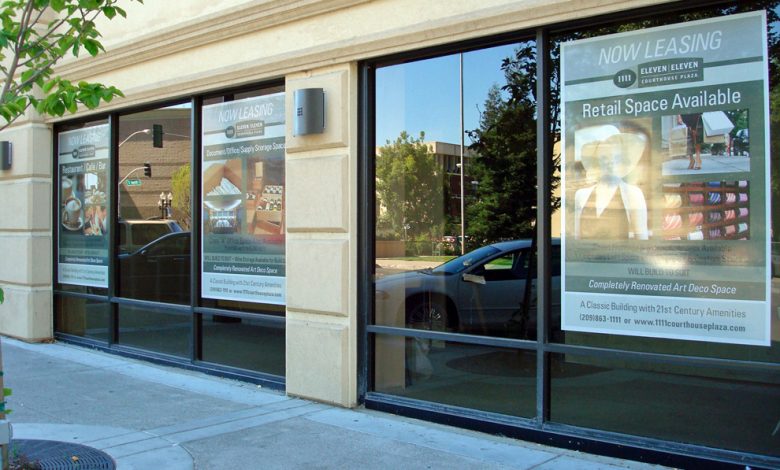


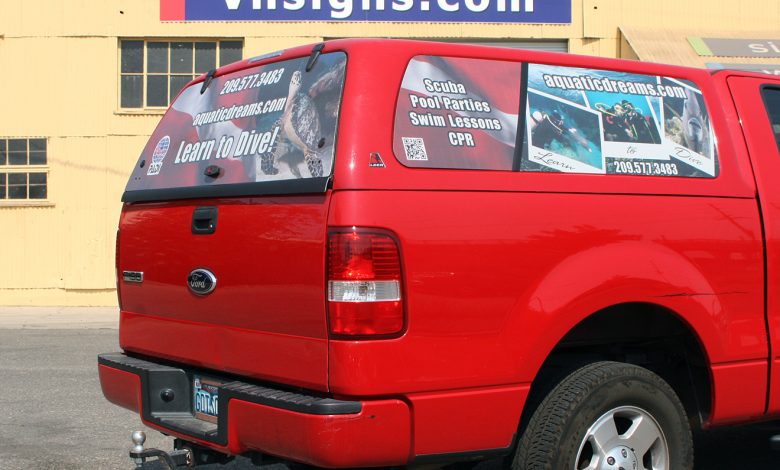
Perforated window films allow you to extend advertising across both vehicle and storefront windows while still allowing visibility from the inside. Since it’s also easy to work with it makes sense to add window perf to the products your company offers.
Installing perforated window film, as with all vinyl films, starts with good surface prep and continues with simple steps for a quality install. There are also a few tips and tricks to make your use of perforated window film both effective and durable long-term.
Prep Work
A clean surface is important with any vinyl install. Be sure to use soap and water to remove any dirt and avoid using any window cleaners that leave behind a film. A final wipe down with a lint free cloth helps remove any dust or lint.
If the window is to be covered completely, I recommend over-printing your graphics-usually by a couple inches all the way around-over the size of the window you’re installing on. It’s smart to wipe down the area surrounding the window too, since the graphics will be slid around and adjusted for proper alignment.
I highly recommend laminating your perforated film with a premium optically clear film laminate. It makes the material easier to work with, enhances the colors, protects against abrasion, and eliminates the build-up of water and dirt that will collect in all the small holes.
Install Using Marks
I’ve seen a couple different methods for installing perforated film on windows, and I don’t think there is any one perfect way to do it. I’m a big advocate for trying a couple different options and then doing what works best for your shop and your particular installer. That might be a completely different method than noted here.
Both methods start out the same by aligning the graphics to the window, whether it’s a car or storefront, using a couple pieces of masking tape stuck to each side of the graphic. The graphic is then measured and aligned to ensure text is straight.
With one method the installer cuts the tape on each side in half along the edge of the graphic, essentially creating alignment marks. The graphic is then removed entirely and the top edge is peeled back, about eight inches or so, exposing the adhesive on the back of the perf film.
If it’s a large graphic then you may need the help of a second person. The graphic is then realigned using the tape on both sides. The exposed adhesive is then pressed into place at the center and you begin squeegeeing the graphics into place applying firm, even pressure with a soft or felt-edge squeegee. Overlap your strokes, and press from the center out.
Install Taping in Place
Another installation option is the method we use. Once we’ve aligned the graphics using tape, we leave the graphic in place instead of removing it, to expose the adhesive.
On storefront windows and vehicle windows that are more square or vertical we would put horizontal pieces of tape about six to eight inches below the top of the window with a couple pieces of tape vertically under the horizontal pieces to hold it in place. We then flip down the top piece, peel back the backing paper from the film and cut it off.
The top flap is then flipped back up into place. The masking tape holds the bottom portion of the graphics in place and helps ensure that everything stays aligned. Once the top piece is flipped up then you do the same method as above by squeegeeing the graphics into place with firm, overlapping strokes from the center out.
With both methods you would start peeling back sections of the backing paper moving down the graphic, installing with the same even strokes. If it’s a smaller window you could remove the backing paper entirely. On larger windows it’s better to remove sections at a time. You don’t have to cut off the backing paper as you go, you can simply peel it back and let it hang down.
The nice thing about this option is typically one person can do the install, especially if the window is a little larger. Because the graphic is taped in place and remains there, your hands are freed up to do the cutting, aligning and squeegeeing in place without a second person to help out.
Install in Vehicles
If we’re installing perforated film on a horizontal storefront window or rear vehicle window, where the width of the window makes it cumbersome to do a top down installation, we change it up a little.
Instead of putting tape marks on each side of the graphic, we put tape at the top of the graphic on each side. The graphics are then aligned to be sure they are straight and centered.
Once the graphic is positioned, I typically do a vertical piece of tape about six to eight inches in on the right side of the window. Because I’m right-handed I want to install a minimal amount with my left hand.
Again I add a couple pieces of tape, this time horizontally, behind the vertical pieces to help reinforce my hinge. The graphic is also taped in a couple other places to hold it in place.
Prior to starting to squeegee I add a couple pieces of masking tape along the outer edge of the graphic as alignment marks. You could also use a wax pencil to make the marks and then go back and clean them off. This is an important step to ensure your graphic is going on straight because the curve of the window can throw you off.
Once my tape is all in place then I flip back the six to eight inches and cut the backing paper off. Use firm, even pressure; overlapping strokes; working center out, then up and down.
When that flap is in place and squeegeed down, it then acts as my hinge and I can start applying the rest of the graphic by peeling back a little more backing paper, exposing the adhesive. I like to hold the excess graphic up against the window to make sure that it is staying aligned to my tape marks while I’m squeegeeing the graphics in place.
Obstacles
Storefront windows and side windows on vehicles typically have minimal obstacles. Rear windows on vehicles often have a few obstacles to work around like handles, hinges, windshield wipers and bolts.
If it’s at all possible to remove the bolt caps or windshield wipers then do so to make the install easier and hopefully seamless. Anytime you have to slice the graphic to work around the obstacle it becomes an area that will either curl or shrink in the future detracting from the overall look of the graphic.
Unfortunately on some installs you simply have to cut a vertical seam. In this case be sure you cut a nice straight line, work the two pieces around either side of the obstacle and then butt the graphic back up to itself under the obstacle. You may have to make a couple small cuts horizontally at the obstacle to relieve tension, squeegee the graphic around the obstacle and do any necessary trimming.
With some obstacles you can make relief cuts over the obstacle that allow you to lay the graphics flat without creating a seam. For example, on hinges that come down from the top of a back window, I like to pull the graphic away from the hinge gently and make a vertical slice down the graphic with a sharp knife, making sure to not cut on the hinge itself. I also make small horizontal cuts at the bottom of the hinge too depending on how wide it is. This creates tension-free flaps that can be squeegeed right up to the hinge and tucked into place. The excess can then be trimmed off without having to worry that you would cut the area around the hinge too big, leaving window exposed.
If I’m able to remove the windshield wiper, leaving behind just a post sticking out, I squeegee the graphics up to within a few inches of the post and make a small slice just above the post. Using this slice I bring the graphic over the post, poking it through the slice, and then continue to squeegee the graphics in place. If you make the slice too low then the cut mark will be visible below the post.
Another common obstacle on vehicle windows is the set of bolt caps that hold some windows in place. If you’re able to remove the bolts by unscrewing the nut on the inside of the window then do this first. If they cannot be removed then squeegee your graphics in place encapsulating the bolt head, much like you would a standard rivet on a box truck.
Instead of heating and forming the vinyl like you would a rivet, you want to remove the vinyl over the bolt. Perforated window film is not intended to be heated and formed like premium wrap vinyl so any heating and forming will end up lifting and shrinking quickly because of the memory in perforated film.
Using the tip of a sharp blade carefully cut around the edge of the bolt. Take your time and move slowly to avoid choppy cuts. Once it’s trimmed out then squeegee the graphics flat to the window, tucking them up around the bolt.
Trimming
Once your graphics are squeegeed in place it’s time to trim off the excess. This may seem like a ‘duh’ step in the process, but poorly trimmed edges can cause some serious issues.
Not only does it look sloppy for the edges to be trimmed choppy, but edges that are not trimmed smooth and don’t lay flat can begin to curl or lift, get dirt behind them and then start to fail. It’s important to make sure the graphics are completely squeegeed in place.
This is where proper cleaning during the first step also comes into play, especially on windows that have a rubber seal along the edge. Any loose dirt should have been wiped out along and behind these rubber seals (if they lift up) prior to installation.
I like to use a squeegee with a felt edge on one side and a hard plastic edge on the other side. Once the graphic is in place I use the hard side of the squeegee just along the edge to create a visible line that makes it easier to trim to; this is typically on storefront windows where I want to clearly see the line I should trim to. Using a sharp blade, slowly trim the excess by running the blade along the edge of the graphic.
On vehicle windows there is often a gap between the window and the vehicle itself. Once the graphics are all squeegeed in place, overlapping the edge, you can use the edge of the window as a guide.
Make sure your blade is sharp before doing any trimming. I like to use an Olfa knife with just the tip of the blade sticking out. This helps me control the blade a little more and also ensures the blade isn’t too long where it can slice the vehicle behind the window edge as I’m trimming.
Lay the tip of the blade along the edge of the window and poke through to get started. Angle the blade in toward the window running it along the edge to completely trim off the excess.
You could try 3M Edge Sealer 3950 to seal the edges of the window graphics for extra durability. Another option is using ½” strips of optically clear laminate applied along the edges of the graphics.