Let’s Talk Shop: Cutting Your Wrap
Tips for mastering wrap installs with Knifeless Tape


When I was first thinking about this wrap-tips article, I kept coming back to how often we use 3M Knifeless Tape during our installs. Just a few years ago it wasn’t something we ever used, and now we use it on most of our installs.
Damaging a customer’s paint while trimming or accidentally cutting through a layer of vinyl when trimming overlapped graphics are always big concerns when trimming with a blade. Adding new installers magnifies this concern because they just don’t have the experience. By training them from the beginning to use cut-tape effectively, we have eliminated some of these concerns.
Options
There are seven different tape options for Knifeless Tape available, each one designed for a different application or material. On a majority of our installs we use the Finish Line tape option. It cuts most films and is easy to apply along vehicle contours and curves.
We’ve also used their Perf Line tape which is designed to cut perforated window film. Another tape we find useful is the Design Line tape option. It stretches slightly and can turn along tighter contours. The filament is a little thinner and is designed for a single layer of vinyl, but can be broken by hand for faster application.
Be sure to check out the other options as well. They’re designed to cut through thicker materials, to bridge gaps between doors and moldings and to create pinstripes, gaps and butt seams.
Roof Wrap
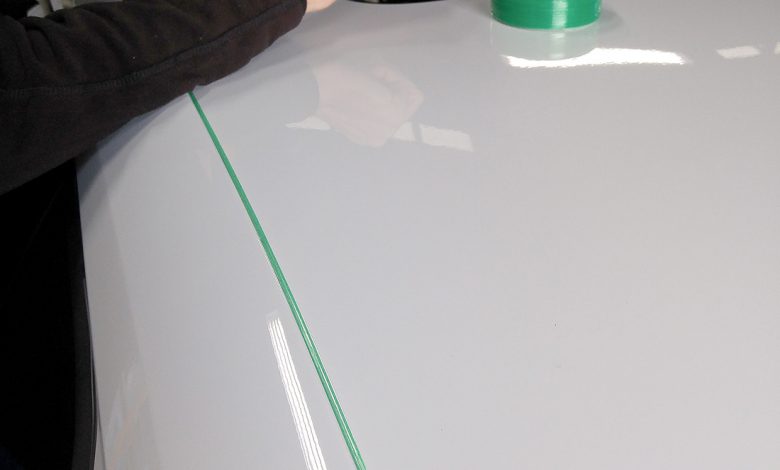
Roof wraps are one of the most common wraps that we do where Knifeless Tape has both sped up installs and resulted in a cleaner wrap. Often the sides of the roof don’t have a clearly defined edge to trim to by hand. Using the Finish Line tape we can take our time running a straight line along the edge before installing the graphics.
Many of the vehicles have a rubber seal/gasket that runs across the front of the windshield, as well as rubber seals around the sunroof. Trimming directly on this rubber poses a risk of cutting into or straight through the rubber. And because the rubber flexes it can result in jagged cuts. By installing the cut-tape first we’re able to create clean cuts through the vinyl without using a knife and then we tuck the overlap under the rubber seal.
Grill Wrap
While we don’t wrap plastic vehicle grills every day, we do get these kinds of specialty wraps in fairly frequently. Sometimes it’s a plastic grill, other times it’s a plastic ice chest, a vehicle dashboard, motorcycle helmets, coffee makers and other parts.
Since many of them are plastic we’re extra concerned about the dangers of trimming on the object with a blade and leaving a nick or trim-mark behind. By setting up all our cuts ahead of time with the cut-tape we can avoid most blade-cuts on the piece, and we’re also able to ensure straight lines.
For this grill wrap the customer had a specific pattern he wanted us to create with our trims. Using a photo for reference we planned out our trim lines, leaving the edges we would start our tape in areas where we removed vinyl. For example, the vinyl over the center of the grill would all be removed so we started and stopped many of our cut lines in this area so we could access the cut-tape.
For this install we used Design Line tape so we could get into some of the tighter contours a little easier. We also used 3M’s Print Wrap IJ180c-10LSE film because we were wrapping a plastic grill. The LSE in the name refers to ‘low surface energy’ plastics which is what the film is designed to adhere to. It also works with powder-coated metals and other surfaces that regular vinyls may not bond well to.
The adhesive is a little tackier, but is still easy to work with since it has Comply, which is conformable. However, it did leave behind a little adhesive residue, but that easily cleaned off with alcohol.
Vinyl Over Vinyl
Using cut-tape isn’t always something we plan out ahead of time either. Sometimes we’ll be in the middle of a wrap and we see that a panel is going to come around the back of the vehicle and we will need to overlap existing graphics. Many times there are breaks in the body that we can trim to, but on some vehicles we don’t have a clean line to end and trim the graphics to.
In this case we’ll grab the Knifeless Tape and throw a quick line of tape along the existing graphics and apply our second panel over the top. We can then just pull the tape line and we have a clean cut line without having to take a blade to the vehicle. This eliminates the possibility of accidentally cutting through the top layer of vinyl and into the second layer.
Concaves
Transit vans, Sprinter vans and some other vehicles have deep concave areas that can be time consuming to tuck graphics down into. These are also common failure points if the graphics weren’t installed correctly.
When the customer is on a budget, yet wants large graphics, we can use cut-tape to our advantage. By running the tape around the perimeter of the concave area we can wrap our graphics over the flat area, pull the tape line and we have a clean edge with no tucking.
Speed Trimming
A few other common applications for cut-tape not will only give you a clean trim line, but also speed up the trimming. Making money on wrap installation requires efficiency throughout the install.
3M recommends trimming back perforated window film a 1/4″ from the edge of the window, then overlapping the glass and perf film with 8914 Edge Seal tape to help prevent edge lifting. Applying a quick border of Perf Line tape allows you to plan clean, evenly spaced lines ahead of time with a quick trim.
On some installs it’s faster to trim graphics against another object, like a door or tail light, but other times you don’t have something to guide your blade. In these cases applying cut-tape around the emblem, light, door handle or other object will make the trimming both faster and cleaner.
Design
Knifeless Tape can also be used to enhance the wrap itself. Sometimes a wrap doesn’t cover an entire area of the vehicle, but instead is intended to be decorative in the way it’s finished.
For example, a gloss black hood can be enhanced with a matte black partial wrap across the center of the hood. Pre-installed cut-tape insures perfect trim lines without having to touch the hood with a blade.
The Design Line tape and Tri Line cut-tapes both allow you to create stripes and designs in the film. Layering the vinyl and tape can create designs that enhance the wrap.