If there is one segment of laser engraving that must be the most exciting and potentially the most lucrative, it has to be customized gifts. Not only does it open up the entire menu of engravable products to you, it also will likely have you being asked to work on material you might never have otherwise considered. Of course, there is, equally, the potential to incur significant costs. Further, you can unleash your own imagination to design gifts or work with your customer’s wishes.
Back to basics
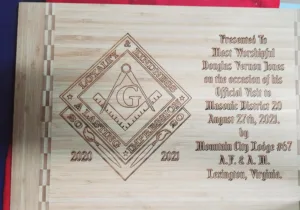
Okay… the basics are pretty simple. Wood, cork, leather, paper and card stock, glass, some plastics… there is a lot of material you can work with, dependent on the specifications of your machine and whatever accessories you have at your disposal.
The potential for losses arises when the customer brings in their own piece or asks if you can work with something a little more expensive, such as nice crystal instead of glass. If you can, contact your regular suppliers and see what they can provide that comes somewhat close to the material you’re going to use for the final product.
It’s better to practice on something that’s relatively close than to destroy the customer’s piece that might not just be expensive to replace but difficult to come by. I mentioned in an earlier piece about a $300 piece of crystal I was asked to engrave as a retirement gift for a high-ranking military officer. I couldn’t afford to destroy the piece for any number of reasons. Having something to practice on would have helped my nerves a great deal!
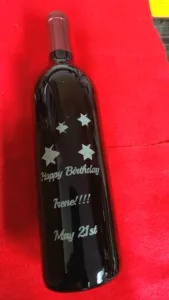
Please don’t panic but remember that lead crystal is very different from standard glass. Your settings will vary depending on your machine. I keep the power at 100%, speed somewhere around 36, and ppi around 380. Different jobs may need some subtle adjustments, which experience alone will teach you.
Most importantly, crystal doesn’t handle heat as well as commercial glassware, so masking with a thoroughly soaked masking material is absolutely essential. If you’re going to be working with exotic (read: expensive) woods, I would also highly recommend tape or another masking element. Keep your power down to avoid burning; you can always accentuate the piece with a second pass at lower power. (One other tip with wood – reduce the focus height by up to 1/4”, at a slightly reduced power setting and run a second pass. This produces an almost 3D effect.)
Next, the judicious use of inlays can add a fantastic result. Different woods, foils, and engraver’s plastic (especially those with special finishes like wood grain, marbled and metallic colors) all add to a pleasing result. Inlays can add an awful lot to a customized piece.
My advice would be to use them judiciously to highlight a gift – not so the inlay takes over the piece. An inlay will require three processes. First, of course, the inlay itself must be cut. You may want to mask the inlay to prevent smoke, chipping, or other process side effects from damaging the body of the inlay.
Use the standard hairline setting at the dimensions you wish to achieve. Second, you need to cut the recess for the inlay. Copy the outline of the inlay and lay that image where you want it relative to the body of the gift. You will want to increase the outline before you cut the recess.
If you are using a very fine inlay material, I have found .75 pt thickness will work. For a thicker piece such as a second piece of wood, engraver’s plastic, leather or the like, you shou should think in terms of perhaps 1 pt or even 1.5 pt thickness.
Third, choose an appropriate adhesive. For thinner or lighter material you can use standard double-sided adhesive tape. Don’t forget… if you want to have the entire inlay taped, apply the tape before you cut. You may choose to spot-tape the inlay. That is completely up to you and it can be done after cutting it. Only partially taping the inlay may not result in an ideal result.
For heavier inlays where double-sided tape doesn’t provide a strong enough bond, there are any number of commercial adhesives that can be found at your local hardware store.
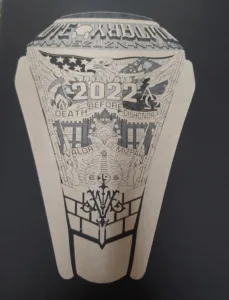
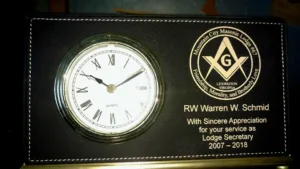
For example, I was asked by my local Police Department to use challenge coins. I used a well-known construction-grade adhesive in this case. Always secure your inlay in its recess, reinforcing it by placing a weight on top of it if necessary, and avoid using too much adhesive. Your piece can be ruined if a blob of adhesive suddenly squeezes out from under the inlay! When finishing your custom gift, just be careful to use as mild a cleanser, oil, or polish as you can to protect the inlay, the body of the piece, and the adhesive. You don’t want the inlay to fall out!
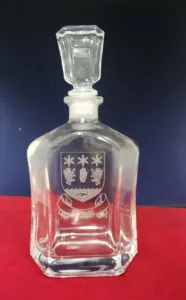
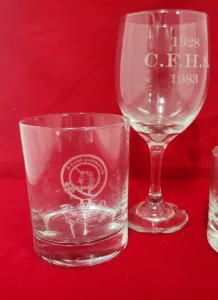
Before I proceed, there are a couple of process tips I should have mentioned in an earlier piece, and I apologize for the oversight. First, engraving glass. Experiment with your settings to get the result you want. I have found the manufacturer’s recommended settings tend to be too high. This results in chipping and an inconsistent finish. Adjust your power and ppi settings to get a clean result.
Protect the piece with a wet mask. I use soaked newspaper or thin packing paper, but there are masking products available from your engraving materials supplier. Using a mask protects the piece against chipping as well helping to dissipate heat.
Graphics editing, copyright, and pricing
What we are selling in this business really centers around the graphics and text the customer wants. This is what makes a custom gift truly unique. There is an almost limitless variety of images available, either through your own graphics software, through pay-as-you-go graphics or through open-source programs. While it’s always preferable to have an image that is editable, a little practice with tracing an image results in a great result. Tweaking the various parts as you go produces a truly unique piece.
Depending on the material you are engraving, being careful with shading adds to the quality of the final image. Also, remember that if you enlarge the image, or zoom in on your screen, double-check the image before you engrave to make sure outlines or other details are proportional and don’t overpower the basic image.
It can be necessary to “reverse” shades in the interests of clarity. Something that is very dark may need to be drawn in a very light shade, and vice versa. It may also be necessary to ignore shading altogether to get a clear result.
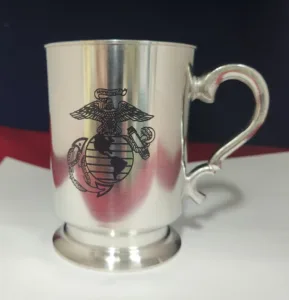
Gifts for members of the Armed Forces can be a little more challenging. Standard Army, Navy, Marine Corps, Air Force, and Coast Guard logos, as well as rank badges, are available through DOD websites, and in many cases, can be downloaded in editable formats.
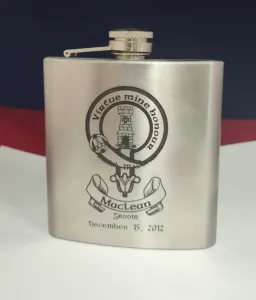
Specific unit logos are more challenging, though in some cases, they can also be found online. In some cases, though, you will need to have your customer supply a photograph or sample. Again, this is where developing your tracing skills will pay off. College logos, corporate logos, and the like can also be found. Law Enforcement agencies will often be only too happy to provide an image.
One word of warning… be very careful with copyright restrictions. Intellectual property is not to be messed with. It may well be necessary to pay a licensing fee, or you might have to contact someone and ask permission to use a logo. I have purchased artwork from some institutions, I’ve paid royalties for using some artwork, but by simply asking permission first and explaining I’m dealing in one-offs, I have enjoyed good luck in getting permission to use logos or other privately-held designs. For more on this see Michael Stewart’s article, Copyright Notice.
How you ultimately charge for your time is completely up to you, but remember, you’ll probably have a budget to work with. I have spent as much as seven days working on a design, and there is obviously no way billing for seven days’ work is going to be affordable for a one-off or limited gift.
The time and material spent using inlays mustn’t, or at least shouldn’t, be forgotten either. You may well have to buy a piece of inlay material that is far bigger than you actually need, and the remainder of that piece really should be accounted for somewhere, if for no other reason than you may never use it again.
Customized gifts are a double-edged sword. The opportunity for good returns is there, but along with it comes the challenges associated with breakage and other losses and the proper valuation of your time. Be careful, and the rewards far outweigh the challenges, both from a satisfaction and financial standpoint.