You peel away the film, but some graphics stick and lift off the garment. You try to push the film back down in the hope that it will adhere properly in the right position, but it hardly ever does. Now you have a messed-up garment with messed-up graphics. Don’t worry — it can be fixed and saved. In this article, we’ll discuss different methods of direct-to-film (DTF) graphics removal and whether it should be attempted in the first place.
Be it screen print ink that’s not where it’s supposed to be, oil stains from an over-lubricated embroidery machine, heat-pressed vinyl that was incorrectly positioned, or, in today’s market, DTF that’s not quite right, reducing the amount of “seconds” through any phase of the garment production process is vital for any successful business. So the “I’ll just make another one” mindset doesn’t really work in the long run.
To save it or not to save it — that is the question. The answer is: it depends. It depends if you have enough spare blanks on hand to print more. It depends on the cost of the blank (i.e., is it a $2.50 T-shirt or a $25.00 hoodie?). It depends on the time it will take to remove. Perhaps the most important question is: Can I fill this order on time?
The misnomer about spot cleaning /garment recovery is that it’s about saving the cost of the garment. What it’s really about is filling your orders on time and being a reliable shop that customers can depend on. Most DTF providers don’t have racks of spare blanks. The last call you want to make is, “I know I said they’d be ready on Wednesday, now it’s looking like Friday.”
Once you’ve decided to remove the DTF, are you going to replace the graphic in the same area? If the answer is yes, the job got a lot easier. The graphics can be removed fairly easily, but the residual adhesive, however, can be difficult and time-consuming to remove completely. So, if replacing the graphic in the same area, you don’t necessarily have to get all the residue off, as the new graphic will cover it up. If you are not replacing the graphic, it will take more time and effort to completely remove the residual adhesive, but it can be done.
Understanding the anatomy of a DTF transfer
Before tackling removal, it’s worth understanding what makes DTF prints so durable. A DTF transfer consists of the following:
- Printed ink layer: Made with special DTF inks, often including a white underbase.
- Powder adhesive layer: Heat-activated adhesive that bonds ink to fabric fibers.
- Film carrier: Removed after pressing, leaving only the ink and adhesive on the fabric.
The adhesive is key: Once melted during heat pressing, it penetrates the garment fibers and cures into a strong bond. That’s why removal requires softening or breaking this adhesive layer without overly damaging the fabric.
Different methods for DTF removal
- Liquid solvent only
- Heat and heat plus liquid solvent
- Electric spot cleaning gun with cleaning fluid
- Liquid solvent plus an electric spot cleaning gun with cleaning fluid
Liquid solvent only
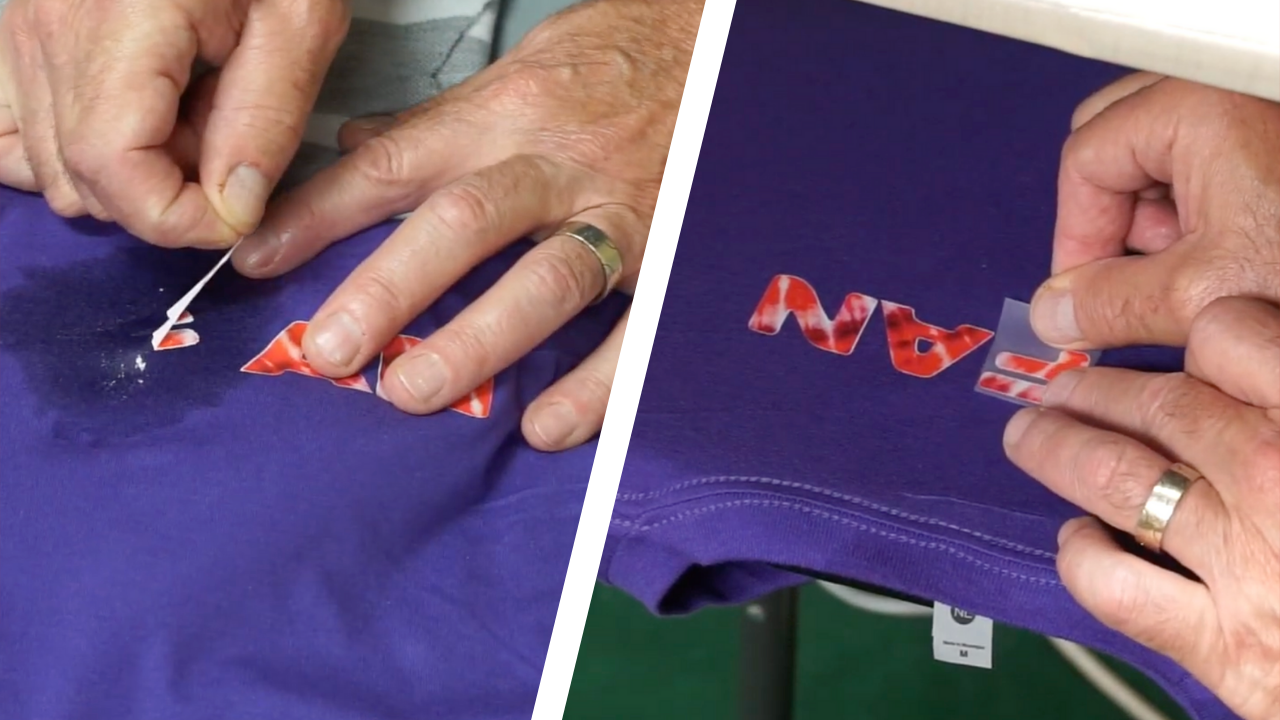
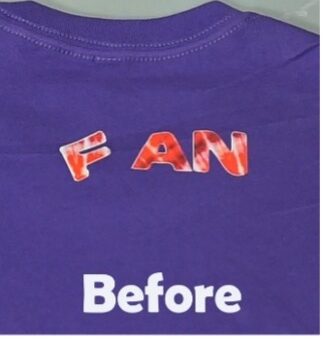
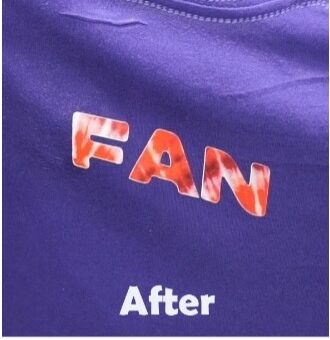
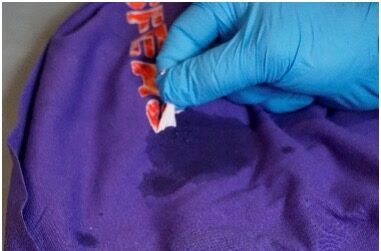
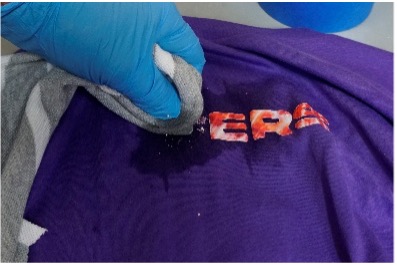
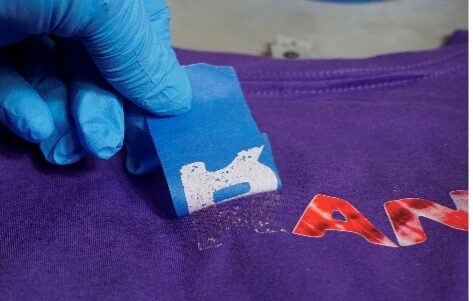
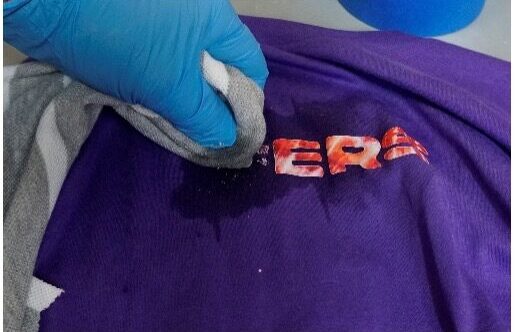
This is probably the most common method for DTF removal. A strong, fast-evaporating solvent is applied to the image. My recommendation is to apply it to the underside of the image to be removed. Others prefer applying directly on top of the image. The reason I prefer the underside method is that sometimes, when applied topically, the solvent can disintegrate the ink, causing it to bleed and spread. By applying underneath, it attacks the adhesive first, and the print may peel or roll off the fabric in clean, large chunks. You can always apply more to the top of the image if necessary.
- Apply liquid to the underside of the print.
- Wait up to 30 seconds.
- Scrape, pick, or peel off the image.
- Using a clean rag with more solvent, wipe off any remnants of the image and then rub out the remaining adhesive residue. Allow fabric to dry completely before reprinting.
Newly introduced to the market is an alternative slow-evaporating solvent. Because the polyurethane-based adhesives in DTF are so strong, fast-evaporating — usually flammable — solvents dry too quickly before they have a chance to fully break down the adhesive. Slowing this process allows for a longer wait time (up to 5 minutes). This extended saturation period breaks down the adhesive more completely and, in the end, makes it easier to remove. This kind of solvent must be flushed with water. This extra step is a little time-consuming, but the end results are much better.
- Apply slow evaporative solvent to the underside of the print.
- Wait one to five minutes.
- Scrape, pick, or peel off the image.
- Using a clean rag with more solvent, wipe off any remnants of the image and then rub out the remaining adhesive residue.
- Flush solvent out of the fabric with water or wash the garment.
- Dry fabric (air dry, heat press, or launder) completely before reprinting.

Heat & heat + solvent
Using heat is remove the print is fast and effective, especially on new prints. But, heat will not release the adhesive from the fabric.
Heat alone
- Use a heat gun, heat press, or iron with a parchment or Teflon sheet on top of the print.
- Heat 10 to 20 seconds to soften the print.
- Scrape off the print and as much adhesive as possible.
- Using packing or painter’s tape along with heat is a pretty cool method. Press the tape onto the image you want removed. Apply heat via a heat gun, heat press, or iron for 10 to 20 seconds onto the taped image, then immediately peel off the tape.
The image should peel off with it. But the adhesive will remain. This again will require a solvent for removal.
Heat + liquid solvent
- Use the “heat alone” technique described above to remove the print.
- Apply a liquid solvent by hand to remove the adhesive residue.
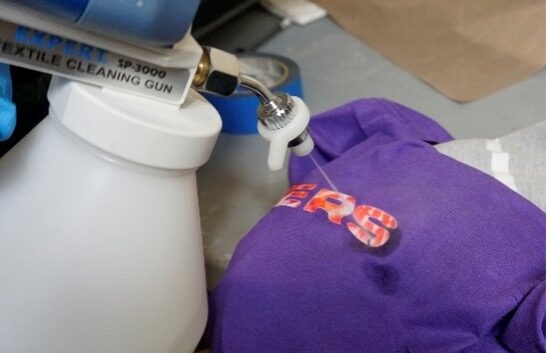
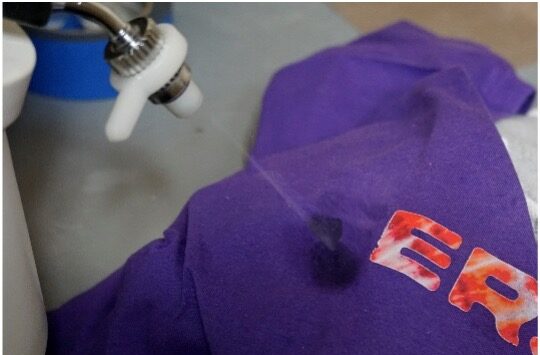
Electric spot cleaning gun
Spot cleaning guns have been used by screen printers for decades. For those of you who are unfamiliar with spot guns, they are handheld electric pieces of equipment that draw up a cleaning fluid from a reservoir, then pump it out at very high pressure in a pinpoint spray. This pinpoint spray pattern pushes the ink or other types of stains right through the fabric.
Most printable fabrics (100% cotton, blends, and synthetics) can handle the sharp pinpoint spray produced by spot guns without damaging the fabric. It can, however, damage fabric, so testing is always a good idea. If the spray pattern is too sharp and damages the fabric, most spot guns have adjustable nozzles that allow for a wider spray pattern, which is strong enough to push the stain through without being so concentrated as to separate the fibers, causing damage.
Cured plastisol ink removers are solvent-based and can be very effective in removing small areas of DTF, along with the adhesive residue. After testing the gun and fluid on a hidden part of the garment:
- Place something absorbent underneath the area to be removed.
- Holding the gun about six inches away, shoot out the unwanted print.
- Turn the nozzle to a mist pattern and spray around the now wet area. This process is called “feathering” and will reduce the likelihood of the stain leaving a “ring.”
- Dry the area quickly from the outside, working in.
Liquid solvent & spot gun combo*
- Use the liquid solvent technique described above to remove the print.
- Use the spot gun and fluid to remove any adhesive residue.
*This combination may be the most effective way to get the graphic off completely without leaving adhesive residue.
Wrapping up
I hope you find this information helpful, even though there is no one-size-fits-all solution. As a chemical manufacturer, we can only recreate so much of the real-world environments. What I’ve always found most helpful is speaking to the people who print/create every day in shops ranging from a basement in the home to tens of thousands of square feet in a commercial building.
The decorated apparel industry is full of creative, resourceful people who inevitably find better ways to use what’s available to solve their problems. So, I encourage you to experiment and share with the decorated apparel community any hints and tricks you discover.