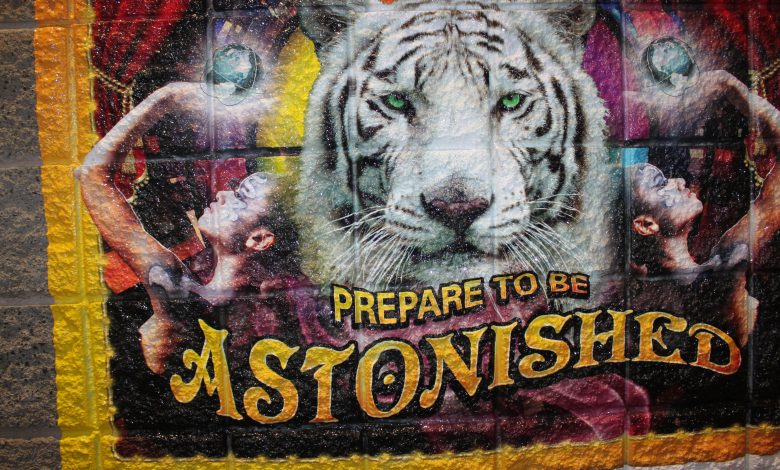
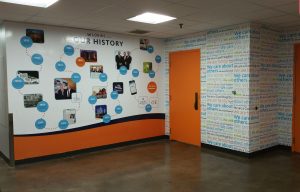
A growing trend in retail stores, restaurants, offices and even in homes is the creative use of wall wraps and murals. For businesses, they’re a great way to promote sales and other important information to customers. On the flip side, wall murals are increasingly being used as an innovative tool for interior design.
The adhesive used on wall graphics like these is strong enough to ensure they will stick well, but can be easily removed without causing any damage to the wall or leaving behind any glue residue. That makes wall graphics a great option for both long-term and short-term use. Businesses can install them to advertise a sale and remove them without fear of damaging walls when the sale is over. Or if you’re using them to decorate a home; clients can decide if they’d like a different design from time to time without damaging walls as well.
Getting into this market requires an investment in some new equipment, some education in wall prep, material choices and application techniques as well as asking the right questions.
Getting started
Joe Walton, 3M Commercial Solutions Division, says that producing wall graphics and other wraps could require purchasing some new equipment such as a printer, laminator and finishing tools. “There are many options on the market so it’s important to figure out which makes the most sense for your shop based on the kinds of projects you will be working on. For those that want to learn more about the industry and what’s available, trade shows are a great resource. These expos are intended for graphics manufacturers, installers and sign makers — both small and large. Walking the floor at trade shows is a great way to learn about the capabilities of new printers, profiles, laminators, finishing, tools, etc., for any budget,” he points out.
What skills do you need to master?
Walton says that technical colleges offer great desktop publishing and digital design classes. “Right now, there is great demand in the industry for talented designers and installers. Anyone starting in this field should consider taking digital design courses, as well as installation classes. 3M offers installation training – both in class and hands on. We provide a three-day advanced training course where someone with no previous experience can come to one of our five authorized facilities across the U.S. for expert hands-on instruction. To be successful in this industry, it’s all about knowledge.”

Ryan Allen, Avery Dennison, explains that alignment is everything when you’re installing film on walls. “The first panel needs to be perfect and straight for all other panels to align to. Included in the planning process are proficient math skills, calculating square footage correctly will ensure full coverage of the graphic or design. Your panels have to line up with a good seam usually around ½ inch. A good overlap gives you room to manipulate the panels for proper figment. Once you get to the application, clean cutting and consistent squeegee strokes are key. In terms of longevity, proper prep is the most helpful.”
What are some wall prep basics?
Walton reports that low VOC paints, meaning paints with low surface energy, have flooded the market. “In laymen’s terms, it basically means you will have a tough time sticking graphics to walls that have these types paints on them. When working on a wall with low VOC paint, we recommend using the 3M Enhanced Cleaning Method. This process helps to build the adhesion levels so the graphic will stay on the wall better. The video walks you through the proper steps to ensure you have a successful installation. You can access this video, along with other product related content, via 3M COSMO, a free app available on the app store, or on our 3M Graphics YouTube channel.”
Allen says distilled water and a 70/30 mix of isopropyl alcohol are recommended for prep. “Once the entire wall is wiped down, take an extra piece of scrap vinyl and see how it adheres to the wall when applied. This adhesion test will show you how intensely you need to clean the wall. If the surface has been cleaned, but adhesion is poor, you may need to spray the wall to soak, dry and spray again, this time wiping the wall thoroughly. This sweating process helps remove toxins and inconsistencies in the wall that may cause failures.”
How do you choose the right film?
Daniel Valade, Roland DGA, says when selecting the film to use for a specific job, be sure to evaluate the installation surface and take that into consideration before choosing the media. “You should also consider the type of adhesive used by the media manufacturer, as that will make a difference. In addition, it’s key to consult the media manufacturer’s guidelines regarding film and surface compatibility. You need to ensure that the media you select is appropriate for the job, and that it’s compatible with the ink set you’ll be using. In addition, be sure to ‘pre-qualify’ the customer to determine whether he or she is looking for matte or gloss finish. It’s a good idea to have samples of each available to show the client before starting the job.”
Louie Calma, Arlon Graphics, points out that with film selection you have to ask the following questions: “Is it an indoor or outdoor project? For outdoor, what is the exposure to the elements? Is it for a smooth or textured surface? What are customer expectations on durability? Removability?”
“These are all very important things to consider when choosing a film. Best rule of thumb is calendered for smooth surfaces (2-D) and cast for textured (3-D) application. Calendared has a shorter lifespan and is subject to shrink up ¼ inch over the life of the film. Cast films have a much longer lifespan and shrink almost immeasurably over the life of the film. Adhesives paired to these films also vary depending on your needs as permanent and removable. Walton says choosing the correct film depends on how long the customer wants the film to stay on. There are basically three types of films: changeable for short term (1-2 years); removable for long term (3-5 years) and permanent.
Best rule of thumb is calendered for smooth surfaces (2-D) and cast for textured (3-D) application. Louie Calma, Arlon Graphics
Allen notes that depending on what the customer wants, your film choice will change. “If they want a textured film, such as Avery Dennison MPI 2600, or a matte or gloss film, you will need to make a proper film selection. Also, a textured wall will require a film that can adhere to a textured surface, like MPI 1405. This film rolls out over brick, cinderblock, and other tough materials.”
What are some of the best applications to start with?
Matt Braswell, Technical Sales Specialists for Arlon Graphics, says for beginners, smooth interior wall application is the best place to start. “Start with smaller pieces (spot and partial wall decals) and work your way onto larger pieces (full wrap) as you grow in experience and confidence.” He notes to use painter’s tape for registration marks and hinging.
“With full walls, one needs to pay special attention to overlap, bleed, and the key panel. Since the films today only have a maximum width of 60 inches, the graphic needs to be tiled vertically and overlaps set to ½ or 1 inch. Extra bleed on top and bottom of the graphic is necessary to compensate for walls, floors, and ceilings that are out of square; longer spans can have larger variances to overcome. Due to these variables, if they cannot be foreseen, it is best to dry-fit the first two or three panels by taping them up on the wall, making sure they are plumb and make the necessary adjustments before proceeding with the application. Always evenly split the difference of the top and bottom bleed to make sure the graphic is vertically centered.”
“For someone just starting out in the industry, walls, windows, and floors would be the most simple installs, says Walton. “That being said, the introduction of low VOC paints has created some challenges with adhesion, so testing the walls and using a 3M Adhesion Test Kit is crucial for a successful installation, especially when you start getting into complex contours and deep recesses. It’s a great idea to get some training on how vinyl needs to be worked and what we call ‘reading the vinyl’, as well as when to use heat and when not to.”
Calma adds that once smooth walls are mastered, textured walls are next. “The same approach applies when it comes to alignment and setup. However, on a textured wall, it will be easier to remove larger portions of the liner due to the minimal points of contact. Instead of squeegeeing down with pressure, you’ll heat the film to zero tension and roll over with a foam roller to apply the film.”
Valade points out that interior wall wrap jobs are typically easier than external wall wrap assignments, as interior jobs rarely require lamination and are usually smaller and less labor-intensive. “Interior wall wrap jobs also take place within indoor, controlled environments, so you won’t have worry as much the effects of the elements.”
Getting Started Factoids
What is the ballpark estimated cost of entry?
“There are many factors that could impact cost of entry, but I would estimate one could get set up for an investment of around $30,000-$40,000,” Walton says. “The factors that could impact this would be real estate or lease costs, equipment type, and the overall size of the operation.”
“I’d estimate the cost of entry to be about $25,000. That would include the cost of the printer or printer/cutter, inks, initial media required, and a laminator for any outdoor jobs,” notes Valade.
Allen notes that about $500 is required for a basic collection of installation tools. “A printer, laminator, office space, insurance, work license, and work vehicle will add costs as you get deeper into the business,” he adds.
What are the basic equipment needs?
Allen says installers need to build a toolkit that they can use on location that would include a spray bottle, microfiber towels, and isopropyl alcohol. “Applications require a wide range of squeegees in different sizes, a RollePro roller, snap blade knife with extra blades, a blade disposal case, snitty cutting knife, a straight edge ruler, a torch, and a high end, sturdy ladder. I prefer high angle blades, such as the 30-degree, versus standard snap blades.”
Calma says a heat gun is ideal though a torch is suitable if the film’s finish is gloss. “The flame from a torch will gloss up a matte or satin finish film.”
He adds that for textured walls, a foam roller is required. Even on flat walls, heat-rolling edges is always ideal as well.”
Recommended tools: Yellotools Wallroller “Chrissi,” Wallroller Basic, TSA-1 Marshalltown, RollePro, foam, and rubber thin wheels, etc.
Braswell adds that a standard 4-inch Teflon squeegee will work although many prefer wider squeegees to lay more vinyl per squeegee stroke that can vary from 6 to 18 inches in width. “Overlapping strokes is crucial and firm pressure helps the adhesive adhere to eggshell or satin paints that are common for interior walls.” Recommended tools: A standard squeegee, a felt block squeegee, Wrap Mafia’s Bill Collector, RollePro wall squeegees, etc.
Valade says on the equipment side you will need a quality eco-solvent wide-format printer, which will give you the widest range of media options. He says that Roland DGA offers a selection of advanced, reliable, and affordable printers and printer/cutters that are ideal for wall wrap applications. “Print-only models, such as the VersaEXPRESS RF-640, are better for wall wraps that involve larger graphics, whereas inkjets with integrated print/cut capabilities, like those offered within our TrueVIS series, offer greater versatility, allowing users to handle a wider variety of jobs. In addition to a printer or printer/cutter, some accessory tools, such as squeegees, may be needed for wall wrap applications.”
He adds, “When starting out, it’s also a good idea to use ‘removable’ wall graphic media, such as Roland’s WallFlair Removable Vinyl. This will allow for some ‘forgiveness’ as you perfect your skills and techniques by making the media much easier to remove and re-install if you make any mistakes.”
How much total space is required?
Walton explains that it varies. “I’ve been in shops ranging in size from garage stalls to buildings that are thousands of square feet. It ranges from a one-stall garage to a facility with thousands of square footage.”
“For applications, you’ll need about five feet from the wall for at least the length of the wall. 1,000-1,800 square feet would be ideal to fit a printer, laminator, and a production space with a cuttable,” says Allen.
How much time is needed to become proficient and turn a profit?
“At least six months of wall installations are necessary for installers to become proficient in prep skills, application skills, and production knowledge. It can take longer for some, however,” Allen points out.
“Generally speaking, you should allow for a learning curve of about six months. Of course, the time required to become proficient and start turning a profit will vary, depending upon your current design skills and whether you have experience in other print application that involve similar equipment and skillsets,” says Valade. “As far as profit is concerned, there are many other variables that come into play besides technical skill level, including business management/operational skills, sales and marketing skills, etc.”