Get Inspired: The Magic of Incorporating a Laser Cutter into Your Sublimation Business
Using different fabrication methods, such as laser cutting, can help expand your sublimation offerings and give you a spark of creativity.
About this Sponsored Content
Johnson Plastics Plus, headquartered in Burnsville, Minnesota, has been a leading supplier to the engraving and sign making industry since 1970. Our Johnson Plastics Plus commitment to serving the needs of the engraving, sublimation and sign making customers remains our primary focus. Visit www.jpplus.com for more information.
When incorporating color and dimension into a sublimated piece, it can be hard to think outside the box. Trying to figure out less cumbersome or time-consuming ways to offer your customers high-detail, full-color products that add a layer of dimension can be a challenge.
Johnson Plastics Plus is here to help get the creative juices flowing. Using different fabrication methods, such as laser cutting, can help expand your sublimation offerings and give you a spark of creativity. In our most recent “Get Inspired” project, we found a great way to save time using the laser to enhance our sublimation.
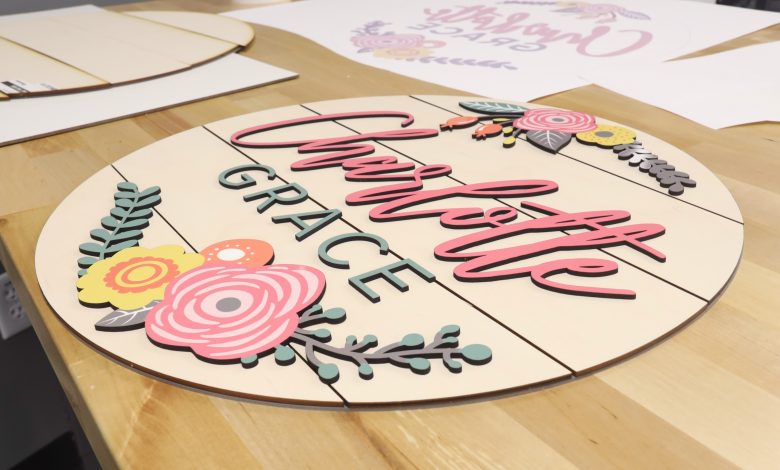
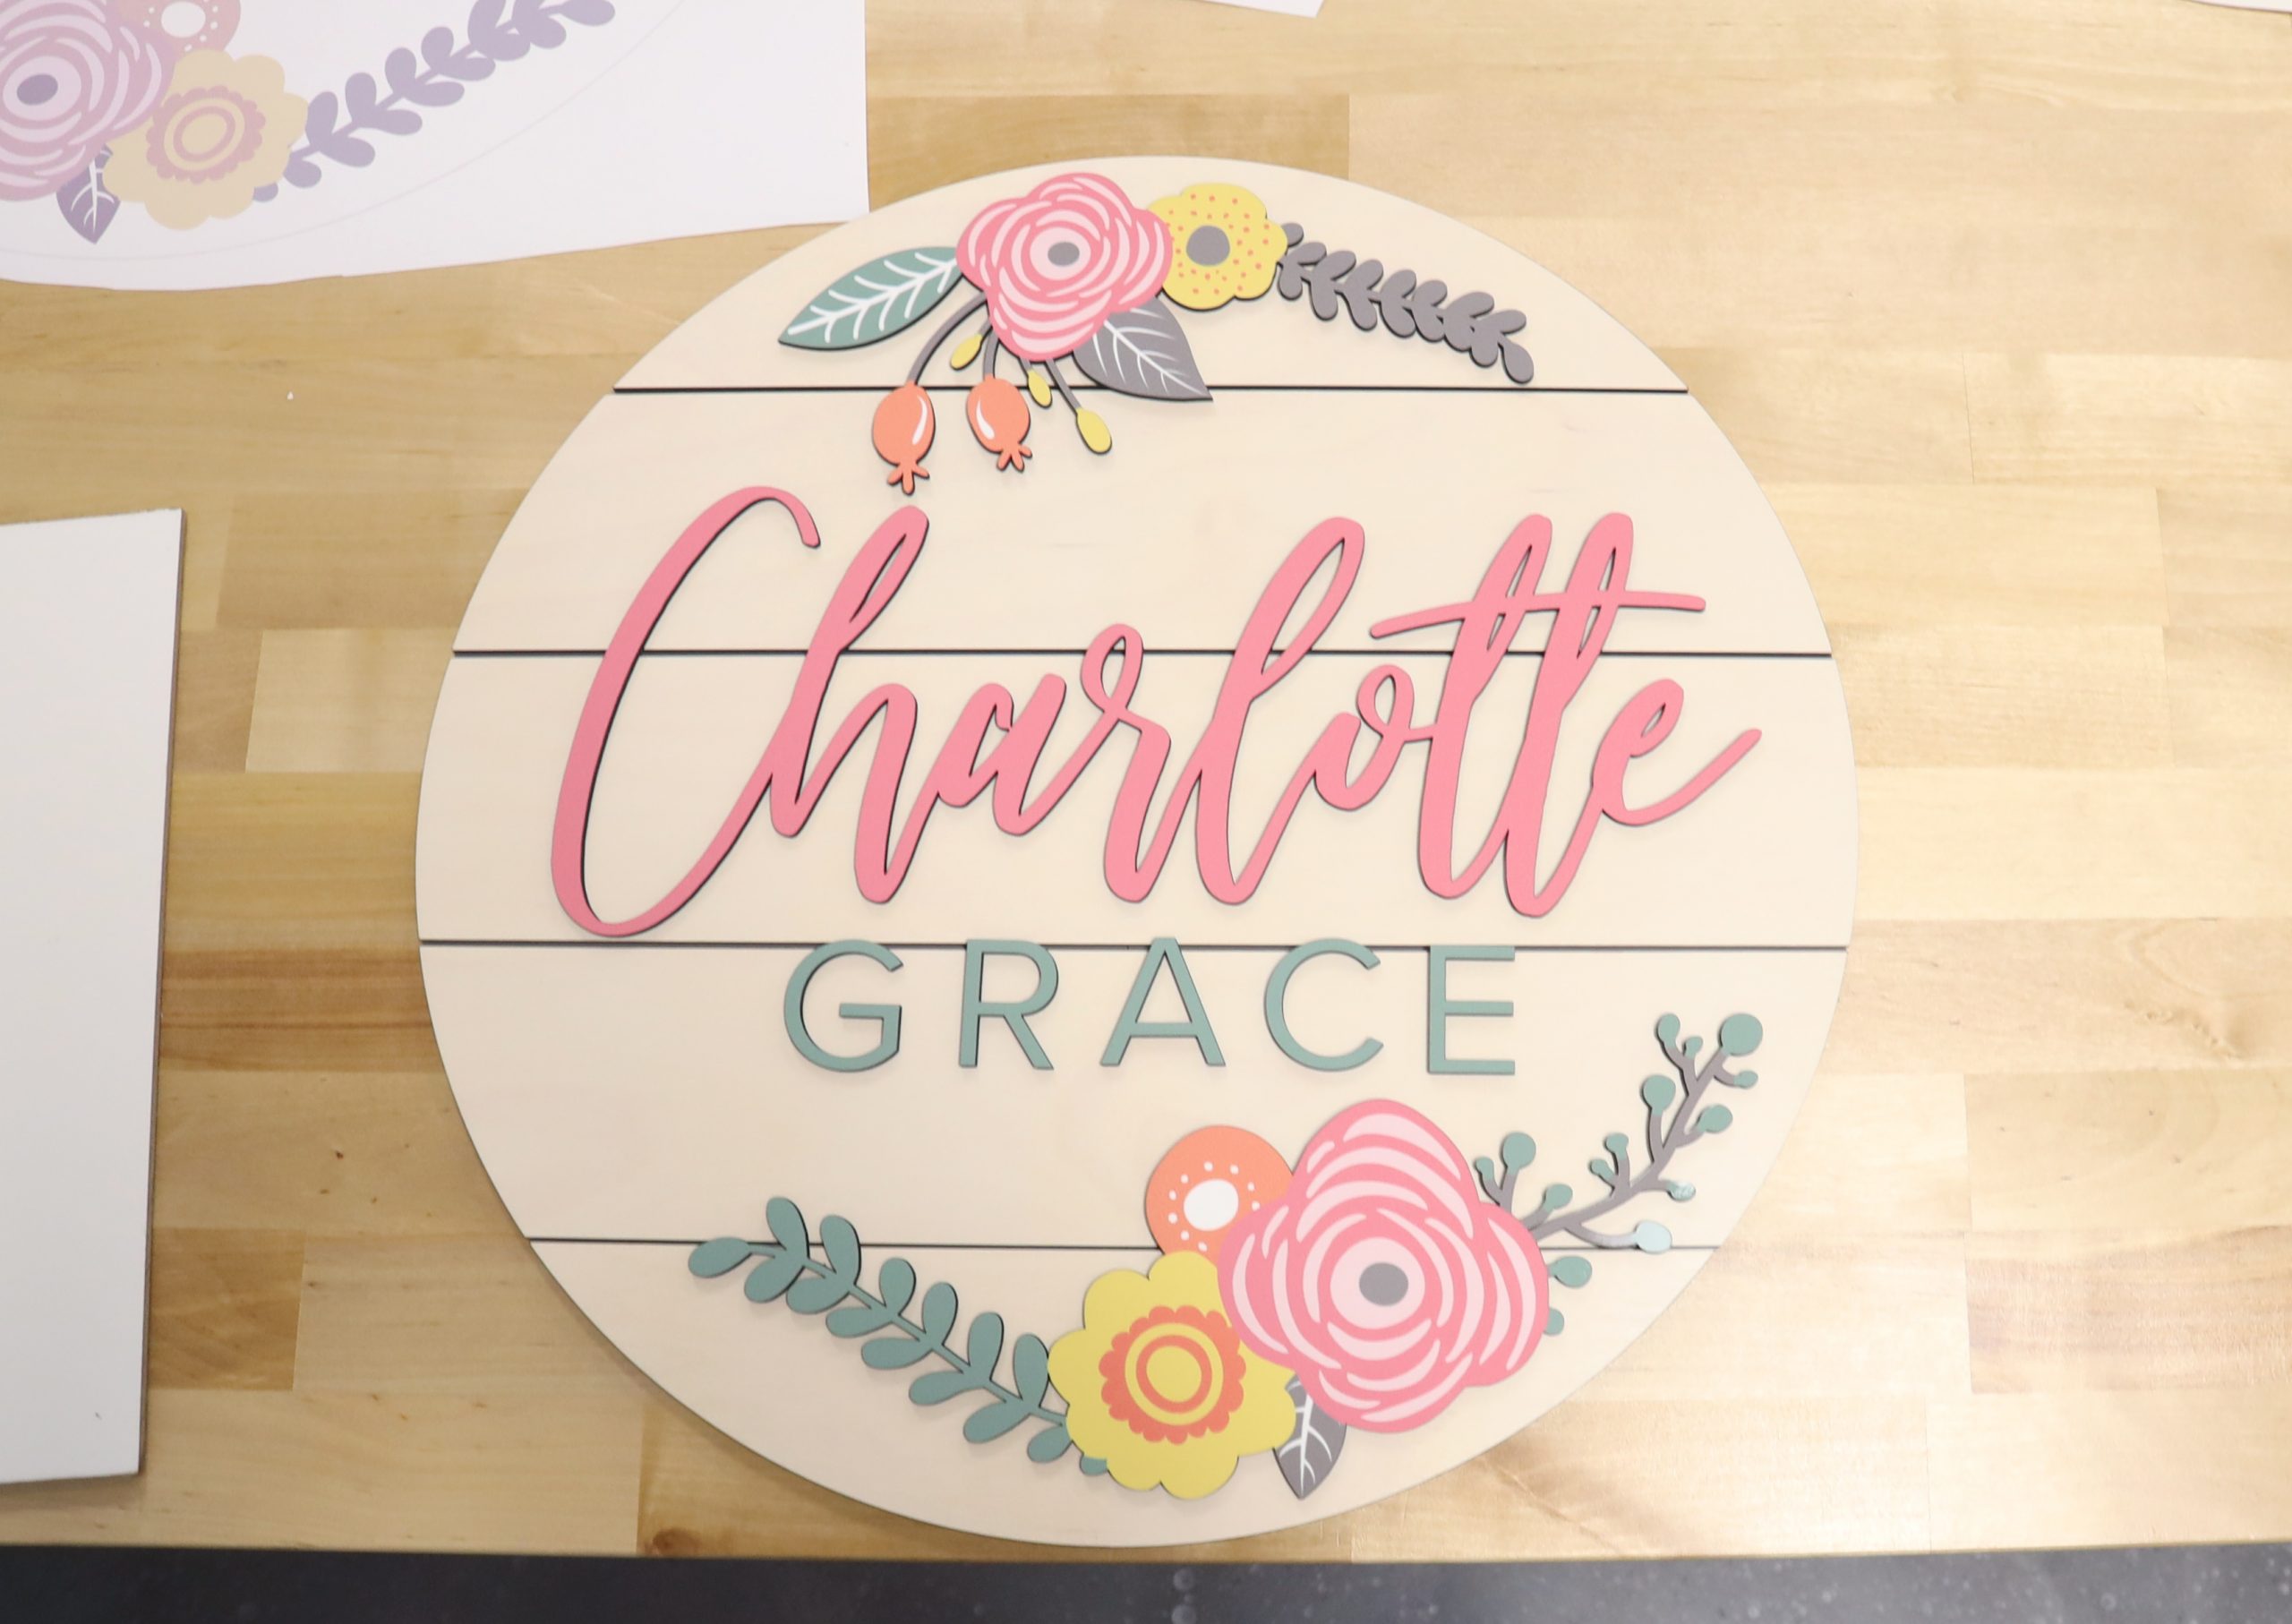
A hot trend right now is child and family name signs that incorporate multiple colors and, in some cases, dimensional layers. Many crafters who create signs like these are hand-painting the designs and cutouts, and use hand tools to get 3-D cutouts to add dimension. However, we’ve got a way for you to eliminate a few extra steps and create consistent, repeatable results with your projects.
We like to pair our laser cutters and sublimation printers on a regular basis to give those flat pieces of art a little more heft and customization to them. By laser cutting sublimation hardboard, we’re able to create custom shapes and lettering that we can further embellish with whatever color or pattern we choose.
You can follow along with our example project and see how you can incorporate a similar process into your routine. It’s a great way to add stunning personalization to your project and save time from painting and cutting with your scroll saw.
Used in the making of this project:
- Dremel LC40
- Sawgrass SG800
- Stahls’ Hotronix Fusion IQ®
- ColorShop Woods – Whitewash
- Unisub White 1-sided Hardboard
- Sublimation Paper
LASER CUT SUBLIMATED NAME SIGN – INSTRUCTIONS
1. Import ADA-Alternative backer cut file and adjust settings. Then place your plastic sheet into the laser and tape down to ensure it doesn’t move or shift.
Run the file. (We’ve created these to be used on a desktop laser or large laser).
2. Open the Shiplap cut file and tape your ColorShop Woods into your laser to ensure it doesn’t shift when being cut.
3. Next, import the sublimation items to be laser cut out. Be sure to tape your masked hardboard to the laser to make sure it doesn’t shift. The masking prevents charring from happening.
4. Once all of your files are laser cut, you’re ready to assemble and sublimate! Print the sublimation art from any sublimation printer. We’ve included plenty of bleed, so your art doesn’t need to completely line up with the laser cut pieces.
5. Once you have your art printed, marry the sublimation paper to the unmasked hardboard, and press in a heat press of your choice. We used a Stahls’ Hotronix Fusion IQ.
6. All that’s left is to adhere all your pieces together!