Engraving Photos on Glass
Take your laser into new territory by creating some memorable photo gift products.

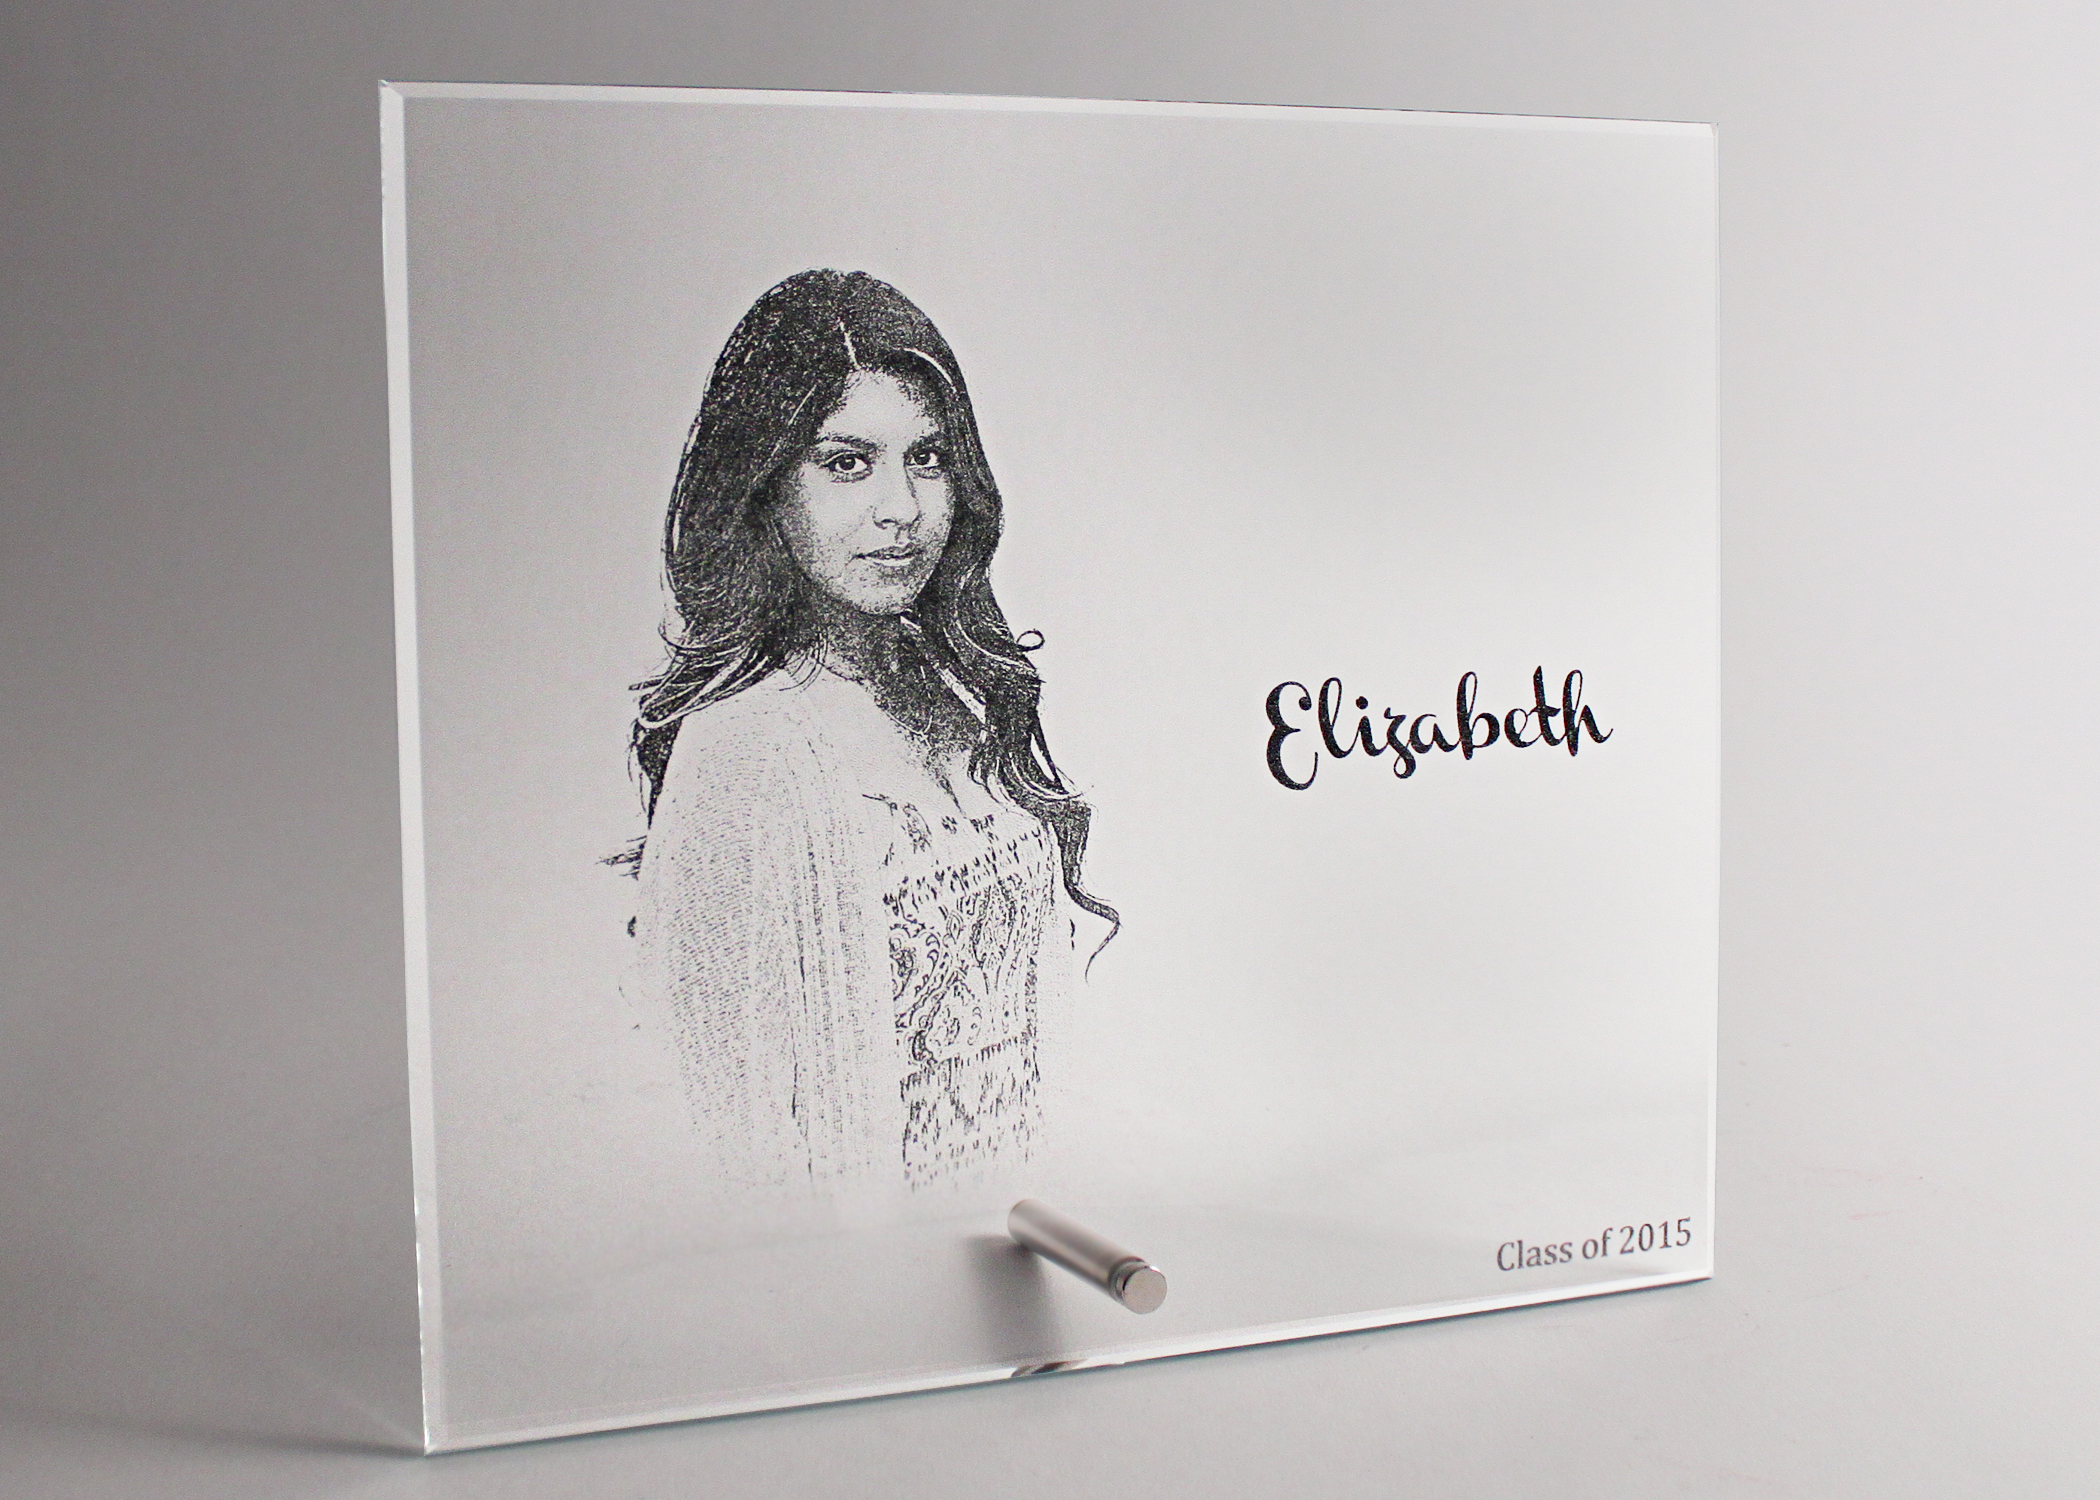
Take your laser into new territory by creating some memorable photo gift products. The idea is to take that cherished photograph and engrave it onto glass. This article takes you through the basics of working with two laser processes to create photo gift items on glass. One uses CerMark on glass to create high-contrast engraving and the other is laser engraving a photograph.
CREATING THE BLACK
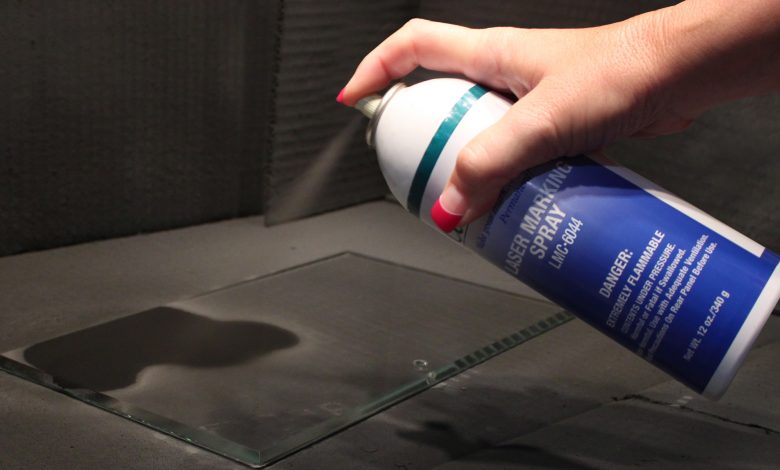
The first step in this unique photo engraving process is to learn the basics of using CerMark on glass. The product we are using is the LMM 6044 tile and glass marking CerMark. If you have experience with CerMark products, the 6044 tile and glass marking product works in a similar manner.
After cleaning the glass with regular glass cleaner and a clean cloth, shake the spray can for a minute then spray an even coat of the CerMark 6044 spray onto the glass. Use steady, even strokes for medium coverage with no thin spots. The CerMark will dry to the touch in five to 10 minutes and will be ready to laser engrave.
When it is time to laser engrave the coated glass, it will be the focused heat energy from the laser that fuses the CerMark onto the glass to create the black colored engraving. The areas that were not engraved by the laser can be washed off using water. The CerMark process for marking glass is a pretty simple one, but I always recommend trying a few test pieces first to get the hang of it before doing a production product.
PREPARING THE PHOTO
The next major step in the process is to prepare the photograph for laser engraving. The photo we are using is a digital image from a mid-range digital camera. The image resolution from the camera is typical of any modern cell phone, so really any digital photo could be used for this process.
Preparing the photo for laser engraving is simple when using PhotoGrav version 3.0 software. With the photo open in the PhotoGrav software, click on the Select Material button. A drop down menu will show a long list of materials that are available, including CerMark.
After selecting the CerMark material setting, the next step is to size the image for engraving. Click on the Resize Image button to find a box to enter the final engraving size and resolution. The magic happens when the Final Process button is clicked and the software begins the process to optimize the photo for the specific parameters. After a few short seconds, there will be a prompt to save the processed image. It is this highly modified processed image that will be imported into CorelDraw for engraving.
CREATING THE ENGRAVING LAYOUT
To create the engraving layout for this project, open a new document in CorelDraw. My default document size is always the size of my laser engraver’s bed size. Using the bed size as the page size in CorelDraw helps me reduce the variables in the laser engraving process and eliminates any silly user errors.
The beveled glass photo plaque has an outside dimension of 8 by 9 inches. Create a rectangle that is 8 by 9 inches in CorelDraw to represent the outside of the beveled glass photo plaque. The next step is to import the processed photo image and position it in the representative rectangle. Create any text or other graphic that is to be engraved inside the rectangle. The engraving layout is now ready to print to the laser.
LASER SETTINGS AND TIPS
Using the correct power and speed settings for your laser is critical when working with CerMark on glass. I’ve used the CerMark 6044 product for over 10 years. Based on that experience, I recommend using a power setting of 100 percent. The speed setting for the laser should be set using the formula of taking the rated laser power as the speed setting. If you have a 50-watt laser system, set the speed to 50 percent.
Keep in mind that the laser bonding process for CerMark on glass works a little differently than you are used to. As I mentioned previously in this article, the focused heat energy from the laser will cause the CerMark to bond to the glass. However, an engraving speed that is too slow will have too much heat energy and cause the glass to chip and flake off. The engraving result will be a coarse look that is gray in color. Conversely, an engraving speed that is too fast will not allow the CerMark to bond to the glass, looking patchy with sections of engraving missing.
After the laser engraving is complete, it’s time to wash off the unengraved CerMark coating with water. As soon as the water comes in contact with the unengraved CerMark on the surface of the glass, it will immediately soften and easily wash off. A soft scrub brush can also be helpful to remove the CerMark coating that is in any highly detailed areas.
Finish the project by drying off the glass with a soft cloth. The beveled glass photo plaque has a simple stand that attaches to a small hole that is in the glass. The stand does an elegant job of creating a desktop photo product.
ENGRAVE MORE PHOTOS
This project illustrates only one of the many photo products that your laser can create. Photo engraving with a laser does take time to learn and perfect but it also can be very lucrative. With every cell phone now being a capable capture device for these types of projects, there are dozens of untapped markets for engraving treasured heirlooms.