I chose the Cadillac CTS coupe wrap to show you how you can use bodylines on vehicles to help hide seams. So many people have told me over the years that they are going to wrap cars without seams and that is how they are going to set themselves apart from their competition. My question is always why? Is that the main concern of your clients?
I have always felt that if seams are needed, then they are needed. The important thing to remember is not that you can never have a seam, but rather that when you need to use them, that you should do your best to hide them whenever possible.
The Specialty Wrap Challenge
Many people think that specialty wraps are easier because you have no designs to have to line up. While this is true about design, the lack of design actually causes a whole other problem. Due to the lack of design, when you look at a specialty wrap that has no design, the eyes are more likely to notice seams, overlap, or other imperfection (like paint chips or bumps under the wrap) and visible paint showing on the edges (especially if the car’s paint contrasts with the color of the wrap).
If you are wrapping a yellow car with a flat black film, you will find out really quick what I am talking about, because a 1/16″ sliver of yellow showing around the edge of a black door or fender will be visible from 15 feet away. This might sound crazy, but the color of the car and the color of the wrap going on it can affect the pricing.
For example, we are wrapping a Lamborghini right now that is Pearl Yellow and the client is having us wrap it matte yellow, this is much easier than wrapping it matte black because if there are very small areas of yellow showing in between body panels and such, you will not be able to tell because the color is close enough that you wont notice. It’s rare that you wrap a car virtually the same color as it was, however you can explain this to the client when choosing colors and take samples up against the car to show them the contrast issues.
We never wrap the doorjambs or inside the hood and trunk area, so for this reason you want to try and stick with something that will compliment the original color so it doesn’t look hideous when the doors open.
Specialty Wrap Clients
When doing specialty wraps, you must be very honest and up front with your client about how the wrap is going to finish out. Your typical clients for specialty materials is a higher end client with more expensive cars, which usually means their attention to detail is also at a higher level than your average client.
It’s best if you have a vehicle around your shop that is wrapped with a specialty wrap so that you can show them how it will look when it is done. You might want to point out where the wrap will stop and if you have to put seams in it, tell them where they will be, why you will be putting the seams there and that you will do your best to hide them.
We have always found that the more time we spend up front being honest with the customers, the fewer problems we have on the back end because they know what to expect. Our own expectation is to do the best job possible for every client, using the best materials and tools that we have available.
Cut Tape
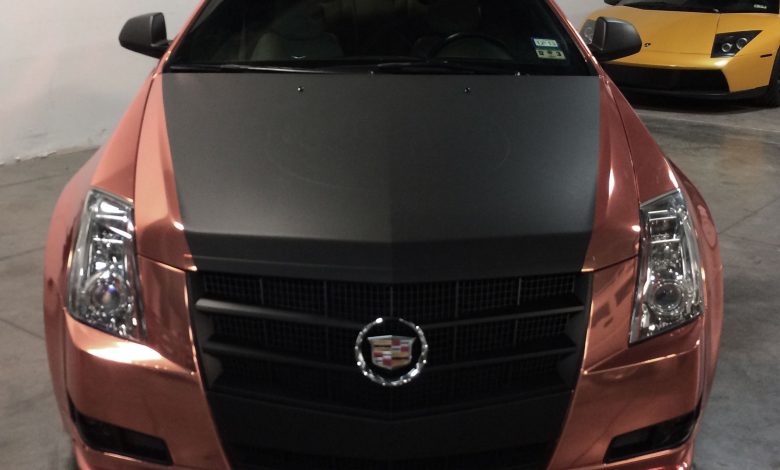
When doing these types of wraps, we use a lot of cut tape in our shop (like that sold by Knifeless Tech Systems) because it allows us to get nice clean cut lines on vehicles without a chance of damaging the paint with a knife. There are a lot of people out there who won’t use the cut tape because they say it is too expensive, and my answer to that is, “If you think cut tape is expensive, try buying a new paint job.” One paint job will cost you more than a couple years’ supply worth of cut tape. It’s worth the investment.
On the Cadillac CTS we were able to use the cut tape on the matte black portions. I will go over in detail how I did the rear bumper using multiple pieces and cut tape to create a seamless appearance yet have the material lay down without much stretching so we don’t have to worry about peel back from stress on the edges.
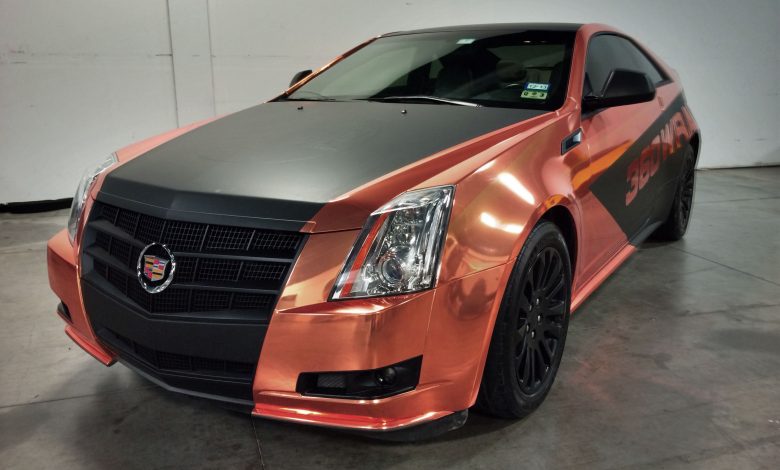
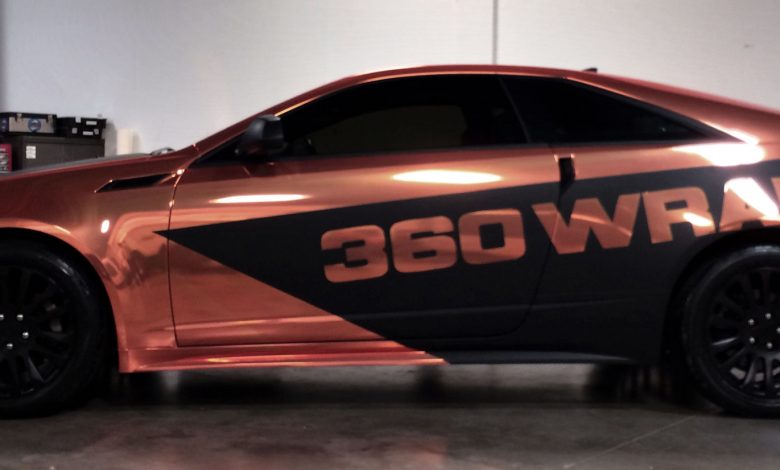
Gold Chrome and Matte Black
As you can see by the picture of the finished design, this wrap is what we call a mixed media design using gold chrome and contrasting with matte black. We used Avery matte black Supercast wrap film for the black portions of the car, and then on the chrome parts we used Avery’s Gold Chrome conformable wrap film that we printed on to give it the rose-hued gold effect that we were going for.
In order to have two different colors on the side of the vehicle, we needed to decide which color would be the first layer. Because the gold is more expensive and a bit harder to work with, we chose to wrap the car black first. For the areas that were going to remain exposed in black we chose to wrap all the way to the edges of the panels. For example, we wrapped the entire door black because this way, when we overlaid with the gold film, there was no visible seam.
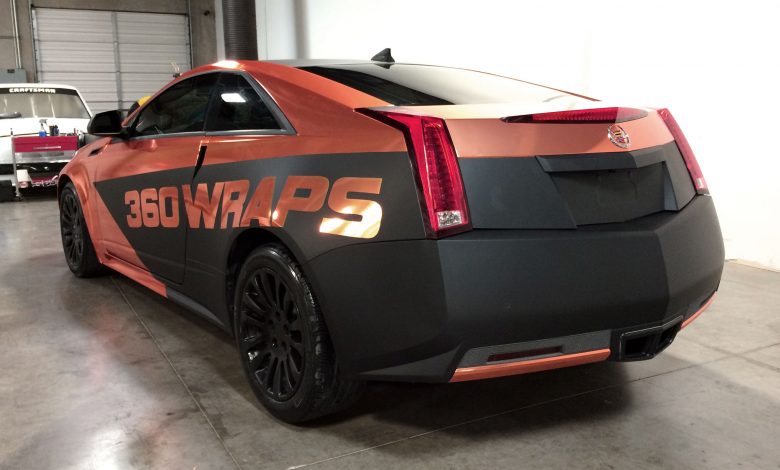
Wrapping the Rear Bumper
This vehicle and many current vehicles on the market today are designed with sharp edges on them, which gives us great surfaces on which to hide seams. When you look at a vehicle that has a sharp bodyline on it, you will notice that the color looks different on each edge, even if it is wrapped with the same color vinyl.
This is because of the way that the light is reflecting on each surface, making it darker or lighter. Because of this, you can easily hide the seam right along the ridge of the bodyline, and your eyes are tricked into seeing just the color shift from the two different surfaces reflecting differently rather than noticing the seam.
I chose to wrap the rear bumper with two pieces from the center out, and one across the top. I also put a seam on the corner to remove the excess material that otherwise would have to be stretched out to remove.
The techniques outlined here can be used on just about everything you do where you might need to put a seam in the wrap. Practice makes perfect in this game, so my best advice is if it is not coming out just the way you want it, practice with scrap material until you get it perfect then remove it and wrap it with the real thing.
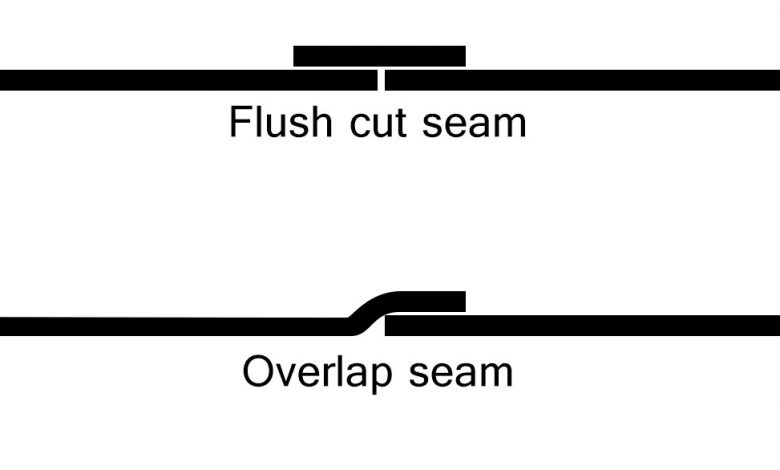
Photo 1
Prior to starting the bumper wrap I applied two parallel strips of cut tape down the back center of the bumper. This will allow me to create a flush cut seam, like a wallpaper seam. I then applied cut tape along the top edge of the bumper and the outer corner about ¾ of the way down to create a relief cut but leaving the bottom attached as one piece so that there was no evidence of a seam.
Photo 2
When I wrapped the corner of the bumper you can see in the photo that I wrapped the face of the rear of the bumper as it would naturally lay flat, and when I got to the corner where the compound curve is, I wrapped it around the bottom first and allowed the excess material to gather on the side part of the bumper. This is where the cut tape that I placed on the corner of the bumper earlier comes into play (outlined in green here).
Photo 3
To finish the corner portion of the bumper, take the cut tape and cut a relief in the vinyl from the top down to where the cut tape stops (Cut). After cutting this with the cut tape, you will want to peel away the unwanted portion (Peel) and apply another piece of cut tape just along the edge of where you just cut. This will allow you to cut your new overlap precisely and leave a 1/4″ overlap without cutting through the layer underneath (Finish). Now that the corner is done, you can finish off the center.
Photo 4
We wrapped the driver side of the rear bumper first (Overlap), and used the vertical strip of cut tape that was to the right first. This gave us a nice clean cut while leaving another strip of cut tape a ¼” from the edge of our first cut. Once we lay the passenger side of the rear bumper down, the second piece of cut tape will cut through both pieces of vinyl leaving a flush cut (Trim). The reason we had put the first strip of tape down was to ensure that our overlap was no more than ¼”. This will allow us to remove the overlap from the seam. After removing the overlapping piece and the cut tape, you can seal the seam with a thin strip of the matte black material (Seal).