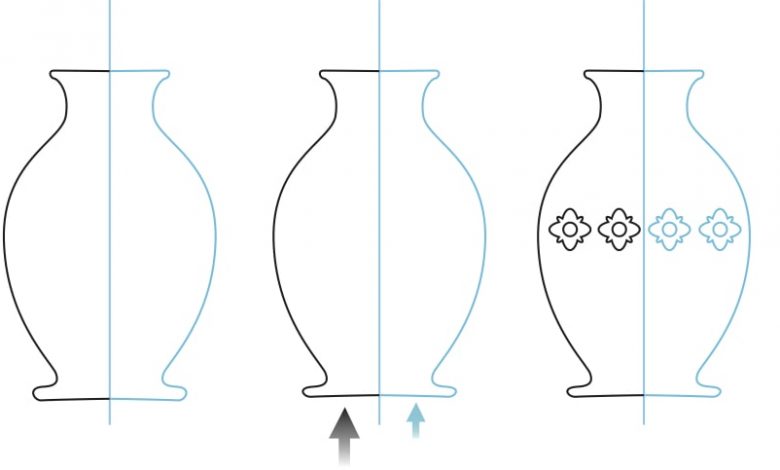
The Symmetry tool (introduced in CorelDRAW2018) speeds up the process of something that has always been possible using CorelDRAW, but at a much slower pace. It allows us to work faster, more efficiently and therefore, more creatively by removing much of the time-consuming drudgework.
The Symmetry tool is located in the Objects dropdown menu and comes with many options available in the Properties bar. For instance, it is possible to indicate the number of gridlines radiating from a single point. An object (a small circle, for instance) placed along any of those guidelines is then automatically replicated on all of the other guidelines and equidistant from the center. However, while in this mode, any change made to the original circle is automatically reflected in each of the other circles. That means we can move that circle, change its size and color, or alter it in any way possible, and whatever we do, those changes simultaneously appear in other associated objects.
New objects can be added and adjusted, as well, with similar capabilities. In addition, lines can be drawn from one gridline to another or even back to themselves, and those lines can be mirrored across the gridlines, and all of these lines can be automatically joined where the endpoints intersect.
Perhaps an even more practical application of this tool is in the drawing of anything symmetrical. With only a single vertical guideline, for instance, it’s possible to draw the right half of a vase with the midpoints of the mouth and the base of the vase connecting with the guidelines. Automatically, the left side of the vase appears with the two halves joined at the guideline. But then a decorative element could be added on the right side of the vase and would also show up on the left side. By making changes to either the right side of the vase or the decorative element, the changes automatically occur on the opposite side, ensuring accuracy and saving a lot of time.