There are few things in the wrap industry more frustrating (and expensive) than having your $5,000 project come back to the shop due to failures. You have spent massive amounts of time, energy, and resources creating the wrap only to have an unhappy customer complaining that the edges are curling up or the recesses are pulling out.
Unfortunately, you may have ingrained failure into your wrap right from the start if you haven’t considered the entire process in full.
-
PROBLEM: Inaccurate or poorly-considered design
Incorrect sizing can create situations for an installer to have to unduly stretch/manipulate the film. Did you allow for compound curves or transitions from sides? Did you allow for extra printing around the perimeter of each side to allow the installer flexibility? Did you anticipate that hard lines do not translate well running up, over, and around corners? How about providing enough film for the installers to hold?
Don’t try to pinch pennies by saving the bits of film and ink only to ruin the project by forcing the installer into a bad situation.
Relying solely on digital vehicle templates can create unforeseen issues. Most modern vehicle templating is fairly accurate; however, slight changes to body styles, hardware add-ons, sports packages, etc. can dramatically affect your wrap design. A good practice is to obtain good, straight-on images combined with detailed and accurate measurements of the vehicle to double-check that template.
-
SOLUTION: Make sure your designers are communicating with your installers and vice-versa. A little discussion about real-world scenarios might just save you from future headaches.
-
PROBLEM: Chemistry and all its glory
All commonly used wrap printing technologies require curing or an “outgassing” period. Even latex inks have a disclaimer warning printers to allow some time for those inks to cure before laminating. The biggest culprits of improper outgassing problems are solvent and eco-solvent inks. The printing process uses a solvent-based ink which often requires 24 to 48 hours to cure, especially if you have highly saturated colors. Rich Black is a common problem color as that CMYK combination needs a lot of ink which results in a lot of solvent being dropped onto the film. Rushing the time to laminate will trap those solvents. You cannot trick physics, so the trapped solvents will be forced into moving through the path of least resistance. The path of least resistance in this case, unfortunately, is right through the vinyl and into the adhesive itself. The solvents moving into the adhesive layer will begin to break down the glue, collapse the air-egress channels, and damage the repositionability properties of most modern wrapping films. Additionally, the solvents will break down the chemical properties of the adhesive and often create a tacky, more aggressive initial bond.
Improper curing will create an unpleasant situation which experienced installers should reject immediately. An experienced subcontracted installer, upon being hit in the face with solvent fumes as they open the box, will immediately report the situation and abstain from beginning the project. In short … the warranty has already been compromised, the glue has been damaged, and they will have no desire to be blamed for a faulty product that is out of their control.
-
SOLUTION: Allow for the proper curing time per the film manufacturer’s guidelines before laminating. Plan your print time accordingly. If you need to ship the prints by end of day on Friday, then make sure your printing is done by Tuesday, the curing period happens properly on Wednesday and Thursday, and then laminate, trim, and box on Friday. Proper, unrushed planning will see you through this pitfall.
-
 PROBLEM: Contaminated surfaces
 PROBLEM: Contaminated surfaces
Improper cleaning of the wrapped surfaces is dooming your wrap to failure. A brand-new vehicle will often have surface contaminants directly from the factory that are intended to help preserve the paint. These must be properly removed using a Xylene or PrepSol type of cleaner. Be sure to follow proper health and safety guidelines for handling.
An older vehicle always has road grime, salt, dust, and dirt, etc. which settle on the vehicle during everyday use. Most shops require their clients to wash their vehicles properly and fully with no waxes, sealers, clear coats, etc. Even when a vehicle is brought in freshly washed it will require thorough cleaning with a final hand-wiping using 70% isopropyl alcohol. The wet/dry method works best as the wet rag loosens the surface contaminants and the separate dry rag pulls those loosened particles off the surface. Just using a wet (or sprayed alcohol) approach will only swirl the contaminants around and will often leave problems behind.
Full attention to detail while cleaning is important. Just like dirt can collect in cracks, crevices, alongside panels, under seals, etc., you must also take extra care to clean those specific areas out for proper adhesion.
-
SOLUTION: Fully and properly cleaned surfaces are an absolute must to avoid wrap failures.
-
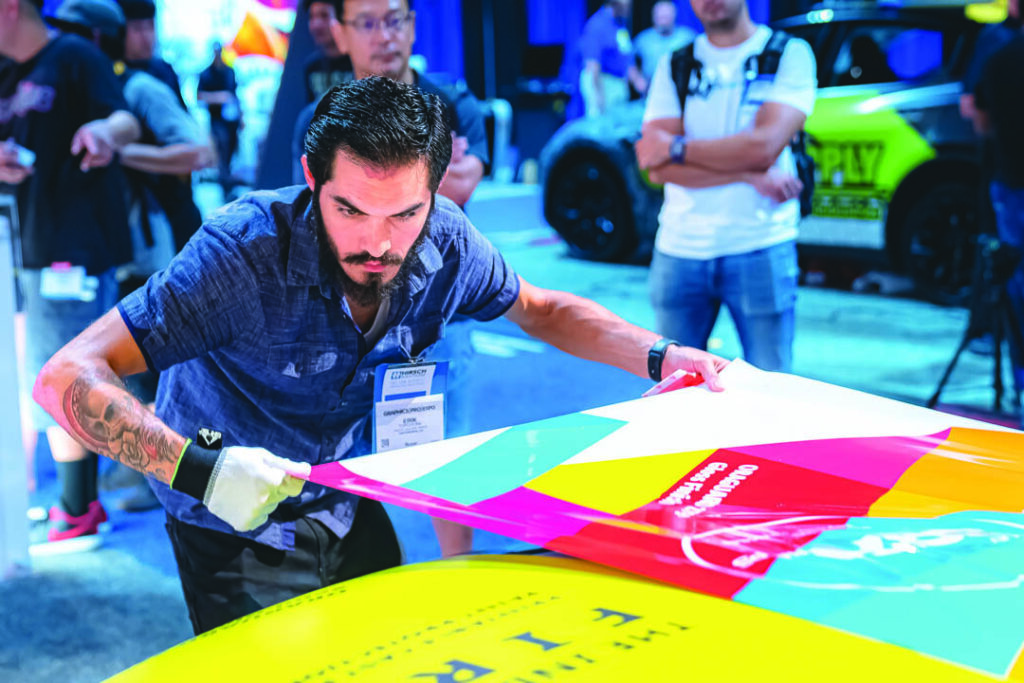
PROBLEM: Not dry fitting the project
It is a common mistake for an inexperienced installer to want to get right into laying the new wrap. Missing the dry-fitting step; however, can often create wrapping failures. When an installer does not double-check sizes and positions of the various graphic elements, they run the risk of creating a bad situation. Aligning a panel too far to the rear may create a need to overstretch an element farther forward to compensate.
-
SOLUTION: Organizing and dry fitting all wrap elements enable the ability to anticipate problems before they become unrecoverable.
-
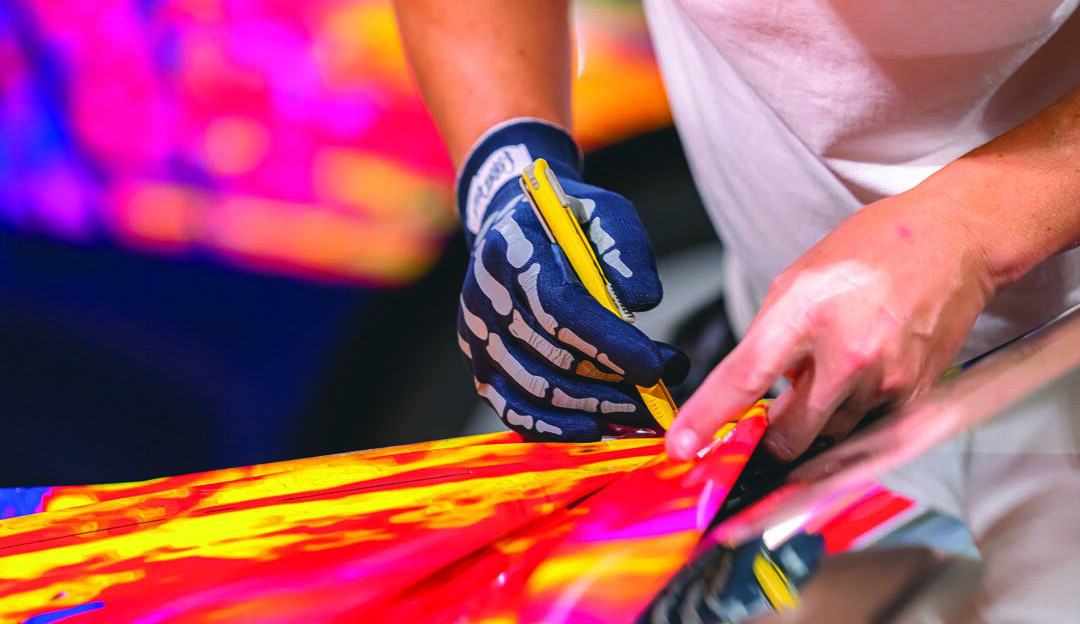
PROBLEM: Overstretching, overstretching, overstretching …
Way too many installers overestimate the ability of heating vinyl films to “stretch” into problem areas. Yes, there is an element of stretchability, but it is much wiser to use proper installation techniques that avoid stretching at all. The tendency for a wrapper to heat the film to pull it around a compound curve, push it into a recessed groove, or cover it down under a panel may seem to work at first. Unfortunately, this approach tends to overstretch the film and will result in failures within days. The edges of the vinyl will curl up, fingered wrinkles will develop and expand, and recessed areas will pop back out.
Consider this … the vinyl wrap product has two primary layers: a vinyl film and the underlying adhesive. If you stretch that film, you also stretch the adhesive layer. Stretching these layers causes them to thin out. A 50% thinner layer of adhesive means 50% less glue, which lessens its ability to bond. When you combine physical stress on the film with less adhesive to hold it in place, you create the perfect storm for a failure.
-
SOLUTION: Avoid using heat as a crutch to solve a problem and, instead, use heat only as the final finish tool. Learn and practice “zero stretch” techniques as taught by trainers like Justin Pate at The Wrap Institute.
-
PROBLEM: Failure to post-heat
Post-heating is, simply put, applying the correct amount of extra heat to the completed installation. The exact amount of heat is determined in the manufacturer’s specifications and should be followed in full. The basic action of post-heating accomplishes multiple things:
- Post-heating allows the film to set itself into the applied final shape.
- Post-heating will often pull the minor micro-scratches out of the surfaces and re-gloss the film.
- During the install/trimming of a wrap, the adhesive layer will slightly retract from the edges. This leaves a slight lip with zero glue. Post-heating encourages the glue to flow back to the edges for a proper bond.
-
SOLUTION: Use a heat gun with adjustable heat or a propane torch to bring all surfaces up to the manufacturer’s specified temperature to set the film. A hand-held infrared temperature reader/gun is very handy in identifying and controlling the temperatures precisely. Think of it this way: your wrap needs a finishing touch.
Paying due attention to these aspects of a wrap project will go a long way toward predicting and avoiding most wrap failures. Preventing wrap failures goes a long way toward keeping your clients happy, maintaining high morale with both your designers and installers, and improving that all-important bottom line.