One of the strangest things about owning an embroidery business, at least to me, has always been how often our customers bring in something and ask us to add embroidery to the item. Think about it — would you bring raw meat to a restaurant and ask them to prepare the meal with it? Would you take yards of fabric to a clothing store and ask them to sew you a shirt? Of course not. But for whatever reason, in our industry, our customers bring in their own items only to ask, “Can you do that?” after they describe what they want added to the item.
We have handled these requests a few different ways, depending on the situation. The first thing to do is determine if the item in question could even go on the embroidery machine in the first place. A fully assembled golf bag is not exactly compatible with an embroidery machine. A blanket, on the other hand, provides a great deal of potential. The second step is to determine if the item is clean. We do not ever choose to work with apparel or products that are clearly not in new or clean condition. No exceptions. We also decline any items that carry a strong odor from smoke, pets, or unknown sources.
If the product passes those first two hurdles, we continue the conversation with the potential customer, moving to step three. We have what we call a “minimum hooping fee” of $25. This is the bare minimum price for adding embroidery to a product provided by a customer. We also explain that the price usually goes higher than that if we are doing anything more than adding simple text or a small stock design to the product.
At this point, about half of the people would pick up their item or items from the counter and leave. This was perfectly fine with us. We had learned the hard way that most of these customer-provided goods orders were not worth the hassle they caused for us. These orders drastically slow down our prep process. Creating the design takes time. Depending on the design, it could require a sewout. We usually need to swap out threads to get the right colors on the machine. Meanwhile, unless we have another job running while we do all this, we are not earning any income.
If the customer is still standing there, we determine what they want embroidered on the product, in what colors, at what size, and in what location. Walking someone through the necessary decision-making process can be time-consuming, particularly if they have never ordered embroidery before. Inevitably, the customer says, “Oh you know, just make it look good.” Unfortunately, that is not enough information to effectively create the design and meet your customer’s expectations. You need to cover all these essentials or you will end up in the uncomfortable position of hoping that you deliver what they are expecting, what they were envisioning.
Once we have all the specifics, we quote a price for this order and a delivery time frame.
Here are some tips to help streamline the conversation:
- If they want something on the left chest area of a shirt, instead of asking them what size they want the design, show them some examples that are actually sewn out. We use the shirt samples on display in our business, as they have a design sewn on both the left and right chest locations for exactly this purpose. Believe it or not, most chest designs will fit behind a business card, with very little embroidery showing. Yet, if you said to a customer that you will make the design approximately 2″ X 3.5″, they would say that is much too small. Test this right now. How much of your design (you are wearing a shirt with your logo on it, aren’t you?) is visible when you place a business card over it?
- If they are getting a full front or full back design, again, visual samples are your best strategy. Most full front or back designs will fit behind a standard piece of paper, 8.5″ X 11″. However, that sounds small to most people. They will understand more easily and more quickly with a visual reference.
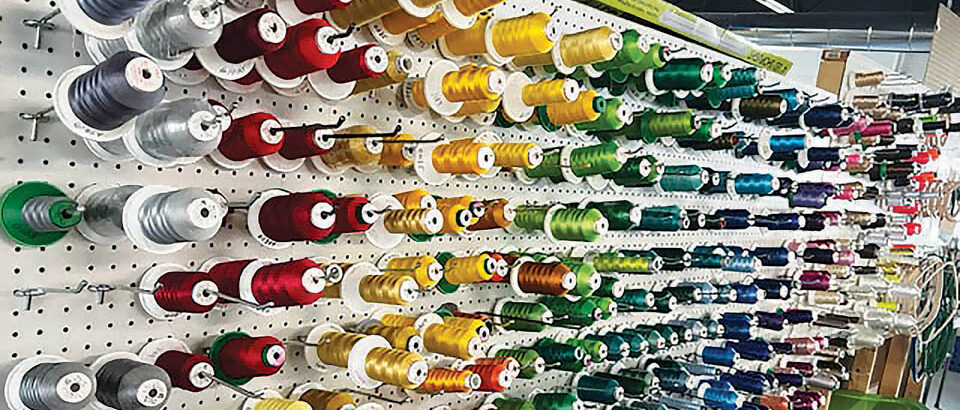
- When you get to thread color selection, never, I repeat, never take them to where you store your threads and ask them to choose. They will freeze up 99% of the time, unable to make a decision when facing so many possibilities. If they say they want their design in navy and Kelly green, assume they mean colors like the Crayola crayons, and skip the color choices. If they indicate they want colors that are more open for interpretation, instead of handing them the thread chart and asking them what color they want, try this: Ask them if they want a light, medium, or dark [insert name of color]. If they say they want a medium blue, show them no more than three cones or spools of medium blue thread and have them make their choice. Do this will all the colors in the design other than white, black, navy, red, and other easily identified colors.
- Lead the conversation when it comes to where the design will be placed. The default location for chest designs is the left chest, unless the shirt has a pocket. If there is a pocket, you have to ask if they want the design above the pocket, across from the pocket, or on the pocket, which will sew the pocket shut. If you can get into the pocket with a specialty hoop or are willing to remove the pocket and reattach it, then offer that option.
- If they want a full front or back design, and the product has a hood or unique neckline, mark how high the top of the design should be so that you hoop the garment in the correct location.
- If they ask for a unique placement or bring in a unique item, make sure that you can get that part of the product into a hoop and on the machine. A pocket on a golf bag won’t work, but a detachable strap or detachable pocket is an excellent alternative. If the item has a thick seam or zipper in the area they want embroidered, discuss a backup plan if their first choice is a no-go when you try to hoop it or load it on the machine. There are a variety of specialty hoops available to get nontraditional products onto your embroidery machine.
If they approve the price, the next step is to hand them a disclaimer to sign. This disclaimer lets them know that we never want to ruin a product that they provide, but that there is a risk that something could happen. I am sure that your equipment has never eaten a garment before, but mine certainly has!
While we never want to turn customers away, becoming clear about what you will and will not accept, and what you and your equipment can and cannot do will help you make the customers who truly want and need their items customized into loyal and happy customers. It should not be cheap, nor should it be ready today or tomorrow. We design and create unique, quality custom goods. It is 100% reasonable to earn a respectable profit for providing your time, expertise, skills, and service to your community.