When you first get started in machine embroidery, it feels like you are learning a whole new language. In reality, you are. Between bobbins, backing, hooping, sharps and ball points, wedge and titanium, digitizing, pique, waffle knit, performance fabric, and all the stitch types, it’s easy to wonder: How on earth am I ever going to figure all this out? And how do I figure out which kinds of stitches to use where? If you have ever questioned why a design just looks “off” even though the machine stitched it just fine, it may be the result of how the design was created, not how it was sewn out.
Here’s the secret: It’s not just the design, the hooping, and the sewing that matters, it’s the stitches themselves. Using the right stitch type can mean the difference between a logo that pops with professional polish and one that puckers, pulls, curls, or disappears into the fabric of the product. Think of the stitches in every design as the “brushstrokes” in your embroidery art — they add coverage, texture, and shine in different ways. Even if you are not creating your own digitized embroidery files, knowing the basics about the different types of stitches will help you create the best possible embroidered products.
In this article, we’ll review the main stitch types you’ll see in nearly every machine embroidery design. You’ll learn what each one looks like, why digitizers choose them, and how you can use them to get better results, no matter what product is in your embroidery hoop.
The basics of machine embroidery stitches
At its core, machine embroidery is just thread and fabric coming together in different patterns. The creation of every stitch is like a pinkie promise from childhood, two threads looping around each other to form each half of the actual stitch. The “stitch type” is simply how the machine lays that thread down to create the look and
feel of the design. Some types of stitches are meant to cover big areas. Others are for crisp edges, shiny highlights, crisp lettering, appliques, or fine details.
Most embroidery designs are a mix of several stitch types that are layered together like puzzle pieces. Additional puzzle pieces include the fabric the design is going on, how that fabric is stabilized, and how the fabric is hooped. Have you ever noticed that the same logo can look amazing on one sew-out and a little disappointing on another? That difference is caused by how the stitches interact with the fabric, the stabilizers, and each other.
Once you understand the basics: satin stitches, fill stitches, running stitches, and a few unique specialty stitches, you’ll start to see how high-quality designs come together. You’ll understand why letters are shiny and smooth, why big shapes look textured instead of flat, and why some designs stitch out cleanly while others fight you every step of the way, even winning occasionally (we all have a rejects pile, trust me!).
Satin stitches: Smooth, shiny superstar
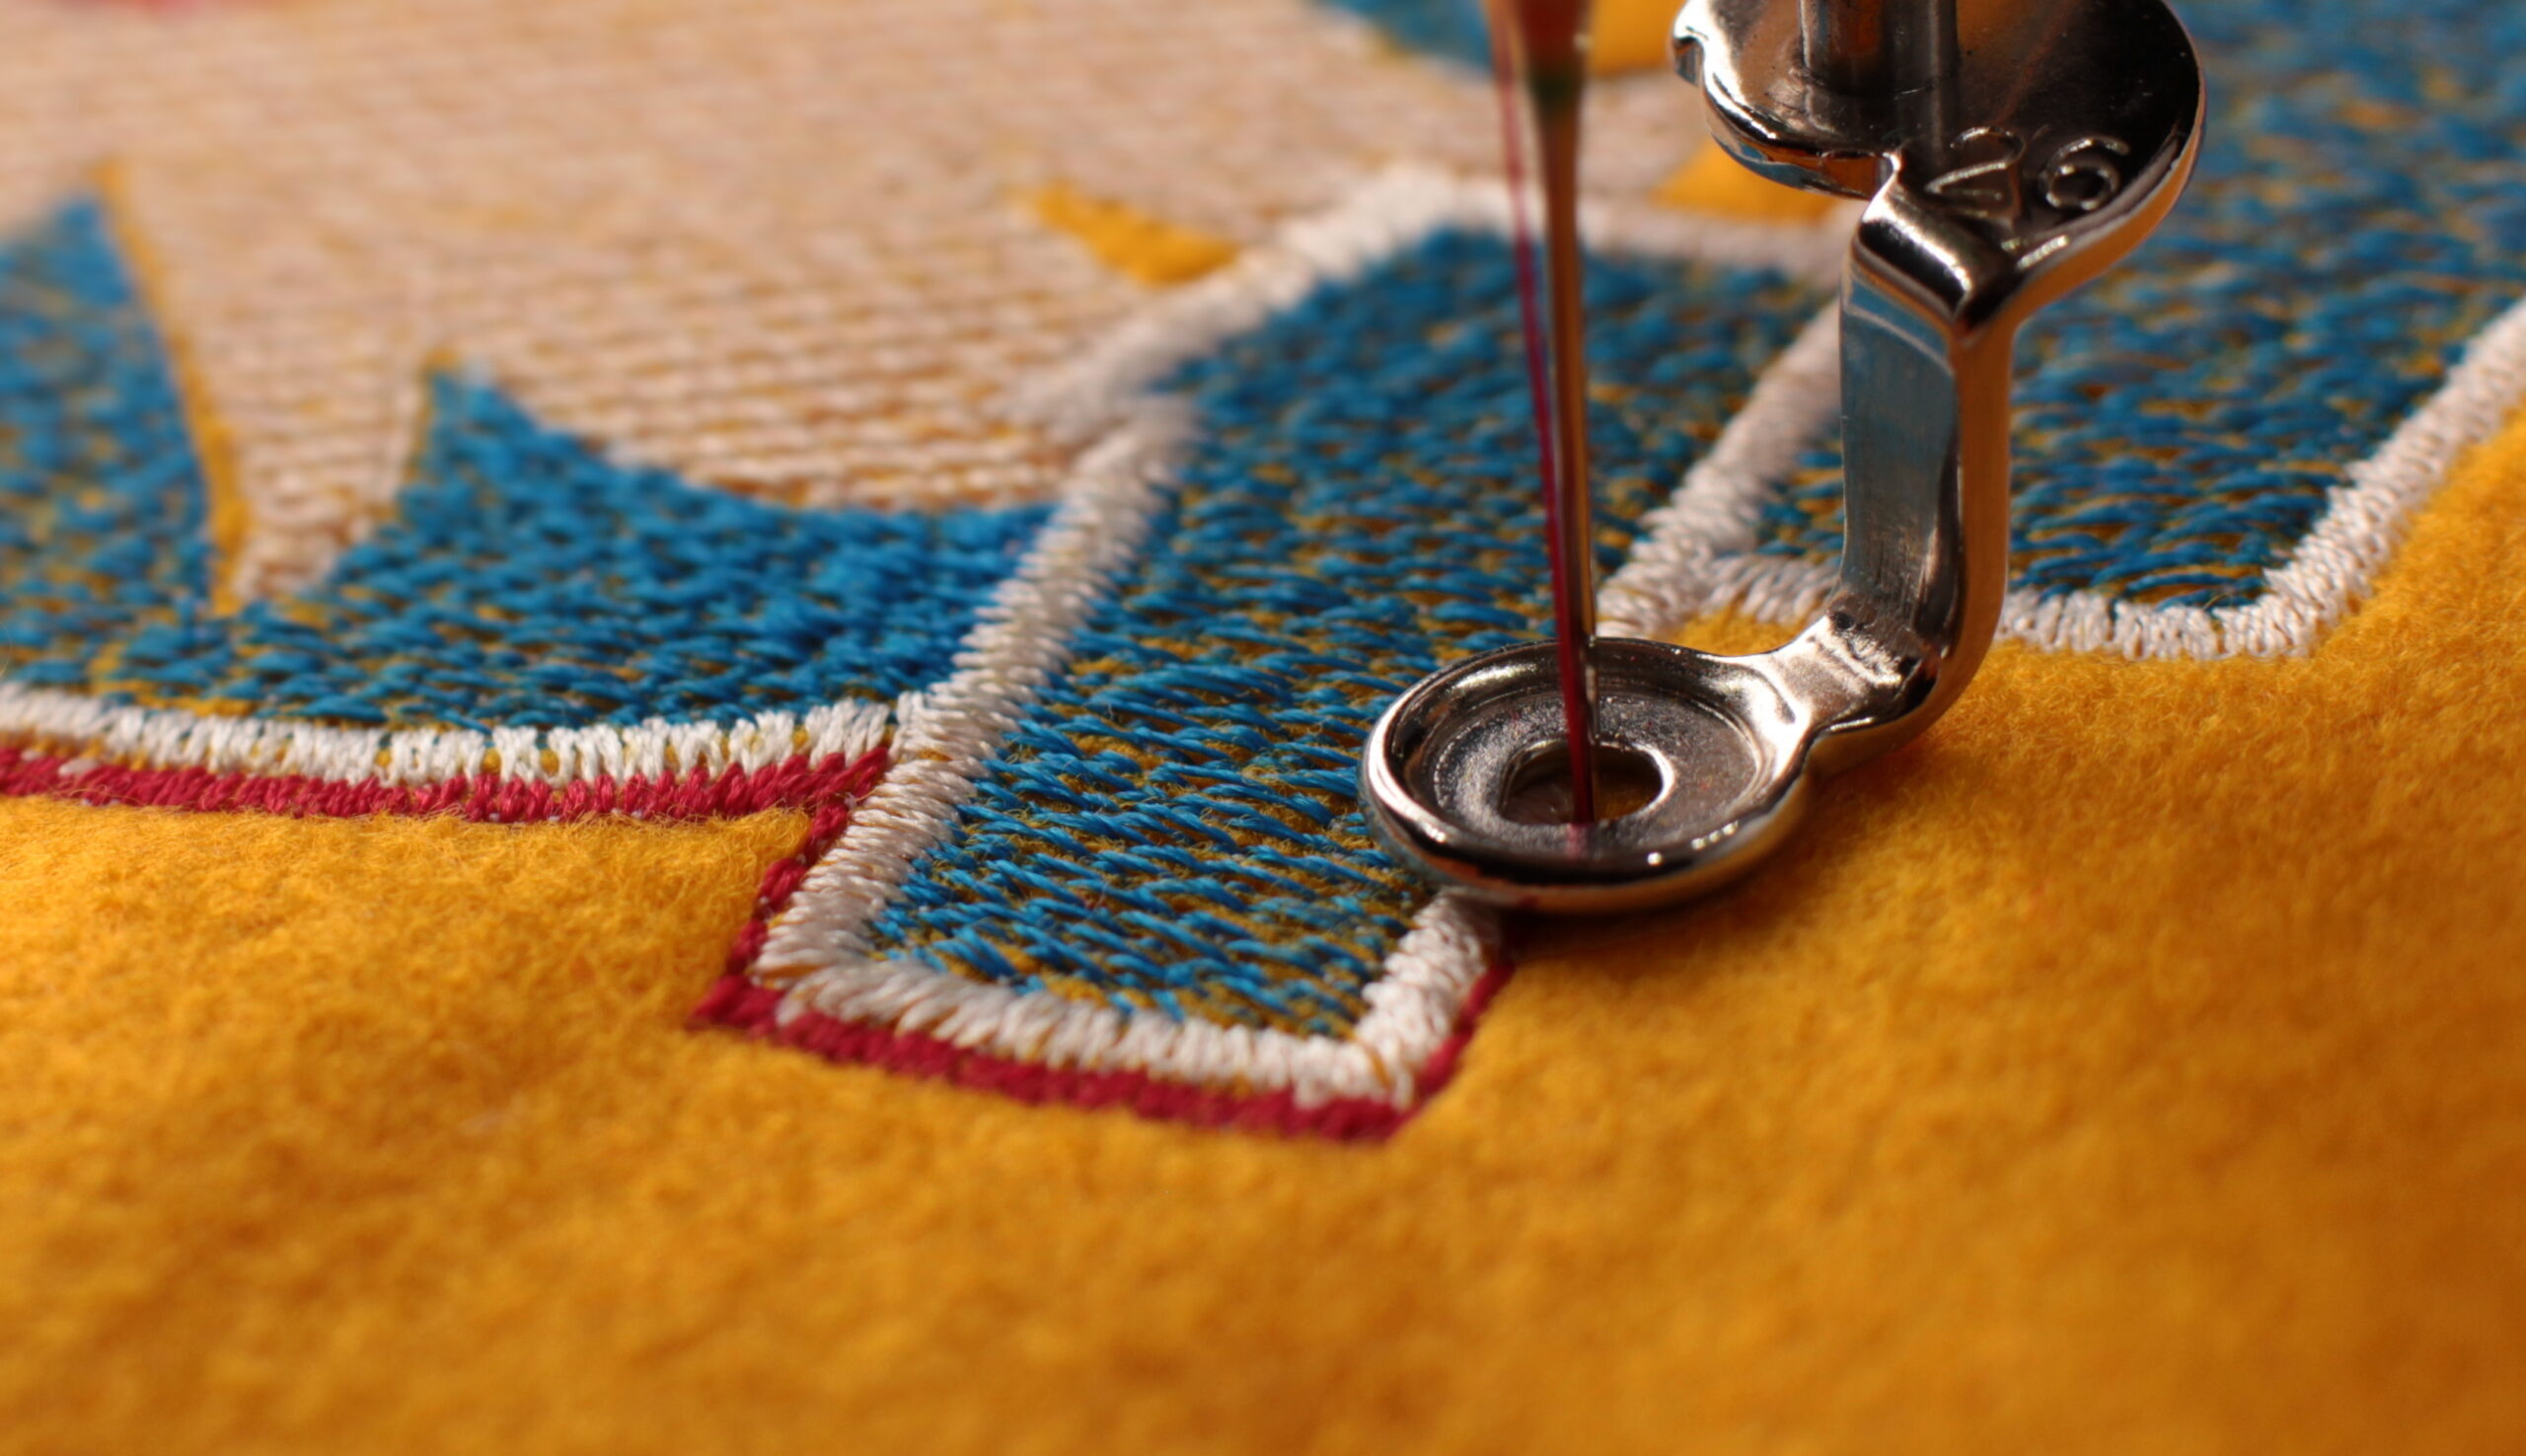
If machine embroidery had a “superstar stitch,” it would be the satin stitch, also called the column stitch. These long, smooth stitches lay side by side, creating a smooth, tight, glossy, and finished look. Satin stitches are what give small lettering its polished look, or what makes design outlines and borders crisp, adding that well-defined edge to the finished design.
Think of satin stitches like the piping on a cake; it’s there to give definition and draw attention. Satin stitches are usually used for narrow design elements — text that’s less than ½“ tall, outlines around shapes, or decorative accents or highlights to add that bit of definition.
- Why they’re great:
- Clean, professional finish
- Reflect light beautifully (they “pop” against the fabric)
- Provide excellent coverage in small areas
- What to watch out for:
- Satin stitches can get tricky if they are too wide. Long stitches across too big of a space can snag, gap, or even pull at the fabric. They can also cause puckering if the design is too dense or if the fabric being sewn is lightweight and not stabilized correctly. The trick is to let satin stitches shine where they belong: on small to medium details that need a crisp, smooth look. For bigger spaces, the fill stitch really earns its keep.
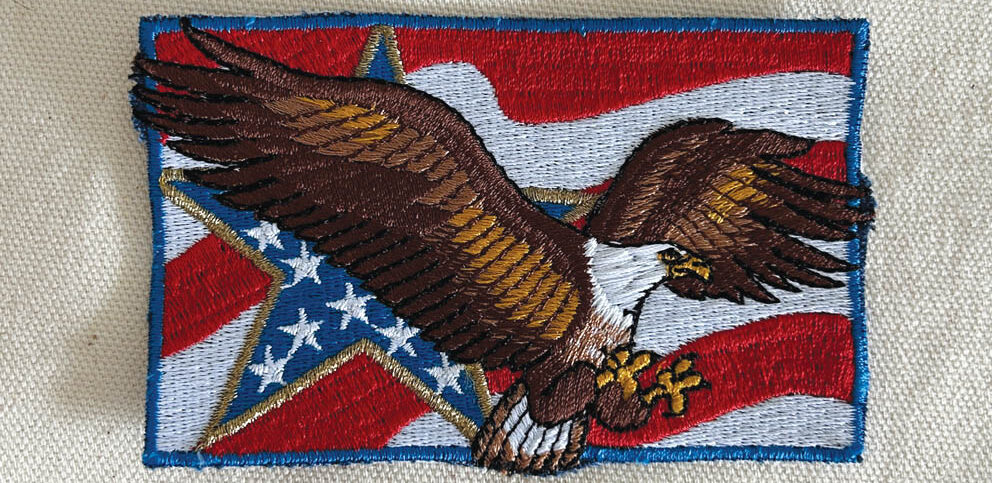
Fill stitches: Coverage workhorse
Fill stitches, also called tatami stitches, are exactly what they sound like, they “fill” larger areas with rows of short, closely spaced stitches. Instead of long shiny columns like satin stitches, fill stitches create a flatter, consistent look.
Use fill stitches for bigger elements. Create the background of a logo, a large shape, or any area where you need consistent coverage. Don’t worry, consistent does not have to mean boring! Fill stitches can be laid down in different patterns, from simple diagonals to decorative motifs, adding depth, texture, and interest to otherwise plain areas.
- Why they’re great:
- Consistent coverage across large areas
- More stable than satin stitches (less likely to snag or gap)
- Endless pattern options to create different textures
- What to watch out for:
- Because fill stitches use a lot of thread, they can get heavy and stiff if digitized too densely. That’s when a design starts to feel “bulletproof” instead of soft and wearable. Understanding design density and adding the correct underlay for the product and the design are key: lighter density makes the fabric more flexible, while higher density gives bold color but risks stiffness. If you’ve ever stitched a big design and ended up with a “bulletproof patch,” you know the fill stitch is too dense.
Running stitches: Understated essential
Running stitches are the simplest stitch of all, a single line of thread, like a dashed line drawn across the fabric. They may look basic, but they do a lot of behind-the-scenes work in machine embroidery. Use running stitches for fine outlines, small details, shading effects, and even hidden “travel” stitches that move the thread from one part of the design to another. They’re also often used as an underlay, a foundation layer of stitches that stabilizes the fabric before the top stitches are embroidered.
- Why they’re great:
- Versatile
- Quick to stitch and low stitch count
- Perfect for subtle details or soft shading
- What to watch out for:
- Running stitches don’t provide coverage, so they’re easy to lose on busy fabrics or textured materials. If the stitch length is too short, they can also perforate delicate fabrics. On the flip side, if they’re too long, they can snag.
Specialty stitches: Fun extras
Once you’re comfortable with the basics, you’ll start to notice a few specialty stitches that can add flair to your embroidery:
- Bean stitch: a triple stitch that runs back and forth, creating a bolder outline with a hand-done look.
- Zigzag stitch: a looser cousin of satin stitches, great for appliques, playful accents, or adding texture and dimension on decorative fills.
- Motif stitches: preset decorative patterns (like hearts, stars, or swirls) often used for borders or kids’ designs.
These aren’t everyday stitches, but they’re fun to experiment with when you want to add character to a design.
Matching stitches to fabric & design
One of the biggest aha moments in embroidery comes when you realize that stitch choice isn’t just about the design, it’s also about the fabric of the product you’re stitching on.
- Lightweight fabrics (like T-shirts) do better with fill stitches at a lighter density, to avoid puckering.
- Heavier fabrics (like denim) can handle dense satin stitches or bold fills.
- Stretchy performance fabrics need stabilization underneath and often benefit from fill stitches that spread tension more evenly.
Talented digitizers also layer stitch types to create stability. For example, laying down a running stitch underlay beneath satin stitches to help prevent puckering and keep the columns looking smooth. If you’ve run into embroidery headaches, chances are the stitch type (or its density) was part of the issue. Some common culprits:
- Satin stitches that are too wide cause threads to snag or leave gaps.
- Fill stitches that are too dense cause a stiff, heavy design that doesn’t drape well.
- Running stitches that are too light allow fine details to disappear into the fabric.
When in doubt, adjust density, length, or underlay. Small tweaks can make a big difference in how a design looks and feels.
Like most things in embroidery, the best way to learn and create high-quality embroidery is to test, test, test. Keep a stack of scrap fabric handy and run small test sew-outs, especially before you hoop to a customer’s garment. Not only does this save mistakes, but it also builds your eye for how different stitches behave.
Don’t be afraid of trial and error. Embroidery is as much an art as it is a science. The more you stitch, the more natural it becomes to look at a design and think, “That’s not going to look good, or this big area needs a textured fill.” Remember, there are resources everywhere: industry publications, software tutorials, embroidery and apparel decoration trade shows, and industry groups like the National Network of Embroidery Professionals, all designed to help you keep learning and growing as an apparel decoration professional.
Embroidery stitches are the building blocks of every design. Once you understand how satin, fill, running, and a few specialty stitches work, you’ll be able to make smart choices that give your work a polished, professional edge. Think of it this way: stitches are tools in your creative toolbox. Knowing when to use each one, and how they interact with your fabric and the design, is what takes your work from “that’s nice” to “wow, that looks amazing!” Go ahead, experiment and encourage your digitizer to take a bit of creative license with a design, while keeping it within reason.