A Few Overlooked Features in CorelDRAW
Learn about placing toolbars and flyouts, and adding frequently used commands to those bars in this February issue of A&E.


Most users of CorelDRAW have discovered that it is a powerful design program that has a massive number of tools and capabilities. No matter which version is used, numerous customization options exist. In this introductory column, I will focus on an often-overlooked feature: that of placing toolbars and flyouts, and adding frequently used commands to those bars.
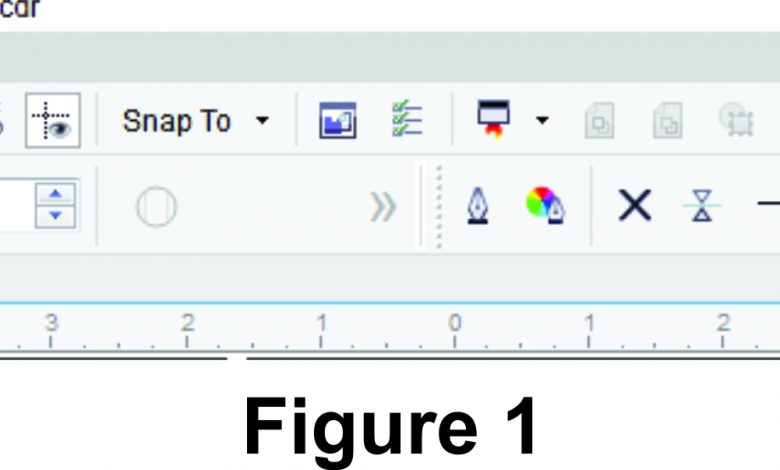
You will see in Figure 1 the changes I have made to my workspace in version X7, which I will use throughout this article, but the processes are essentially the same for all versions of CorelDRAW. Having these toolbars and commands immediately available can easily enhance production time.
New Defaults
Beginning with X5, and all later versions, the toolbars are locked by default. Our first step is to unlock them. Go to Window>Toolbars>Lock Toolbars and uncheck the little square to the left. The next step is to expand the desired flyout on the left toolbar – in this case, the Outline Flyout – by holding down the left mouse button (see Figure 2). Hover over the top of the flyout until the little four-way arrow appears, then, holding down the left mouse button, drag the flyout to your desired location. It will automatically resize and reshape to fit the available space.
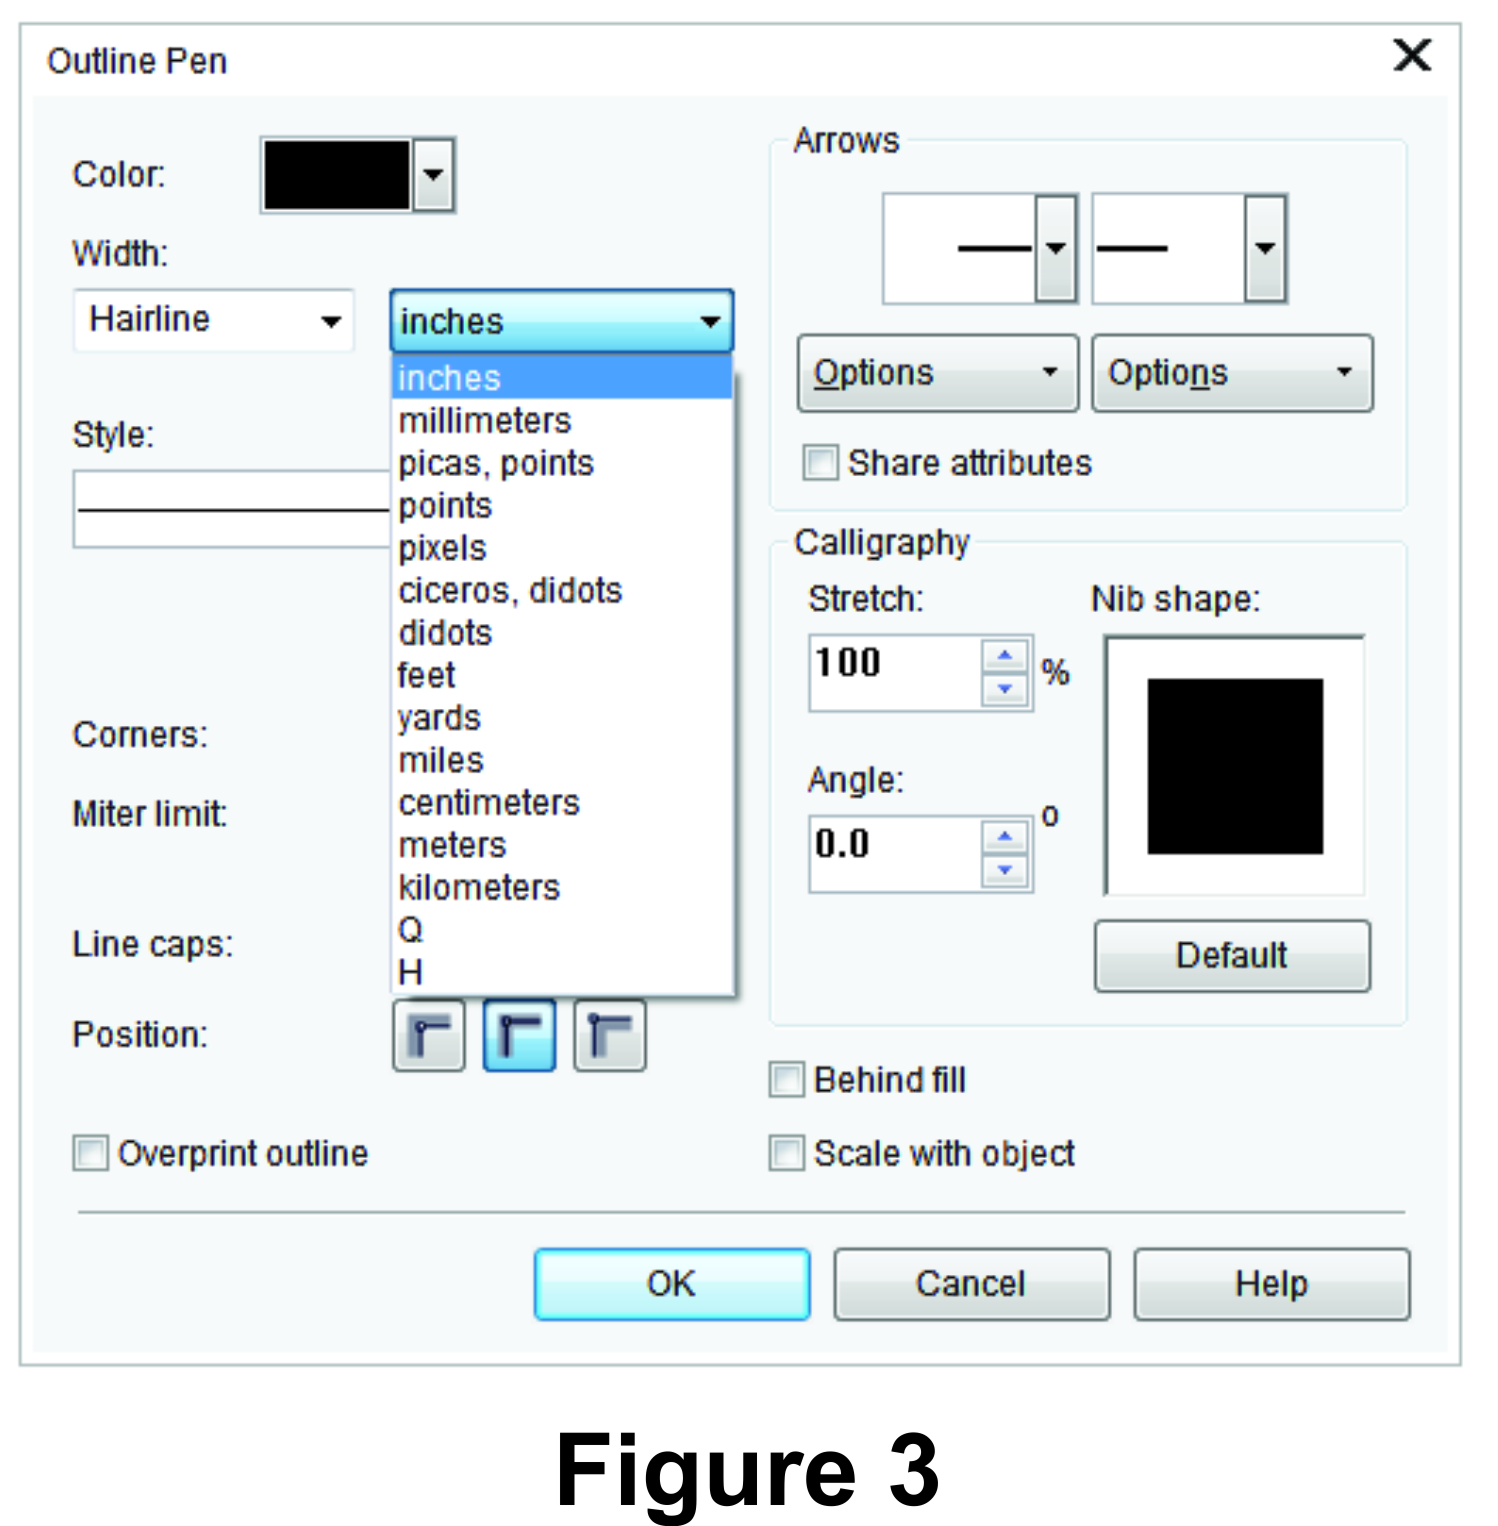
The outline width is, by default, measured in points. Since the bulk of my work is created using inches, I change the width to inches (see Figure 3). Click on the Pen icon – a dialog appears asking which elements you want to include in the new default. Select all that are applicable to your workflow, then click OK. The dialog box in Figure 3 will then appear. Select all the changes you want to be default. Note that I have changed line width to Hairline and Points to Inches as my preferred measurement. When you have completed the desired changes, click OK. Your new defaults are now applied.
Changing defaults for most things in CorelDRAW are done in a similar fashion. An example would be fonts. The default is 24-point, but I may want 12-point as my default. So, by clicking my font icon, with nothing selected, I can type “12” into the Font Size box. It will ask if I want Paragraph, Artistic, or Dimension text to be changed. I chose both Paragraph and Artistic, leaving Dimensions unchanged, and then pressed the Enter key on my keyboard to apply the changes.
At this point, I will usually go to Tools>Save Settings as Default to ensure that all changes I have made are saved to my liking.
Interactive Tool Flyout
The next thing is to expand the Interactive Tool Flyout. Like the Outline Flyout, again hover until the four-way arrow appears, then drag it to its new location. It has been to my advantage to have these tools immediately available without having to search through various dialogs to find them. You may not want the same flyouts that I have chosen, so choose whichever ones best meet your needs; they are all able to be customized in the same manner for your particular needs.
There also exists various commands that I like to have immediately available, most notably several of the Arrange commands. To Front of Page, To Back of Page, Forward One, Back One, In Front Of, and Behind are the most used in my workflow. I also included Mirror Horizontal and Mirror Vertical as these icons only appear when a single object is selected, but do not appear with multiple objects selected.
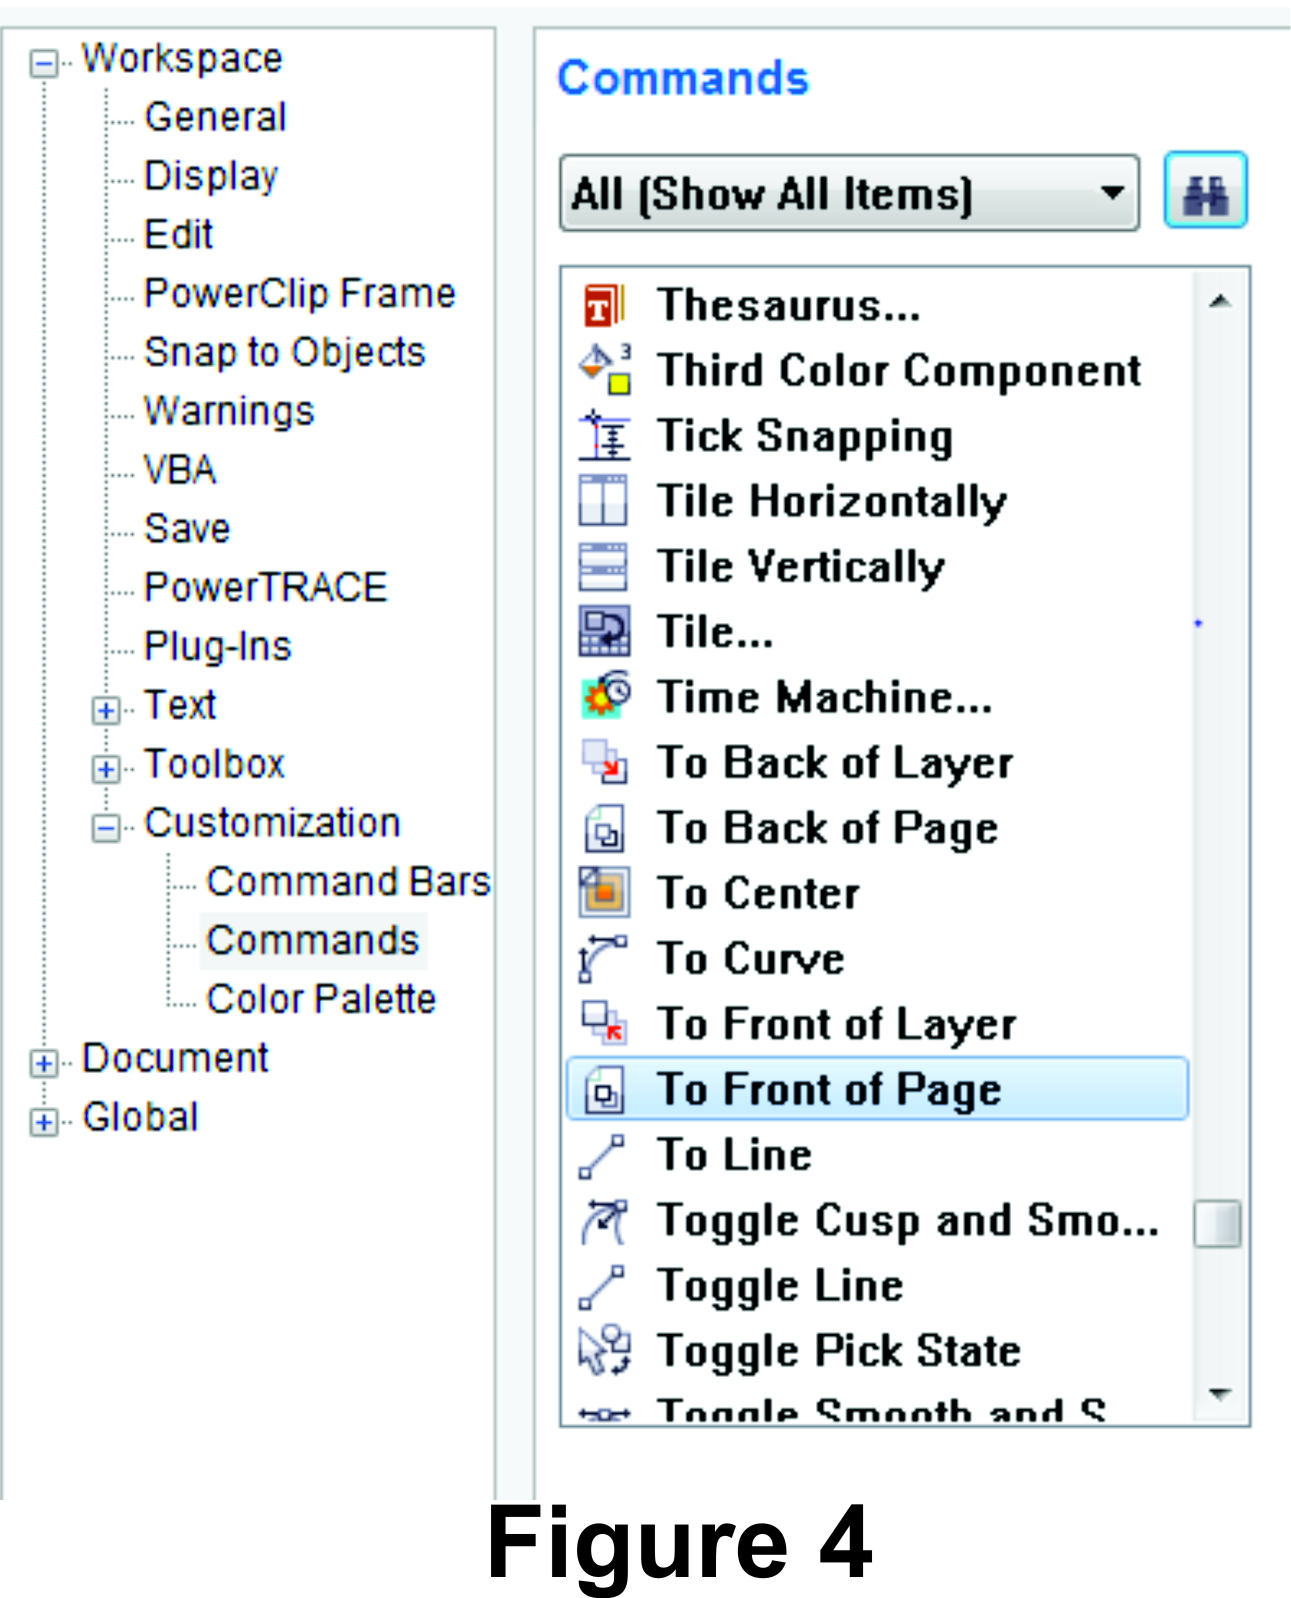
To begin, we need to go to Tools>Customization>Commands, then choose a folder that contains our desired options. I have found that All (Show All Items) is the best choice, since it is seldom known where different commands exist. All commands here are listed alphabetically – scroll to the desired command by alphabetical display, select it, then drag it to the desired toolbar and position desired (see Figure 4). Then select the next command and drag it to the right side of the last one. This may require some experimentation on your part to get it right. It’s best to move each command in the order of importance for your workflow.
Once you have everything just as you desire, go once again to Save Settings as Default to ensure that nothing changes.
Color Palettes
The next thing involves color palettes. Here, I have three color palettes open: the default CMYK palette; a Custom Palette that I acquired several years ago developed for CorelDRAW version 9 reflecting CMYK values that closely approximate the colors of the One Shot lettering enamels; and the Roland spot color palette, which is included with all versions of CorelDRAW Graphics Suite since version X5.
To open a different palette, or set any one as default, hold down your right mouse button on the target palette until a dialog appears, then choose your preferences there. Note: If you choose CMYK in the primary color mode, and then change to RGB, your palettes will automatically update to RGB color model. Most often, CMYK is preferred for printed stuff, and RGB is best for things that are to be displayed on a monitor or digitally, such as a website or online in some fashion.
When you have everything changed just as you want it, it is best to Lock the toolbars to avoid inadvertently moving them. Then, once again, Save Settings as Default. Now one task still needs to be done, that of creating a new Workspace that has all your changes, which is valuable if you have to modify CorelDRAW for any reason. You can easily select your saved workspace and it will open with all your new preferences.
All my changes were done in the CorelDRAW X7 Default workspace. If you have changed one workspace, then choose a different workspace. For instance, rather than Default, if Illustration is chosen, it will need to be changed on its own, as each workspace is an individual and changes made to one will not appear in the other.
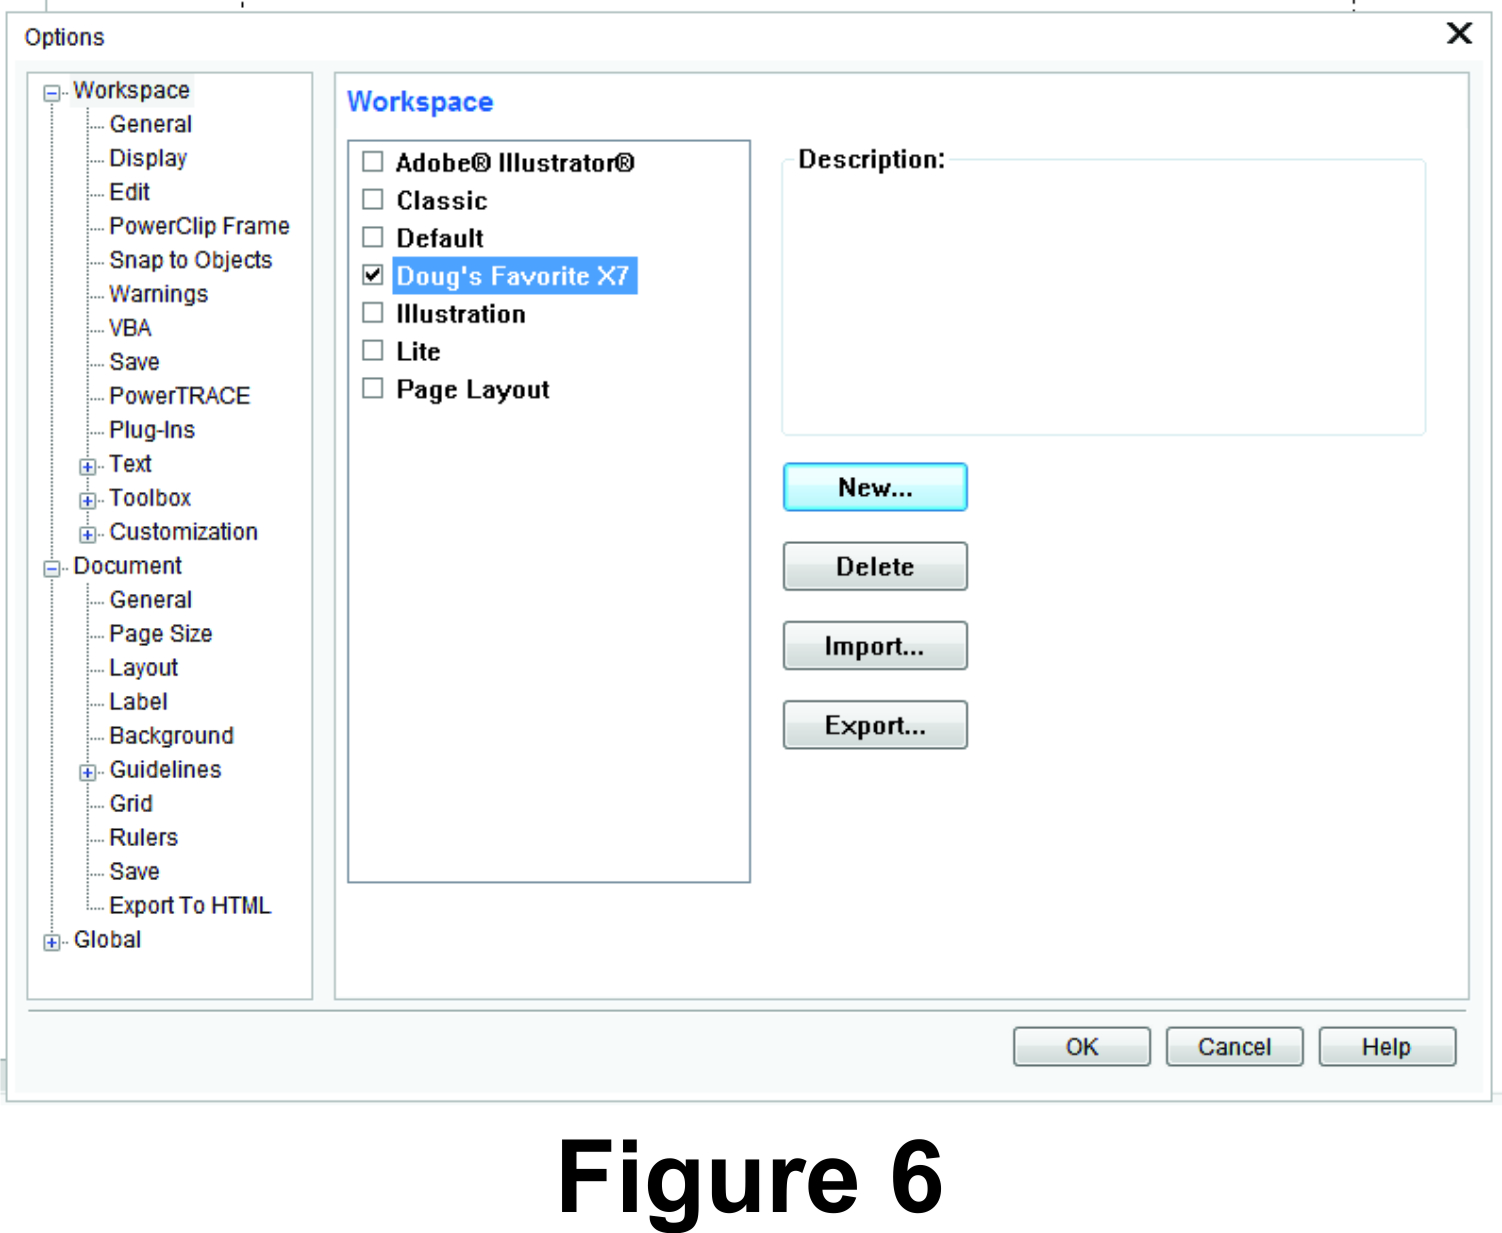
To create a new workspace, go to Tools>Options>Workspace>New. You will see a dialog box (see Figure 5). Type a unique name in this box (in my system, I named it Doug’s Favorite X7) then press OK. It is possible to create as many custom workspaces as one needs, based upon whatever individual needs arise. Each should have a unique name for identification purposes. Figure 6 shows a display of the new workspace applied. It is now in the list of available workspaces.
Since version X6, there exists some Quick Customize buttons. Though helpful, they often don’t give me the tools I need for production. That’s why I choose to customize my interface.
In the future, I hope to explore some keyboard shortcuts, some design techniques, and a few little-known facts about CorelDRAW. A most powerful program, it has new abilities that I continue to learn nearly every day. Some things have become rote processes, but others are an adventure to explore.