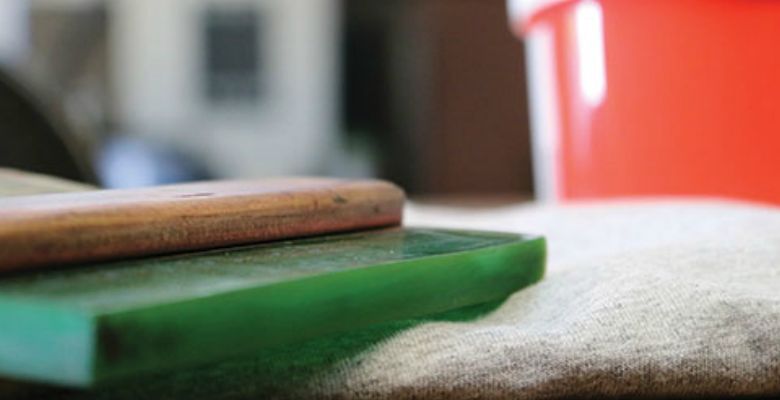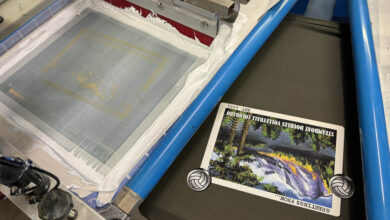
Today’s top-line autos reduce setup time with screen locks, blade locks, and tri-locks for instant registration of a multicolor image. Often, the images are created digitally. In addition, today’s mesh is dimensionally stable and, yet, some days some jobs seem to take forever. It might seem as though registration is the problem, but, in fact, the inconsistency is due to “doodling.” Lost time is not often about image alignment, but rather the misunderstood, misappropriated, and oft-misaligned squeegee blade.
Case in point, most press operators, will take an experimental approach to use their favorite, antiquated squeegee blade to search for the target empirically. For example, they may think more pressure won’t clear, or less pressure won’t clean, a little more this way may fix it, and then, oops! The best operators are those who complete this diagnostic dance in short order. Notwithstanding, when the job is a single-color print, this fishing expedition is not as detrimental to time and profits, but for each additional color we should estimate this “doodling” time and then add to it a very fat multiplier unless you know how to stock, select, and use the blade. Only then can we achieve predictability, consistency, and repeatability.
WHAT ARE THEY AND HOW DO THEY WORK?
Most T-shirt blades are made from polyurethane (PU), which is essentially rocks and rubber-bands with three industry typical isocyanate options including TdI, MdI, and NdI. The physical properties of the blades are almost inconsequential with plastisol inks unless we opt for the far more aggressive co-solvent and discharge systems, which may contain water, strong acids, alcohols, and even hydrocarbon solvents.
The goal of the squeegee when using a highly shear-thinning ink is to run the blade at top speed (maximum shear-rate) to create a fluid pressure head (column in front of the blade), which reduces the ink viscosity and its surface tension, and also increases fluid momentum.
To print with sufficient angle and pressure, you cause the mesh/stencil to compress the garment and create a shape between the blade and mesh to add fluid pressure to transfer tacky inks through low-fill rate or high-capacity mesh. Further, the angle should be minimized to the blade so it can form a pump. This creates a fluid pressure differential between the blade and the garment, efficiently causes the ink to thin to make it transferable and creates an upper seal at maximum stroke speed for the highest shear-rate and an immediate upper seal.
In addition, the angle creates an immediate lower seal to maintain image edge-acuity even when printing on a flashed underbase while maximizing the interface pressure and minimizing the net pressure which causes the fluidized ink to attach to the surface and thereby release the mesh.
SELECTION
Sadly, the top criteria for T-shirt blade selection are price, color, and durometer. If we were to print only 100 shirts a day with the highest priced blade we could find, the cost per print would less than 2/10th cents, or at 500 a day, less than 0.0004 cents per print. So, worrying about the cost of the blades seems a bit silly. As for the color, PU blades discolor when exposed to light. This color change doesn’t affect performance, but you may notice blue blades have a greenish cast. To mask the color shift, manufacturers dye the natural off-white PU. However, all manufacturers use different color codes, so telling someone “we use the red blade” is not a specification.
Durometer is the quasi-high-tech way to describe a blade regarding its hardness. What we want to know is the size of the compressed edge and the flex load of the blade when set to minimal angle and minimal pressure during the print stroke. Durometer doesn’t answer either of these questions nor does it tell us tolerance. For example, the best manufacturers run +3/-2 on durometer, meaning an 80 Shore-A scale blade will be “in spec” between 79A and 82A, and these two won’t print the same. Durometer changes with age, use, grinding, and wash-up and the same durometer at each of the types (TdI, MdI, and NdI) will print differently. In short, don’t rely on the durometer to predict printability. Instead, focus on the following features to better select the correct durometer for your work.
- Chemical resistance. The highest durometer of the three blade types are TdI, MdI, then NdI. This is the ascending order of each in terms of the highest chemical resistance. However, the blade must be cured properly, or the chemical resistance will suffer. This is inconsequential to the plastisol user, but if the ink is more aggressive, please beware that chemical resistance may be compromised.
- Abrasion resistance. This is an issue because the blade is dragged across the mesh. Excessively low or excessively high durometer blades have lesser abrasion resistance. In addition, if the chemical resistance is compromised, abrasion resistance will be compromised even further.
- Compression set. Compression set describes the blade’s ability to return to its original shape. As the blade is used at an angle and under pressure, it bends opposite the direction of the print. As the blade conforms to this shape the pressure on the mesh is reduced, the deposit varies, and the speed must be reduced. Compression set is more prevalent with higher durometer blades and is accelerated with excess angle and pressure.
- Molded curl. Lay the blade flat on a table. If its ends lift from the surface, it exhibits mold curl. This is more prevalent in higher durometer blades. Note, this curling is not only at the ends, as the strain is all the way through the blade but only the ends are unsupported, so the curling is conspicuous. It is imperative to insert the blade properly to ensure the curl will not adversely affect the printed image.
- Fit and flex. For the highest quality and greatest throughput, the preferred method of screen-printed ink transfer is high shear-rate transfer, e.g., optimal gap, minimum angle and pressure, and maximum stroke speed should support these goals. The dynamic edge of the blade should fit the tensioned mesh, specifically between one mesh opening and one opening plus one thread. The dynamic flexion of the blade is predicated upon the required downward force on the ink. Because these two metrics are independent, the two methods of dealing with fit and flex are via laminate blades or one of several beveled edges. The goal is to eliminate the need for “tweaking” the blade’s angle and pressure and put the control of shear-stress in the blade design.
- Physical properties. The length of the blade should be 1″ to 2″ longer than the image is wide with minimum stroke length. Excessively soft blades bounce on an irregular surface, particularly on coarser mesh where they force us to use excess pressure and reduced speed. Excessively hard blades bridge the surface and reduce the deposit on coarser meshes forcing us to use excess angle then excess pressure at reduced stroke speed. The ends of the blade should be ground down or cut to a small radius to prevent isolated stress at the edges of the stencil and the mesh.
- Durometer vs. moduli. The chart immediately to the right names a single 70-durometer blade as 100 percent moduli and then it compares a range of durometers according to the compressive modulus and flexural modulus as a percentage. Durometer units are a bit like body temperature; 5units (think five degrees) is a ton.
Once you have selected the best squeegee, it’s time to insert the blade into its holder and take proper measures to maintain the blade.
INSERTION
In the U.S., standard blades are 3/8″ X 2″. Most of the holders are aluminum, and the elastic blades are secured with bolts. Excess force crimps the opening of the holder to less than 3/8″ at which point a pair of Wonder Bars should be used to pry the holder open without damage. Do not force the blade into the holder unless you want to print with an inconsistent edge. Once the bars open the holder greater than 3/8″, the blade can again be secured. Never overtighten the blade. If the holder is not corroded, use a torque wrench set to 15-ft.lbs.
MAINTENANCE
The main components of blade maintenance are the following:
1. Wash up: Polyurethane (PUR) is virtually unaffected by plastisol inks, so when we print plastisol, we recommend the mildest wash up available. Ink degradant and a pressure washer make quick work of an ink-covered blade. If we use water-solvent based inks, especially discharge, HAS, or PUR inks, a stronger chemical is needed, and wash-up must be done immediately after the press run. Be certain not to use alcohol or solvents containing alcohol in any case as these will quickly degrade the “rubber-band” phase of the blade making the blade brittle and thereby quickly leading to edge-erosion while on press.
2. Sharpening: when the ink of choice is plastisol, the blades seem to last forever. However, this is not the case either with blades which erode due to abrasion of the edge when passed over the screen mesh or with co-solvent inks (water/solvent or water/solvent/discharge). Low-cost sharpeners heat the blade, which is likely to change the durometer and opens the pores of the PUR. Further, they remove a lot of material which begets more angle, which begets more pressure, which begets slower speed, and changes the deposit and printed color. At $0.0004 per print, it may cost more to sharpen than not. However, the best way to sharpen a blade is with a rotary sharpener. Alternatively, the goal should be to remove only the dead material via polishing.
3. Polishing: For the best results, use WD-40 and either 3M 300-grit or 300-grit emery cloth. Remove dead “rubber” by using a sanding block with the wet grit as we would a wood-plane on the 3/8″ surface only. This will take less than 30 seconds a blade after the blade has rested overnight. Resting is particularly critical with co-solvent inks.
NEXT STEPS
Very few shops have enough blades to deal with the variety of garments and images they need. This shortage leads to more print strokes, slower strokes, fibrillation, peaking, element gain, reduced stencil and mesh life, and registration issues. At least one blade manufacturer offers a balanced set of several different blades, ready for installation, any who want to select the optimum blade for maximum quality and throughput. Remember, before we load the blade into a calibrated press, we want it to print with minimum angle, minimum pressure, and maximum speed. The first product to select is the mesh for potential ink deposit, then apply the stencil for resolution, select a highly shear-thinning, low tack ink, then choose the blade. Pick the fit for the mesh and the flex for the ink.


