7 Deadly Sins of Curing Plastisol Ink with a Flash Cure
Learn to cure plastisol ink using a flash-cure unit in this article from the November issue of Printwear.

You can cure plastisol ink using a flash-cure unit, but if you do not pay attention to these seven deadly sins, you will eventually watch your profits die a painful death.
1. INCORRECT HEIGHT OF THE FLASH PANEL
For a proper working height, you want the bottom of your flash-cure panel 2″ to 3″ or fingers width from the top of your platen or T-shirt board. You are looking to deliver as much heat with as little room for heat loss as possible. Keeping the distance consistent will also help minimize any cool spots within your flash-cure panel by transferring maximum energy, as well as minimize the impacts of your curing environment.
Common problems: Shirts are under cured, experience washout, fade, or are scorched.
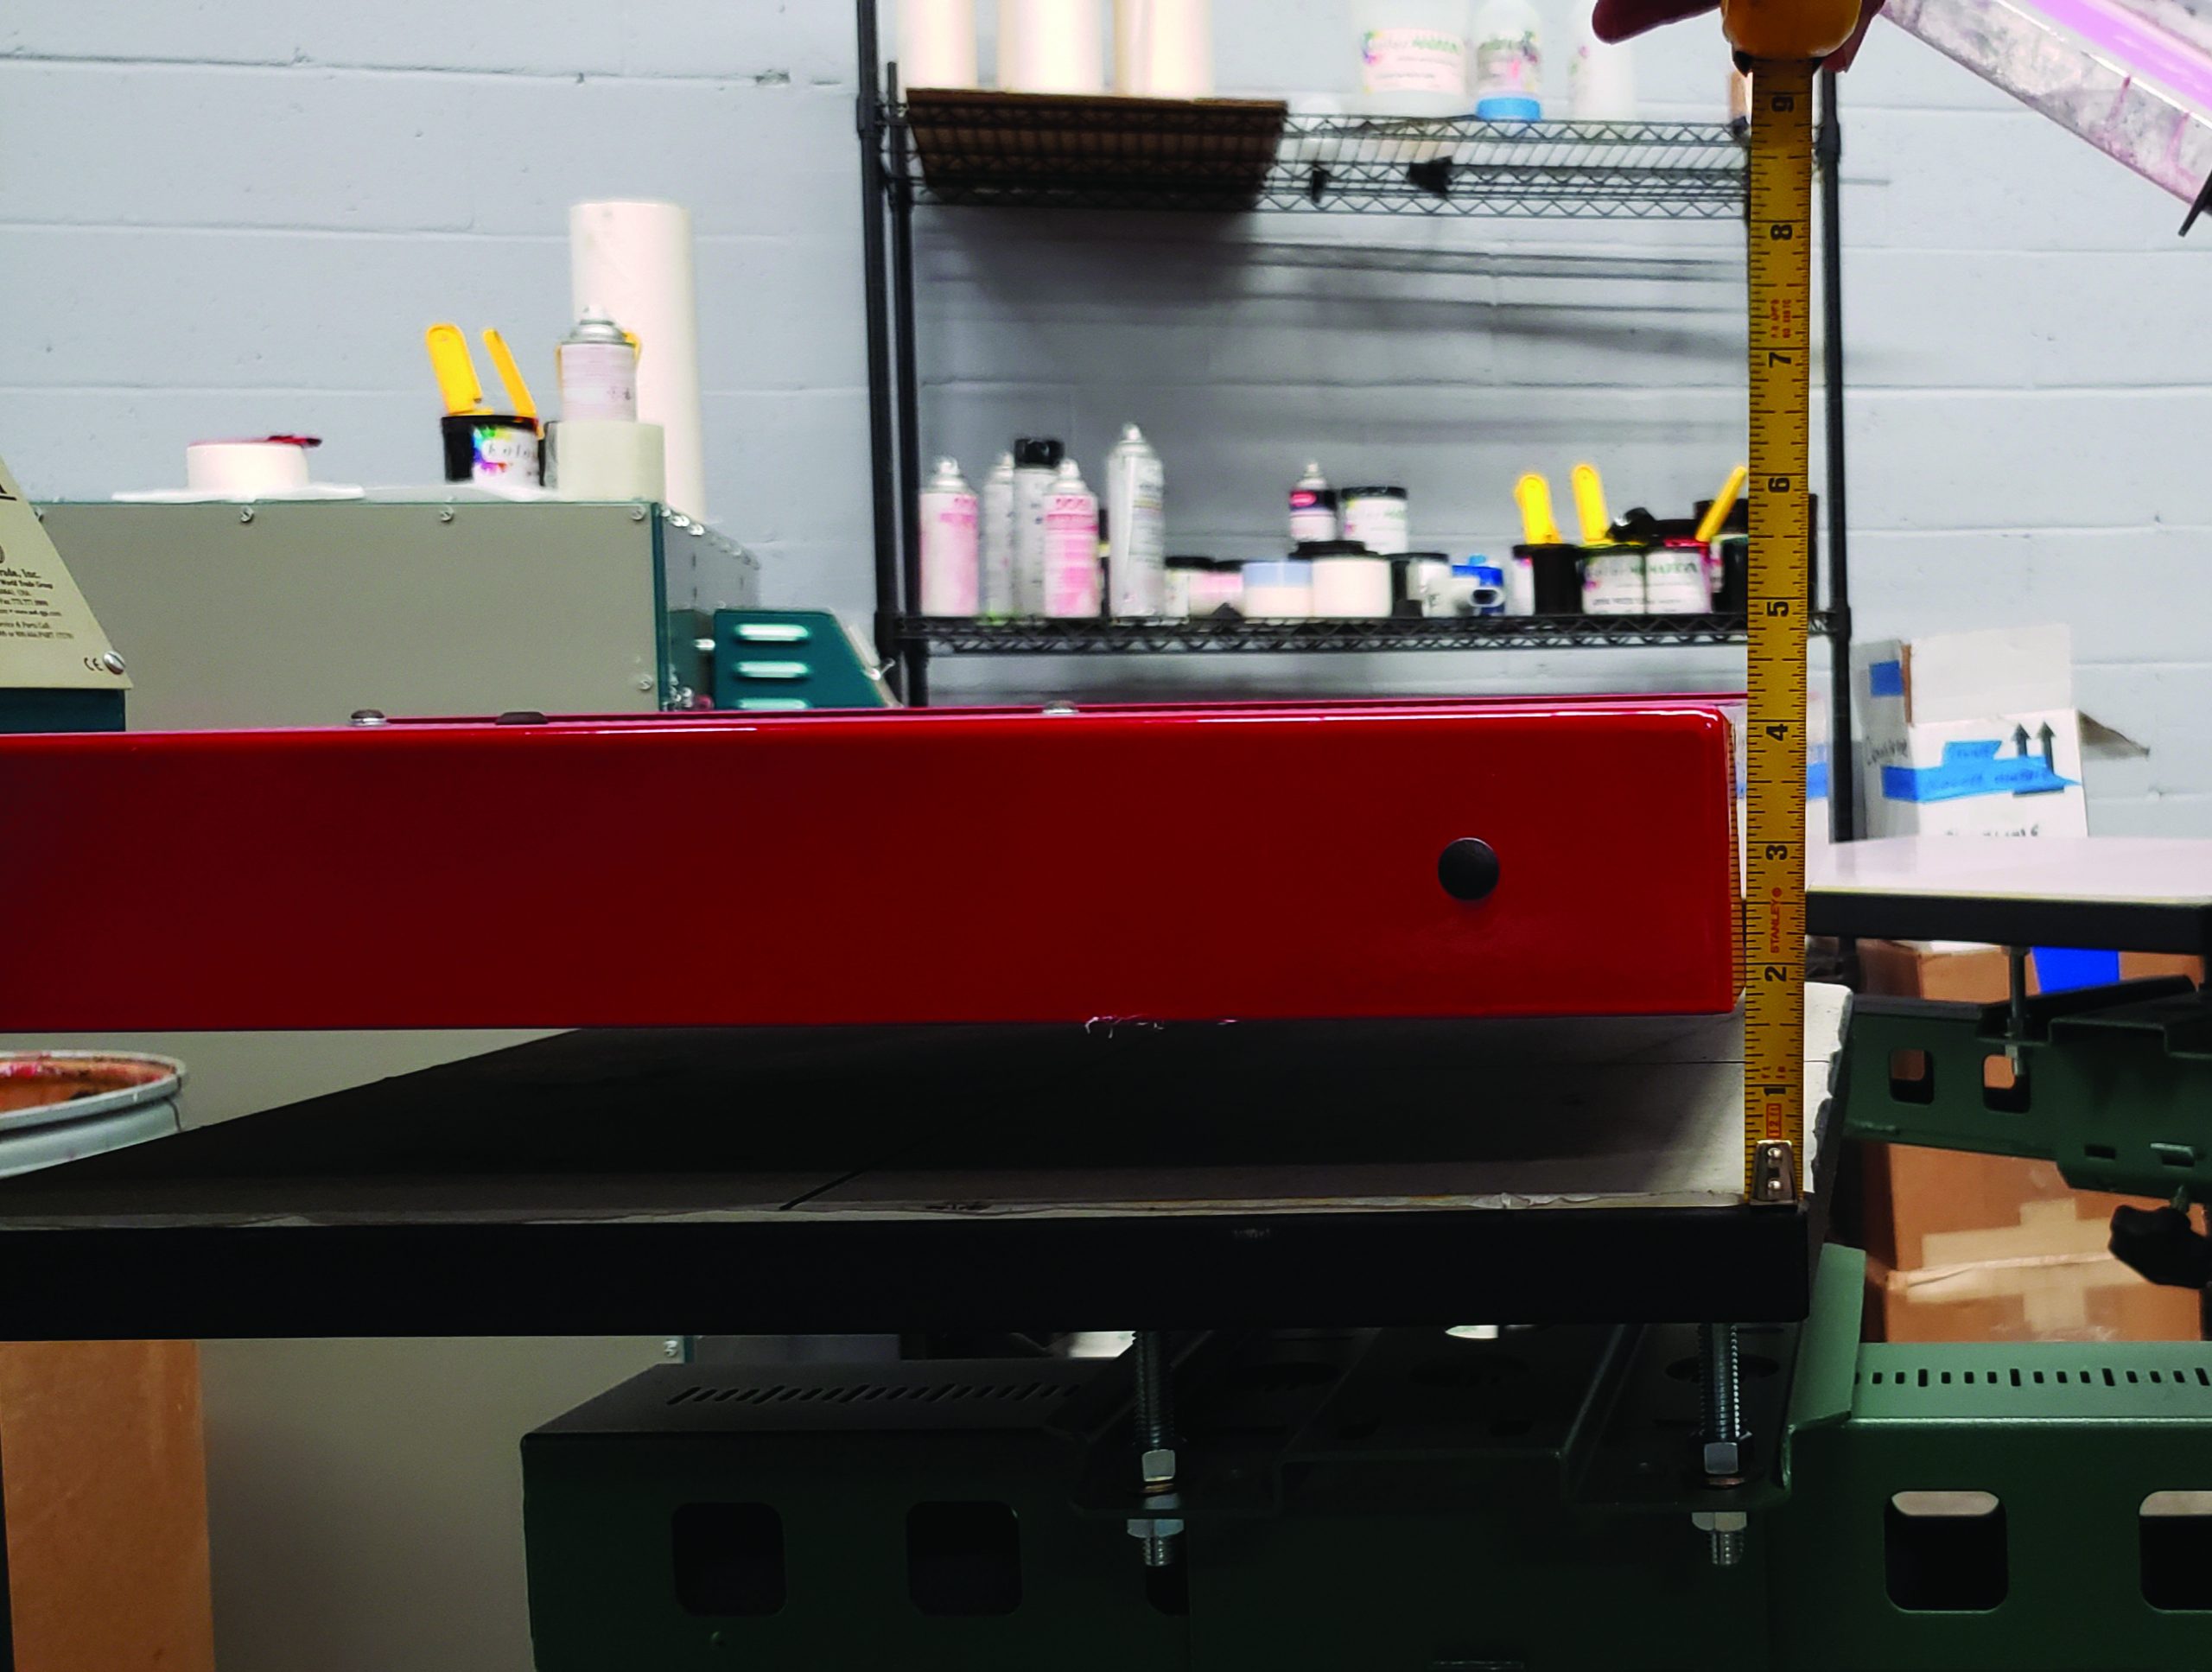
The greater the distance between the flash cure and the T-shirt board, the less heat will transfer and increase the chances of variance in the temperature from shirt to shirt. (All images courtesy Kolormatrix)
2. FLASH PANEL NOT LEVEL
Using a construction level laid across the top of your flash cure, you want to make sure that your flash-cure panel is level and running parallel to your platen or T-shirt board. The most common problem is the end farthest from your stand. Tilt downwards towards the T-shirt board creating a hotter environment near the bottom of the platen, which coincides with the bottom of your printed image. This tilt will also create a cooler climate and deliver less heat near the top of your printed image, which is next to the stand of your flash cure.
Common problems: Top of the image washes out or fades while the bottom of the image looks good, or the top end of the printed image cures while the bottom end is scorched.
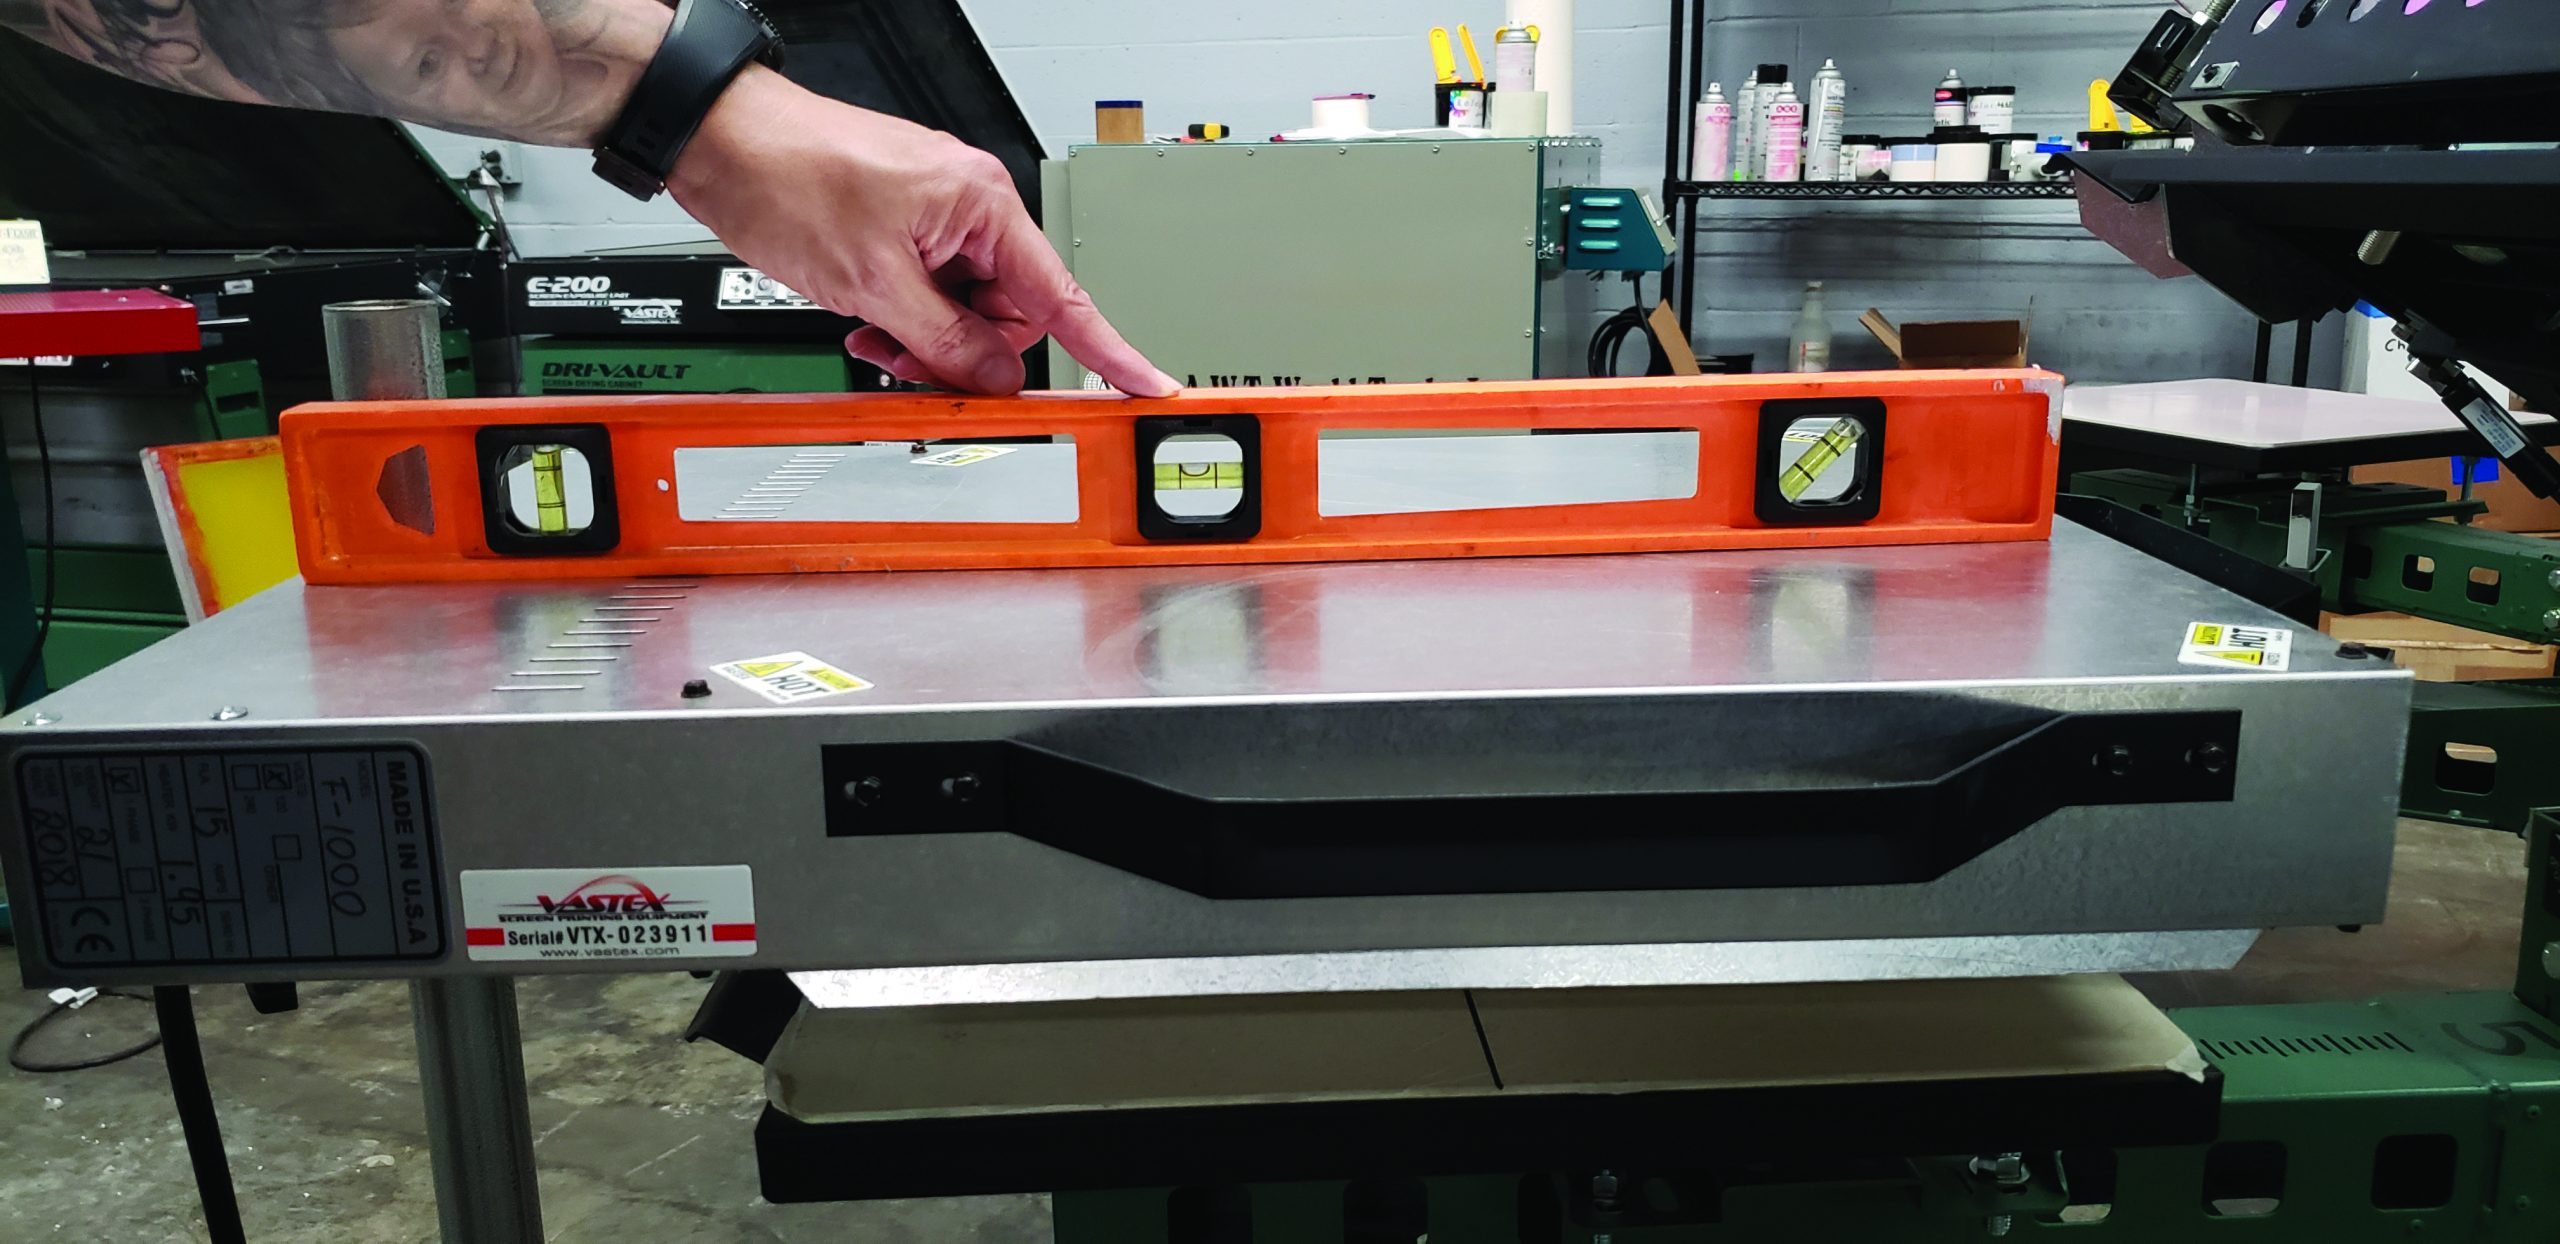
Use a construction level to ensure the flash is even to prevent an uneven print.
3. FLASH PANEL NOT CENTERED OVER PANEL
You want to lock the stand or base of your flash-cure unit in place and swing the heating panel on and off of your platen or T-shirt board. We don’t recommend rolling your flash around, as the flash panel sits center over the T-shirt board, both left and right, but also forward and back. If it is not centered, it will result in uneven curing. By locking your stand in place, you can center your flash on your platen. Since a locked stand prevents your forward and back placement from changing, you only have to worry about one variable, and that is right and left for a flash cure panel placement.
Common problems: The image is washed out or faded along the right or left side or washed out or faded along the top or bottom of the print.
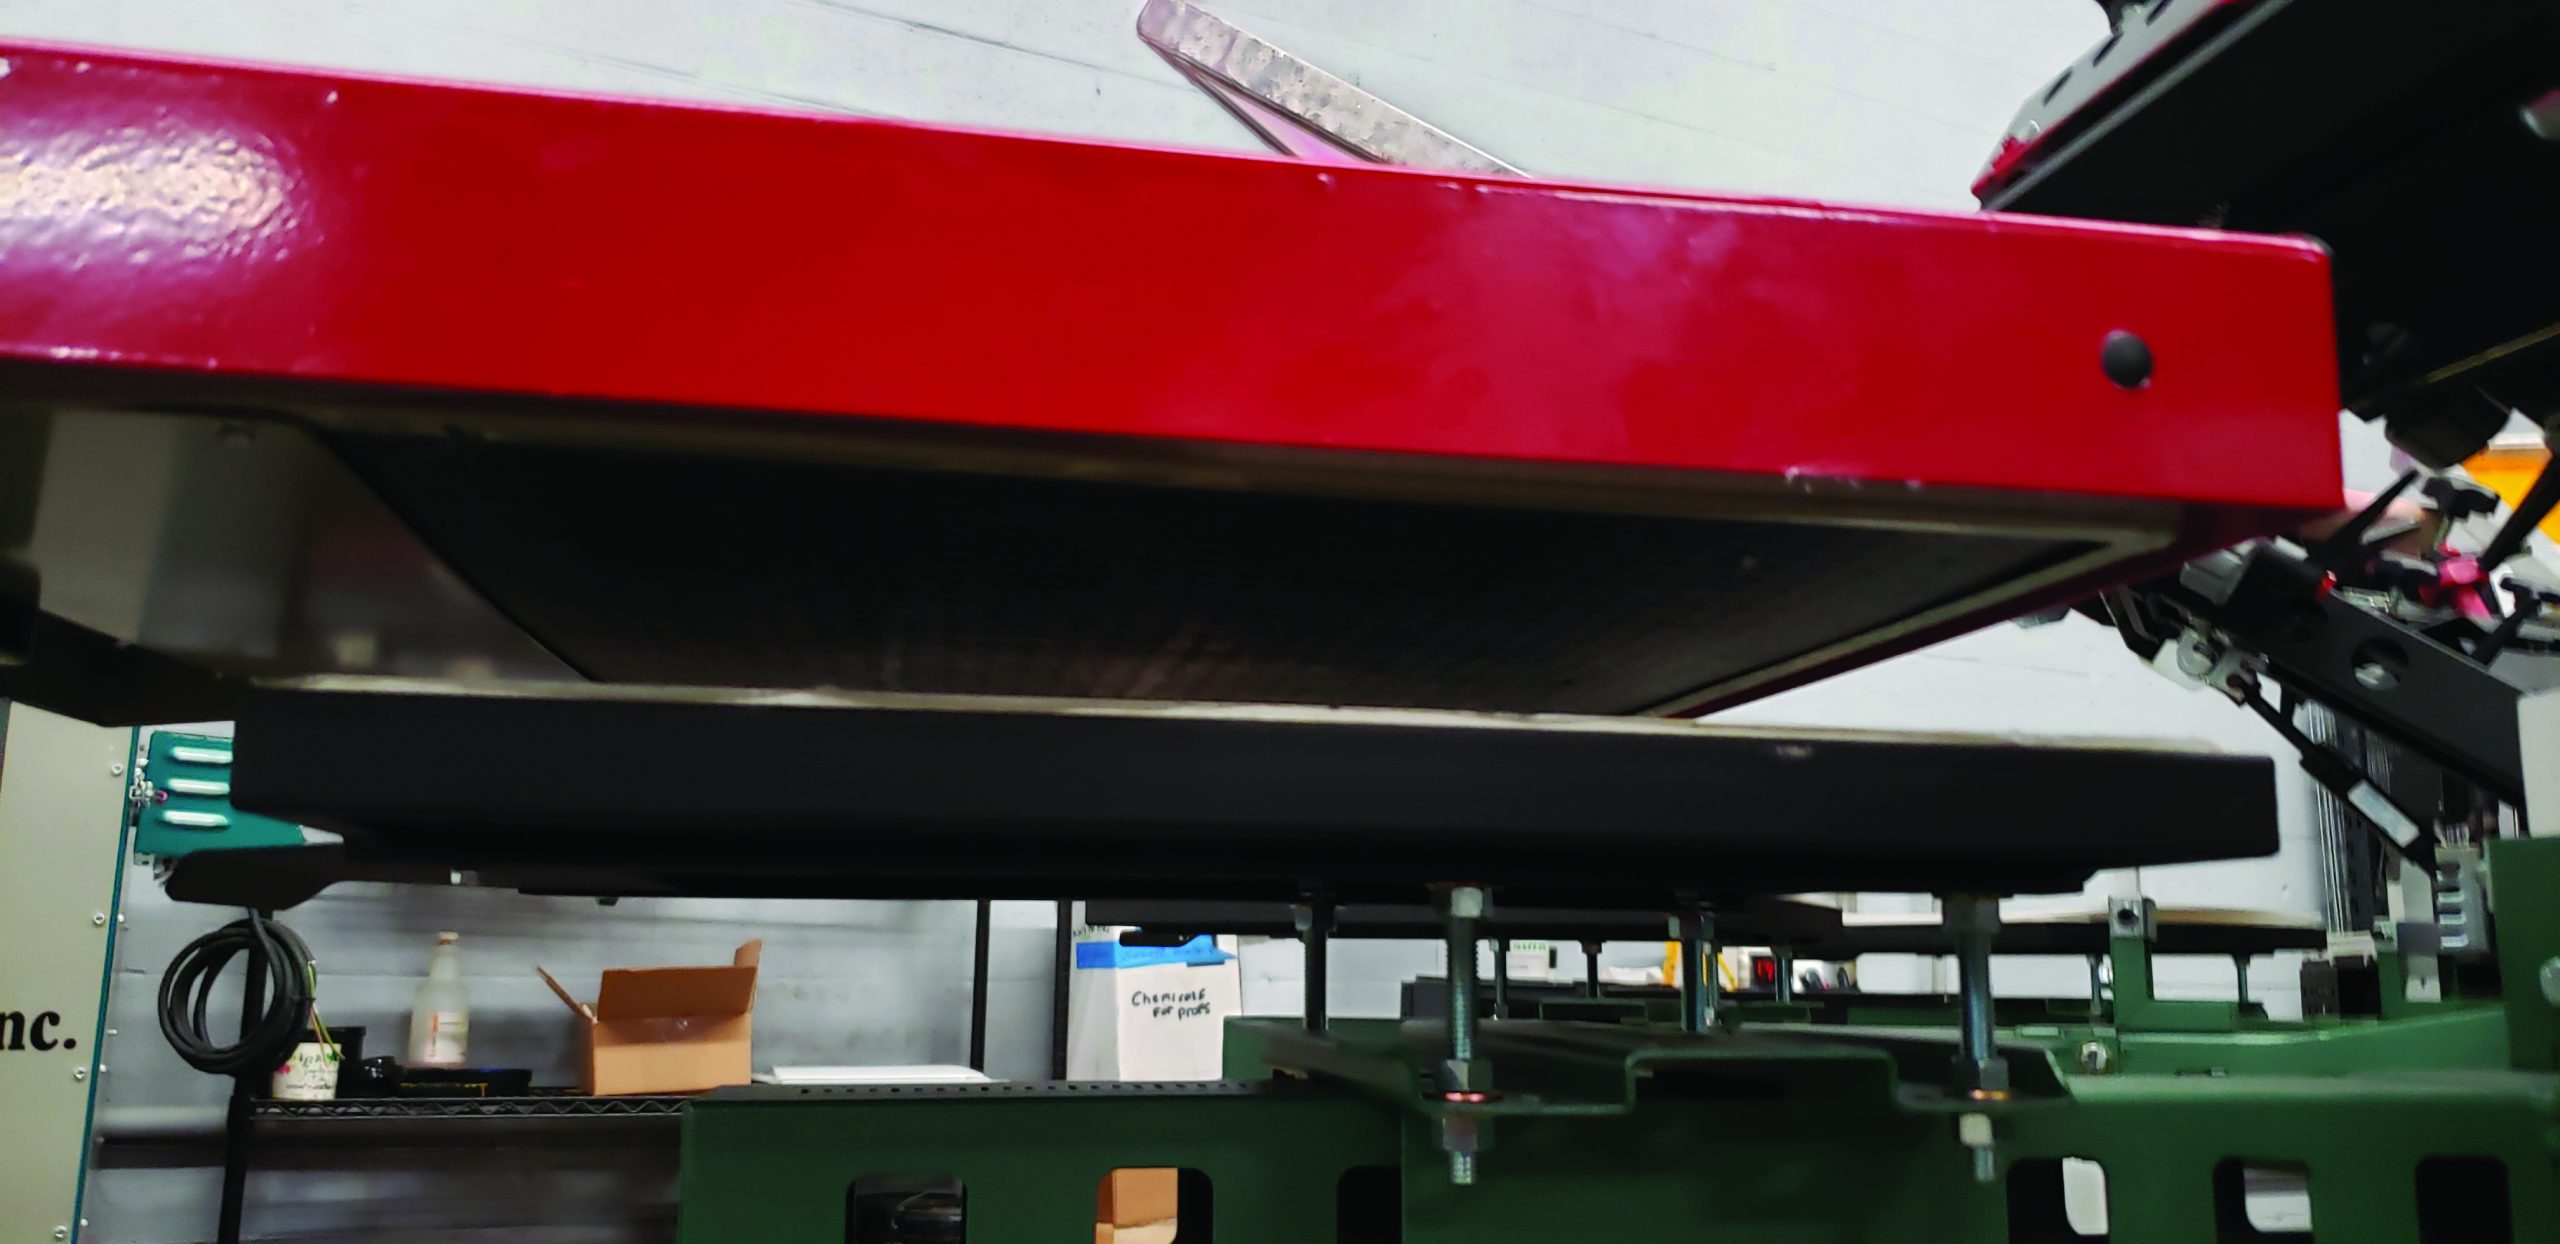
If the flash unit is not centered, it will result in uneven curing.
4. IMAGE IS TOO LARGE FOR THE FLASH CURE
The closer to the edges of the flash-cure unit you get, the less consistency you have in controlling the temperature. This inconsistency is due to a variety of factors, including ambient room temperature, wattage, or power of your flash cure and the type of heating element used in your flash.
Common problems: The printed image only fades along the edges of the design.
5. FLASH LOCATION IN THE ROOM
To minimize variances in your curing temperature, you want to avoid cross drafts in the room. Look at the location of your flash-cure unit. Is it near doors and windows in your shop? Draw an imaginary line between the dock/back door and the front/office door. If the flash is near this imaginary line, it would be safer to move it.
Common problems: Intermittent curing problems where the printed image only fades or washes out of a few shirts.
6. NOT USING A DEDICATED CIRCUIT BREAKER
You want to be certain that you are using not only a dedicated circuit breaker but one for the correct amperage of your flash. Flash-cure units are resistance heaters, which means they create heat by power/amperage moving through the heating element. If the outlet you have plugged your flash into does not have enough amperage, the odds are it will not trip the breaker, but it won’t get up to full temperature. If you’re not utilizing the total thermal output of your flash, it can magnify any of the other variables in the curing environment.
If multiple devices share the same circuit breaker, it can occasionally trip. Tripping the breaker stops production. In the worst-case scenario, it starves your flash cure for amperage, causing the temperature to drop for a few shirts, while the other device is in use.
Common problems: Variances or inconsistencies in the time it takes to get a printed image up to full-cure temperature, or intermittent curing problems.
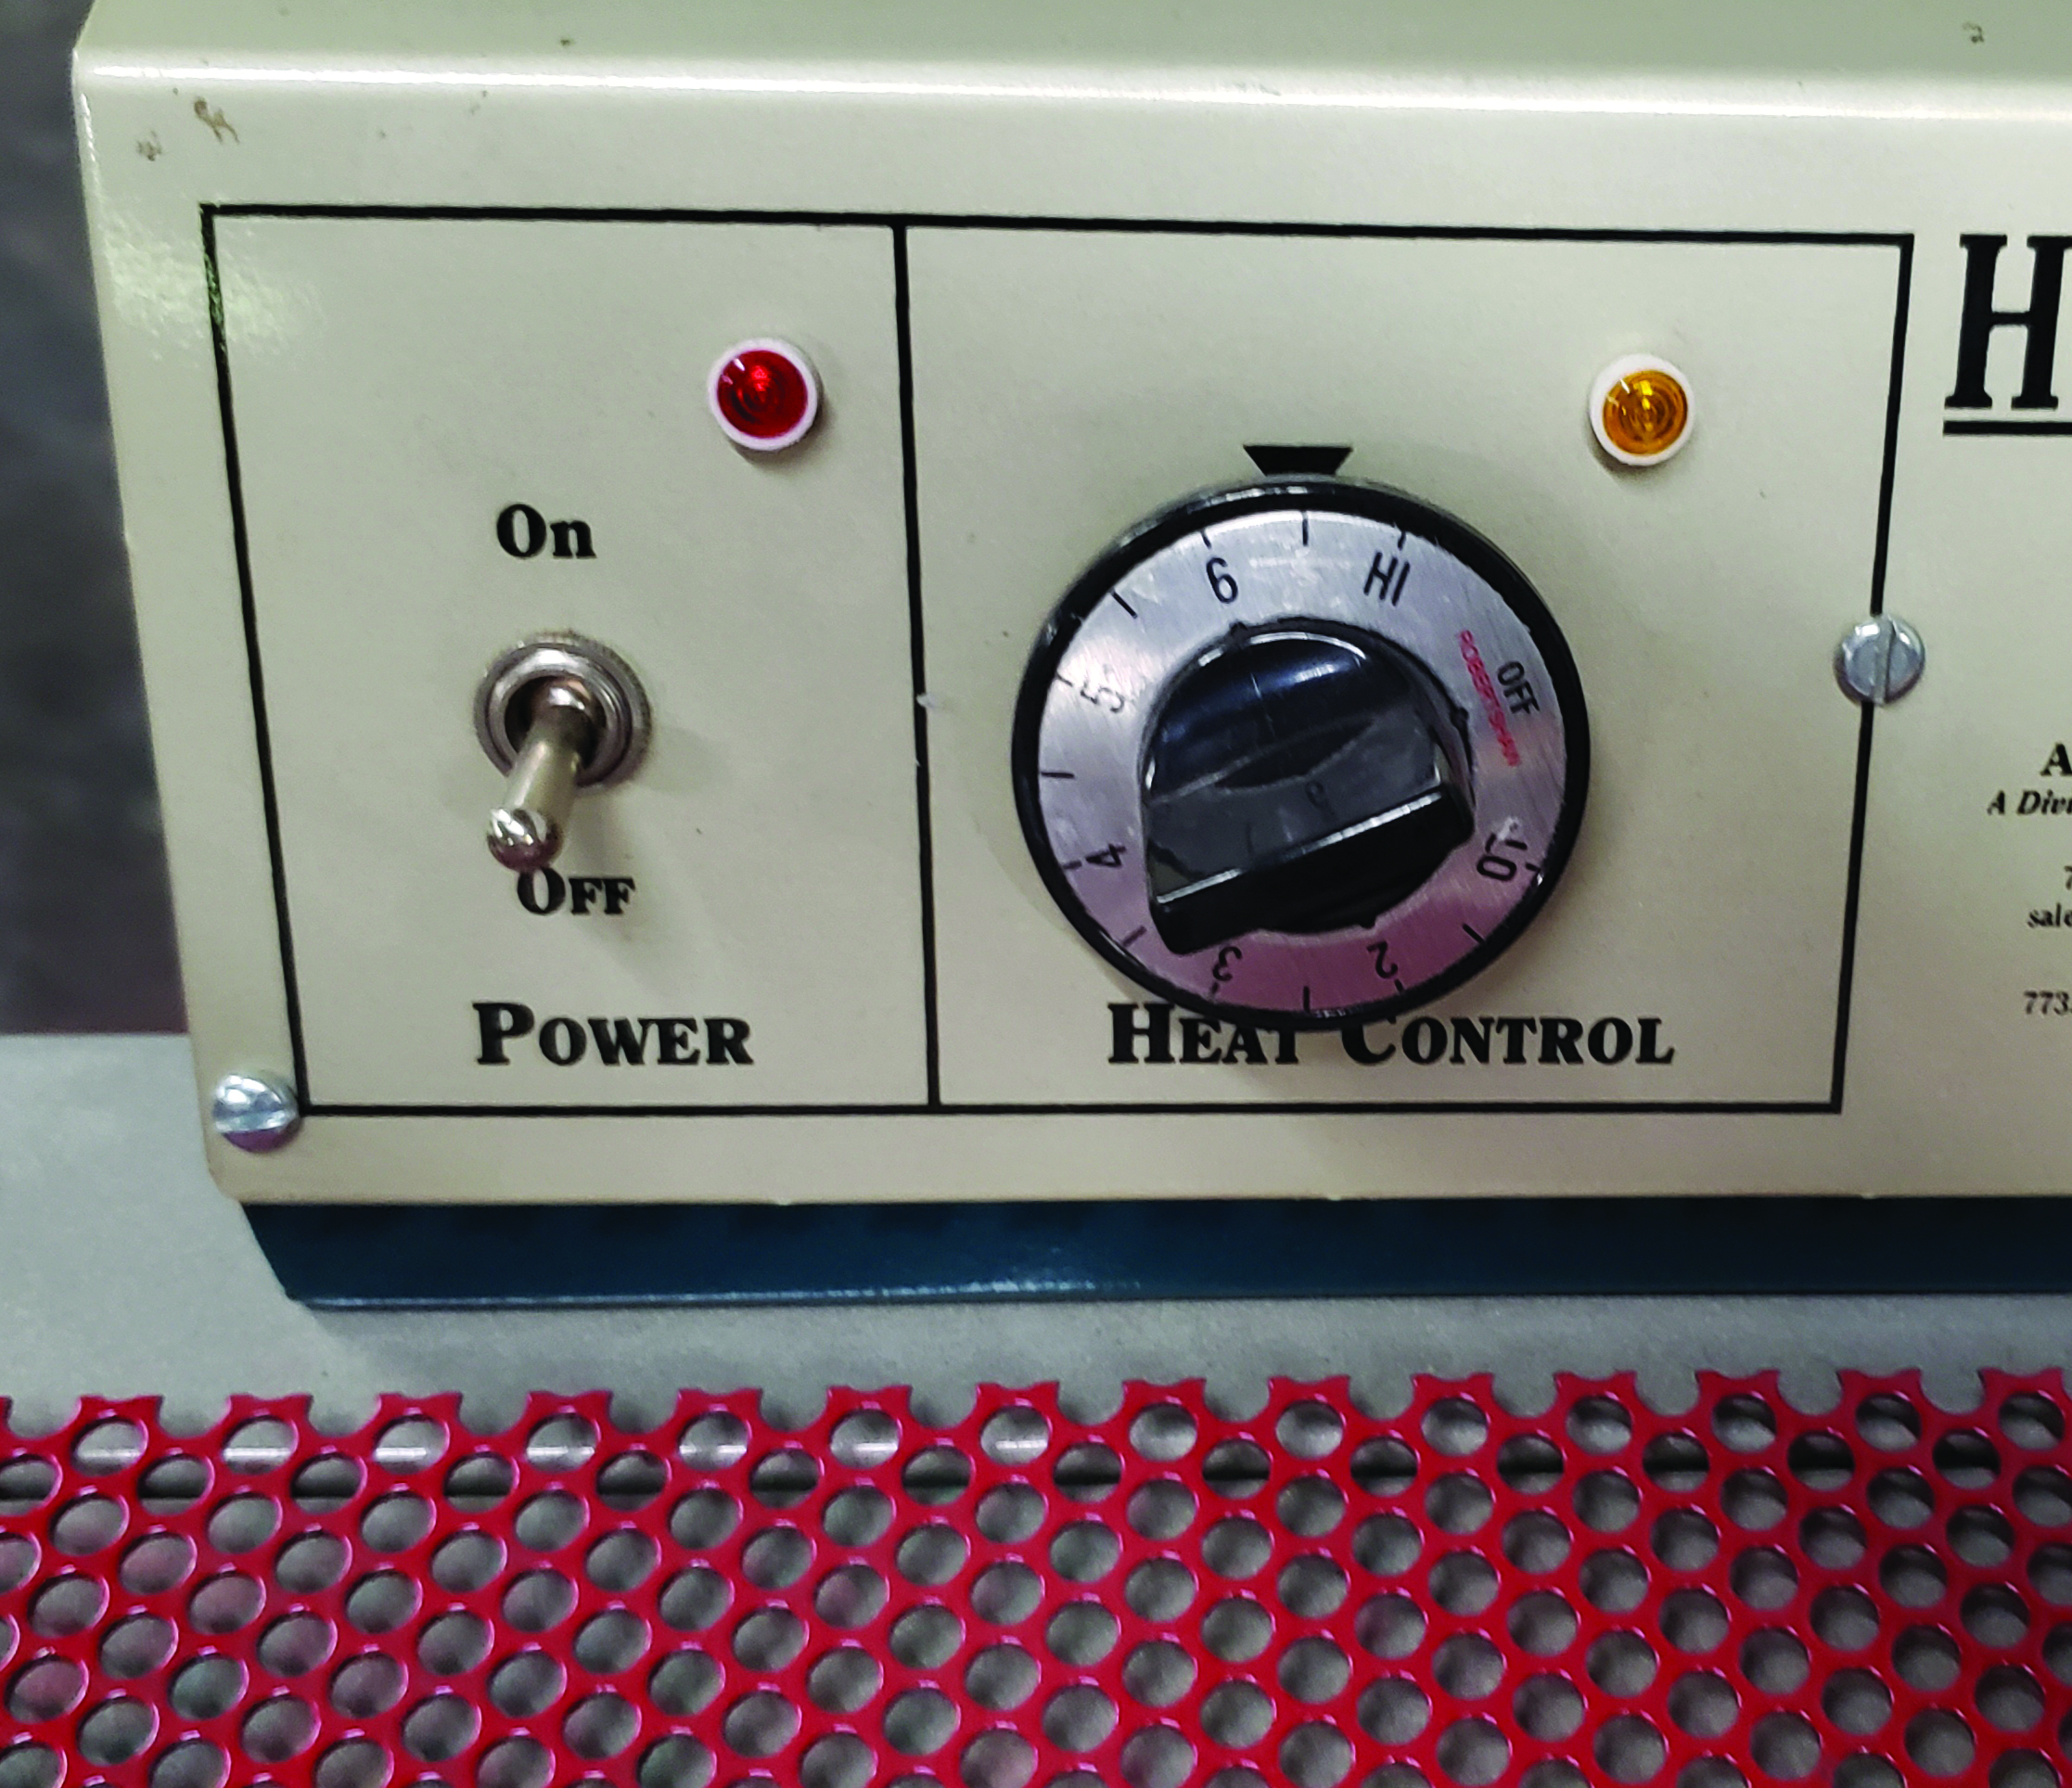
Adjusted temp control on your flash minimizes temperature fluctuations.
7. NOT USING A TEMP GUN AND TIMER
You want to use both a temp gun and a timer to minimize the variances in curing. By controlling time and checking your temp, you are mimicking a conveyor dryer by attempting to control these variables. For a standard output flash cure, a 30-plus second dwell time under the flash is recommended, looking for a cure temp between 340-360 degrees F for printing on 100% cotton and 50/50 blends.
Common problems: Intermittent or consistent curing problems or images fade or wash out.
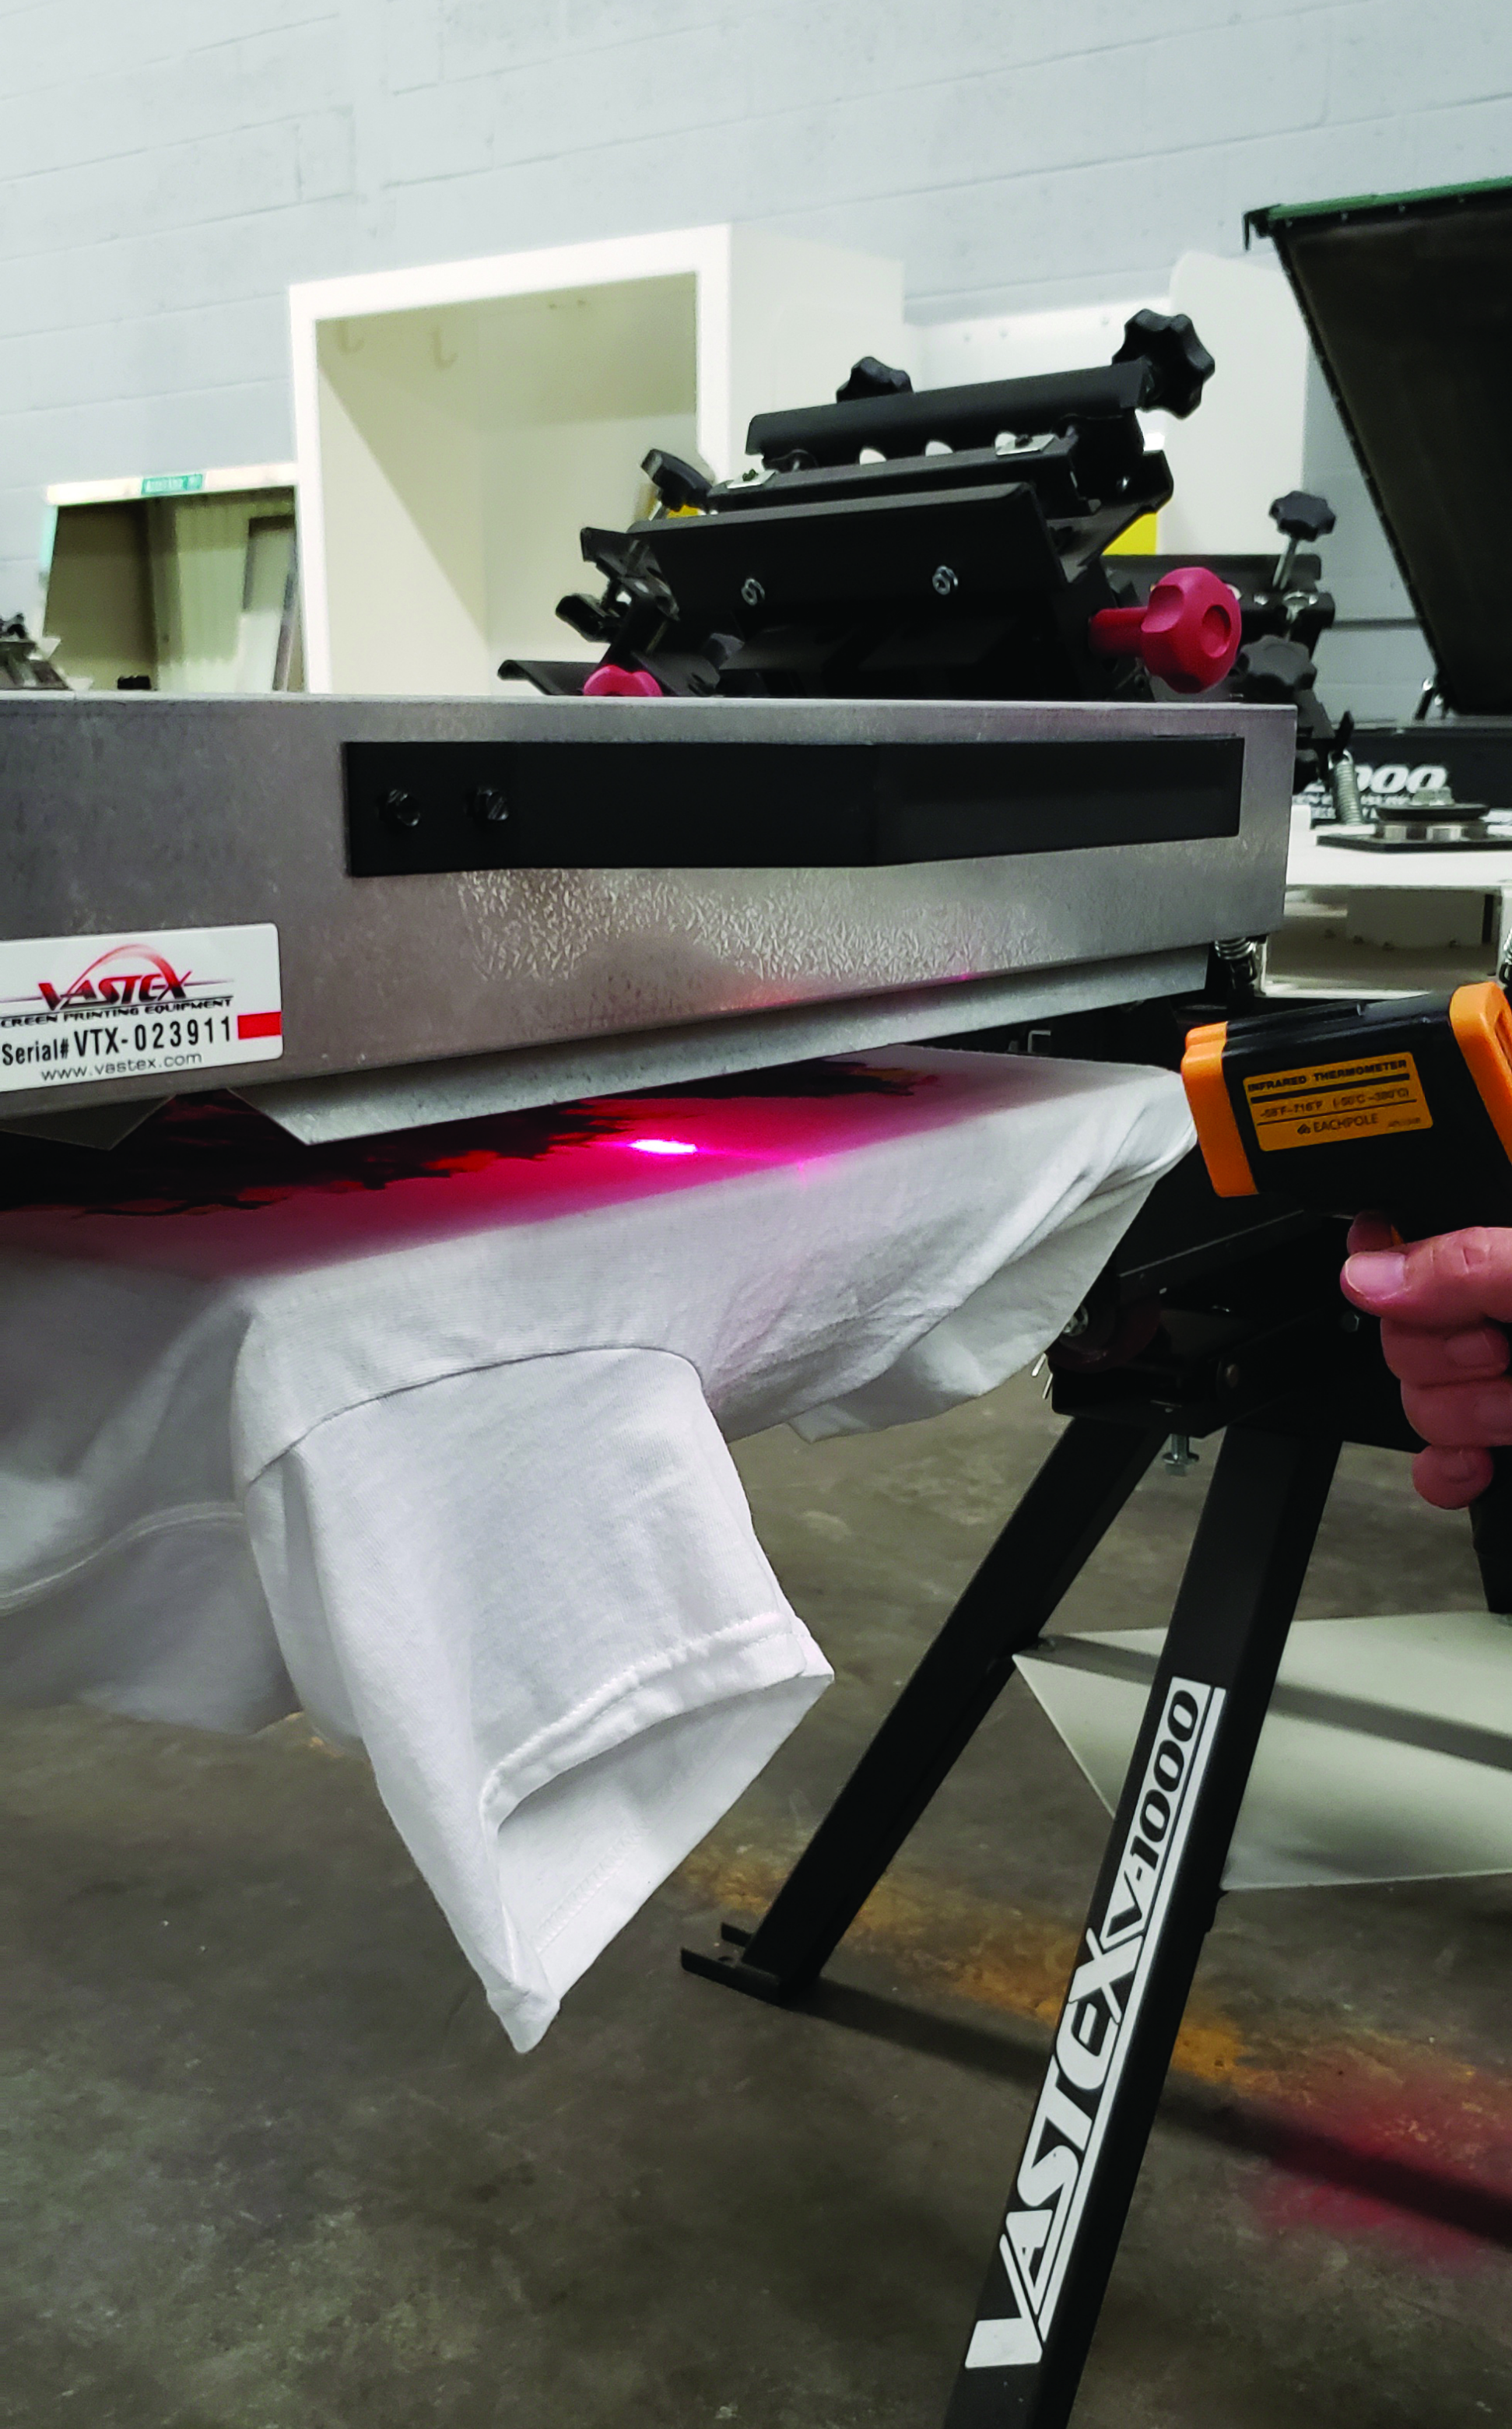
You can mimic dryer settings by monitoring the time and temp with a heat gun.
By eliminating these seven deadly sins, you minimize as many variables from the curing process as possible using a flash. You attempt to mimic the control of variables like you do when you use a conveyor dryer-thus maximizing your chances of consistently achieving a full cure of plastisols with a flash unit.