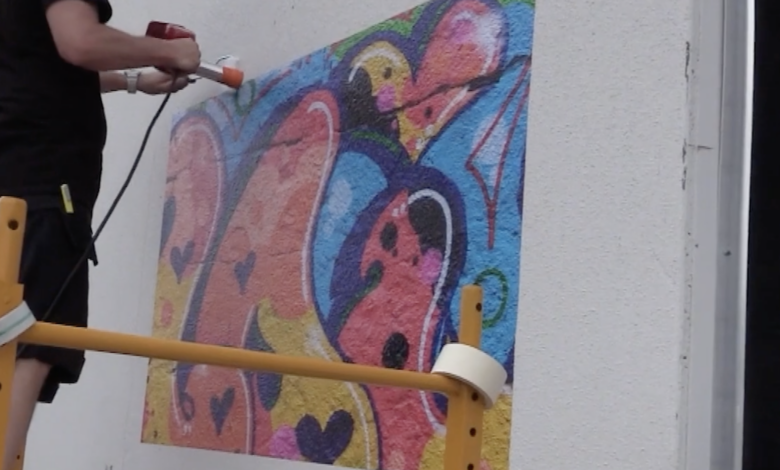
Vinyl film doesn’t just appear on vehicles, but can be on sidewalks; stucco or brick walls; cement, concrete, or asphalt; or anywhere that seems like a rough surface for a smooth graphic.
Artists and installers need to find the right materials, use the right techniques, and have the right tools to get the vinyl to stick and last without ripping or fading or without leaving a mark or defacing the surface.
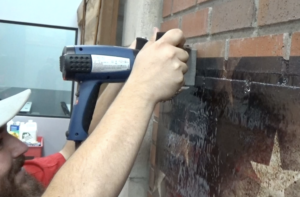
“You obviously have to choose the right materials—materials made for those surfaces—and the right lamination, then prep the surface,” says Justin Pate, chief executive officer of The Wrap Institute, producer of instructional videos and workshops for the vinyl wrap industry. “If you have the right set up, it’s straightforward. … You can make a mistake quickly if you don’t plan it correctly.”
The installation surface needs to be clean and dry, free of loose debris, and the weather needs to be the right conditions—it shouldn’t be too hot or windy or have rained the day before causing materials to be damp, Pate says.
That’s because wraps aren’t like those done on a vehicle or interior wall with a smooth surface, Pate says. Exterior wraps often are on rough and textured surfaces, so the material needs to be thin and able to bond to that surface and the adhesive needs to be aggressive enough to conform to its topography, he says.
The Right Materials and Tools
Before doing the install, installers need to check with the manufacturer and distributor to make sure they’re purchasing the right type of vinyl film for the surface type. They also need to have special rollers in place of squeegees used for smooth surfaces. The rollers, which need to be heat-resistant, are used to apply the film to the surface, causing it to form to it with each roll across. Alternatively, squeegees are hard and flat and glide over the top of the surface without going into bumps, grooves, and indentations.
“You can’t just use a squeegee, you have to use heat,” Pate says. “What heat does is soften the film. … If you don’t add heat, the material stays stiff and doesn’t conform to those areas.”
The heat needs to be at 1,000 degrees, and is best applied with a combined heat gun and roller, says Adam Sumner, 3M authorized trainer and owner of Wrapix Academy and Wrapix Imaging in Burbank, California. The heat gun is mounted onto the roller and, being hands-free, allows more pressure to be applied to the surface, making it easier to set the film into the texture, he says. The film should be rated for textured and rough surface applications, such as 3M LX480 (for latex printers) and 3M SV480 (for solvent printers), he says, adding that he recommends the TSA-4 (Textured Surface Applicator) roller, he says.
The roller is rolled over the film in the same direction in a repetitive fashion so that the heat gun remains in front of the roller and is able to soften the film, Sumner says.
“You can install three inches of film per second,” Sumner says. “It’s a slow, tedious process of rolling over the film and getting that film to adhere to the surface.”
Another option to heat-applied vinyl is a fine aluminum printed with the graphic on the front and adhesive on the back—one such product is AlumiGraphics GRIP. GRIP, which doesn’t require a heavy-duty aluminum substrate with an over laminate, is more rigid and has less of a stretch than vinyl.
GRIP is preferable for small display areas (not a wall mural); heavy-traffic areas like sidewalks and walking paths, and places where there can be vandalism, since the edges are hard to lift, says Jim Miller, co-owner of Miller Decals, a commercial and vehicle wraps company in Acworth, Georgia, with his wife, Starla.
The aluminum is applied using a stiff brush or gloved hands to push it onto the surface and fit it around the rough, uneven surface, Miller says.
“With aluminum, you don’t have to push it into the cracks as deep (as vinyl),” Miller says. “In order to last, it doesn’t have to be in every corner and crevice of the stone or brick. … Vinyl will dry out and crack. This won’t. This will stay there when you leave it.”
GRIP, however, requires more precise work than vinyl, Miller says.
“You can’t stretch it over,” Miller says. “It has to be really all the way down. With vinyl, you can stretch it a little … it’s easier to make corrections.”
The Right Installation Process
Wrapping a textured or rough surface typically takes two to three times longer than a smooth surface or flat wall, something installers need to inform their clients about, Pate says. The costs are higher with each installation, but the material prices are the same, as well as the results, which oftentimes can look like paint, he says. If done right, the wraps can last for several years, except in high-traffic areas where wear and tear limits life to two to three months, he says.
“It’s going to have the same visual look. It looks like paint and does not change the graphic and what it looks like but will change how it feels,” Pate says. “The cool dynamic has the wow factor and gets clients excited about wraps.”
Richmond, California, artist and designer Todd Gilens uses wraps in some of his large-scale art projects that mak commentary on processes like water systems and ecological change.
One of his former projects employed 40 rounded graphics at the Taylor Creek Visitor Center’s paved trails and walking paths near South Lake Tahoe, commissioned by the National Forest Foundation and displayed for a full year, ending in November 2021. The temporary public artwork, called “Reading Forest,” was on weathered and uneven asphalt at a 6,000-foot elevation and represented images of slices of tree rings with bark around the perimeters. Inside the rings, which ranged from 12 to 60 inches across, were quotes from science, poetry, and religion about forests, ecology, change, and resilience.
Using AlumiGraphics GRIP
Gilens used AlumiGraphics GRIP for its non-skid surface and aluminum substrate that is able to withstand harsh weather conditions, he says.
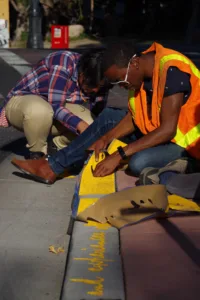
“It tests for adhesion and slipperiness, which is important in my work,” Gilens says. “It’s an aluminum material with a vinyl coating that you can print on. … I can almost burnish the material into the little crevices and unevenness of the asphalt, which gives it a better adhesion than bridging the tiny gaps.”
To install each tree ring, Gilens had to clean the asphalt, then install the graphic using a variety of soft rollers for different surfaces. He peeled off the wax paper on the printed ring to expose the adhesive and pressed the adhesive by rolling back and forth on the asphalt, working slowly and carefully to get a good adhesion. He also made sure to pick spots where they wouldn’t be any standing water, which could cause the graphic to deteriorate, though it can get wet and dry again.
“The most important tool is patience,” Gilens says. “We’re working outdoors, and the wind might blow up a bunch of dust, and we’re trying to align graphics onto a spot on the ground. … When you tear something, it can be difficult to repair depending on what the graphic is.”
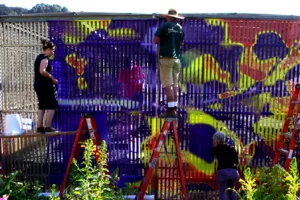
Another project Gilens did was “Shade,” a 1,000-square-foot image of a garden shade plant installed over a lattice structure at the University of California Botanical Garden at Berkeley propagation house. He used a donated premarket product by Avery Design that didn’t end up getting released for commercial use—the material was experimental, proprietary non-PVC based that protected the plants and as a wrap provided them with shade.
Gilens printed the plant image in 22 pieces that had to be aligned and assembled in the right order. He applied the adhesive by slicing, tucking, folding, and smoothing it around the sides and back of each 1.5-inch aluminum lath.
“The big challenge was to cut lettering from a floor graphic material because floor graphics have a rough surface so that it’s slip resistant,” Gilens says. “I did tests on several materials also to find one that would stay on the ground.”
