There are many important choices to be made when working on a large-format print job, and none may be as important as which ink to use. Among your options, UV ink should be at the top of your list. Ultraviolet (UV) ink instantly cures when exposed to UV light, eliminating the need for solvents and absorption time. The ability to immediately remove the cured and ready prints speeds up production time, therefore reducing costs.
When working with Mimaki UV curable inks, there are a few tips to keep in mind.
First, be sure to load the inks and the chip card into the printer correctly. For optimal ink coverage, download the specific profile for the material you are using to print. Load the media into the machine and laminate in a standard manner with normal pressure commonly used.
At this point, you will notice that UV inks have a slight texture to them. With certain laminations, the texture will cause what is called “silvering.” This will go away on its own after a few days. With UV inks, there is a way to speed up this process. To do so, increase the pressure of the roll on the laminators to the maximum. Next, raise the heat on the rollers to 140 F (60 C). Ensure the roller’s temperature is correct and even, from side to side, and run the material through the laminator one more time at a slightly slower speed. You will see that the “silver” is now gone, and you can safely begin the installation process.
Determining stretch for cast films
Every ink platform behaves differently to stretch. To see how Mimaki UV inks behave, begin with two pieces of cast digital print film of the same length.
Heat one piece and stretch it dramatically over a vehicle. Allow it to cool back down to room temperature and measure how the piece has been stretched to around 100%. You will notice that some of the color becomes lighter, and on the darker areas, you might observe some separation of the ink layer, showing the white below it. Next, heat and stretch the second piece in a more normal manner, around 30%. You will see that the colors haven’t changed and are still vibrant. At this point, you can go back to the first piece that was overstretched, and if it’s not touching the vehicle, hold it loosely and add heat. This will trigger the memory effect, and the ink layer will return to its original color, even if the inks have separated.
Real-world vehicle applications and tips
UV inks are a great choice when working with highly recessed areas. To begin the installation, remove the liner and bridge film over the recessed area. Apply heat to relax the film. You will notice that the film won’t glass out with Mimaki ink and may look like it has tension wrinkles. This is a simple property of the UV ink, and the film will install and perform as usual. Even on extreme recessed areas, the color holds up perfectly.
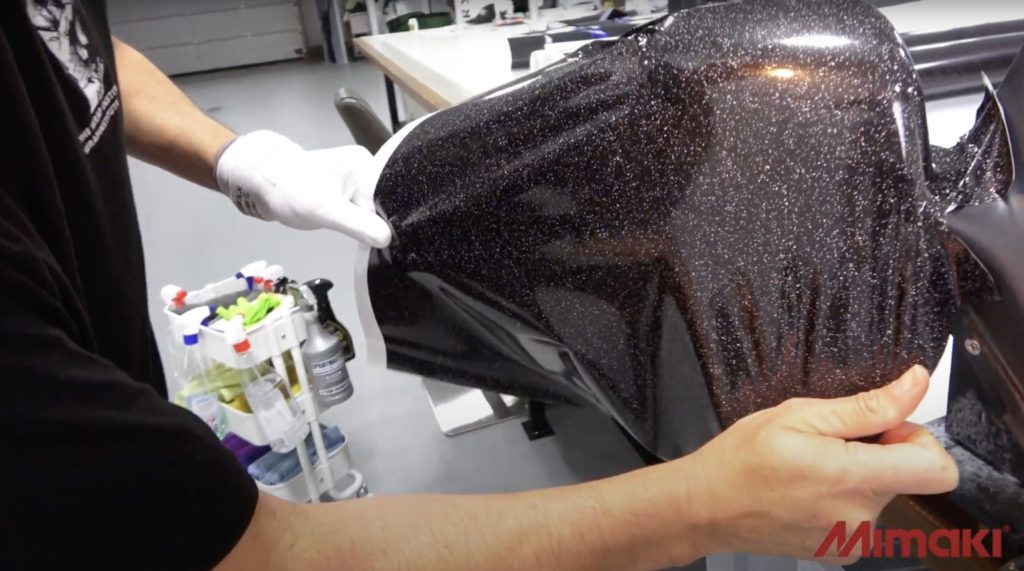
Expert results can also be achieved when working on extreme compound curves such as car mirrors. These areas can be wrapped entirely with cast film using UV ink. They will hold their color on both the outside and inside sections of the mirror without issue. UV inks give the film a very slight textured appearance. However, there is no need for concern; this does not affect cutting. You can cut the excess film away as normal. A good tip to keep in mind is to add heat to the edge before sealing with a squeegee.
It is important to always avoid going past the recommended temperatures set by the manufacturer when post-heating, especially on plastic sections like mirrors and bumpers. Doing so can cause the ink layer to separate. There is no chance to pick the material back up and self-heat it at this point in the installation process. So, always install the wrap film in these areas as usual and stay within the appropriate heat window. This allows the memory to be reduced, and the UV ink will look and hold up perfectly for the long term.
View real-world examples presented by Justin Pate from The Wrap Institute here.


