A relief engraving is a deep engraving with differing, eye-catching heights created by gray shades in the graphic. Data can be generated using gradients and grayscale fillings set up in your graphics program or your laser software. Any gray shade ranging from 0% up to 100% black is compatible and will produce height variations within the material.
Furthermore, grayscale gradients create flowing transitions between differences in height. The laser machine regulates power output through the grayscale of the graphic, and darker graphics deliver greater amounts of power while brighter graphics deliver less power. If you are looking for high-quality photo or data representations for relief engravings, use a 3D program for this complex process because they can produce extremely fine gradations at gray steps.
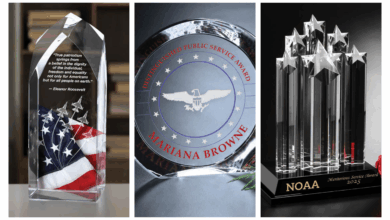
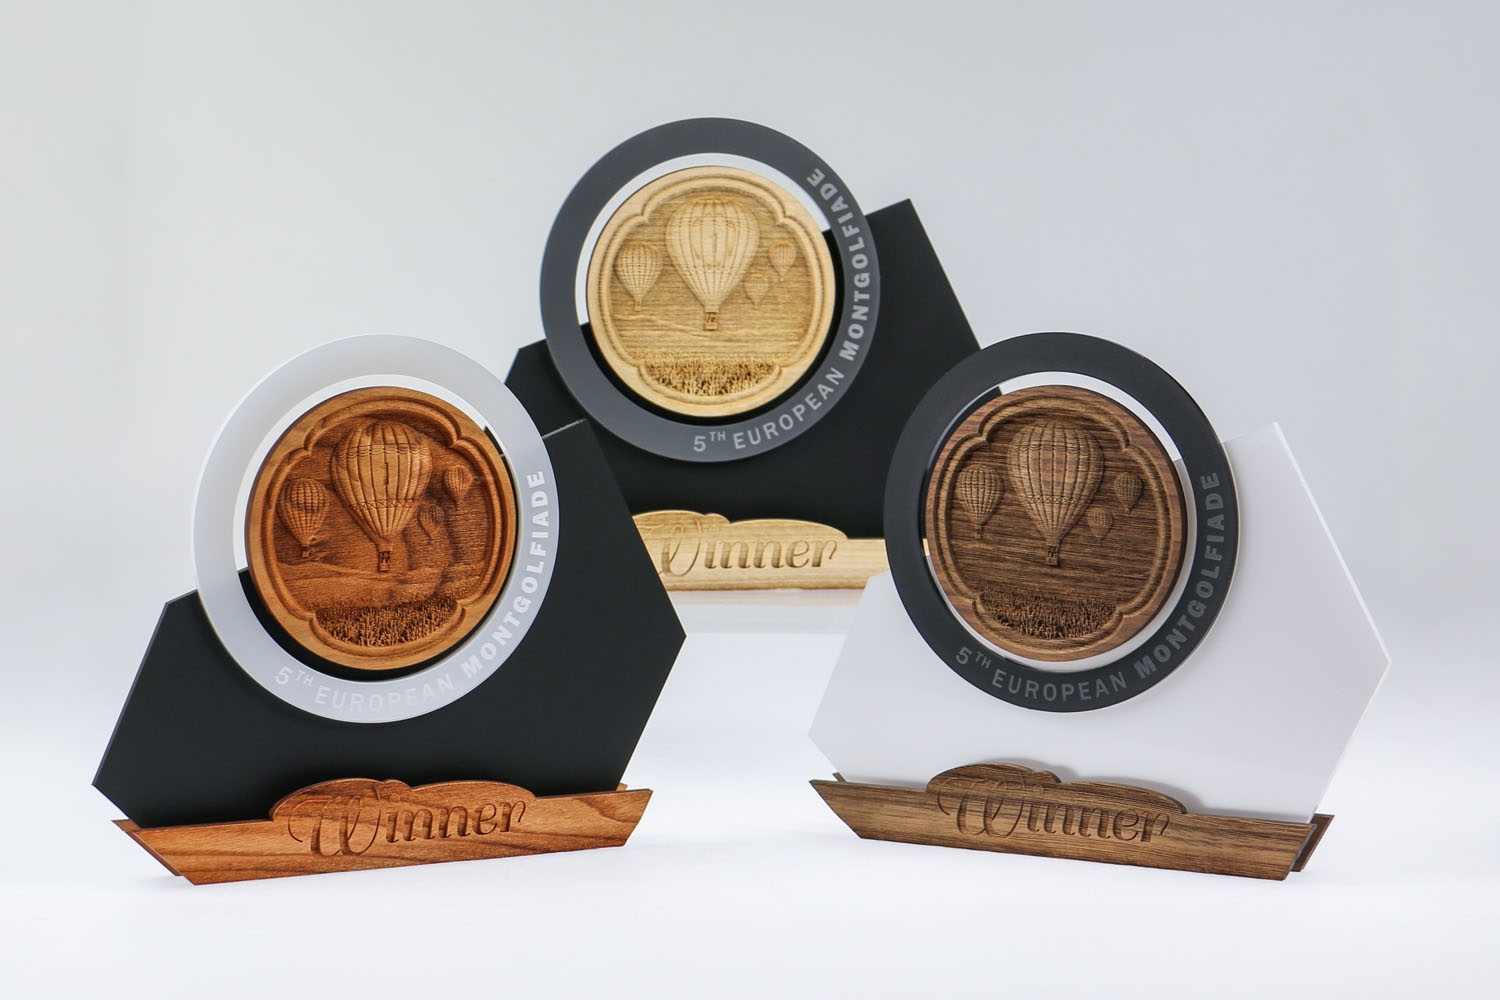
Now, let’s take a look at how we produced this relief carving for a custom trophy.
Preparation
Required material:
- 1 sheet solid wood maple
- 1/4 sheet TroGlass Satins in black (or similar cast acrylic sheet)
- 1/4 sheet TroGlass Color Gloss in metallic silver anthracite (or similar cast acrylic sheet)
- Acrylic glue and tissue
- Double-sided adhesive tape and dots
Machine/accessories:
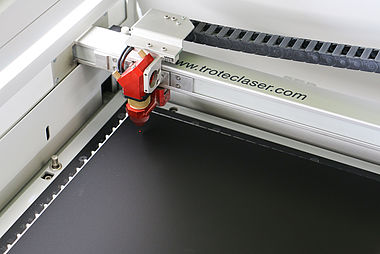
- 32″ X 20″ flatbed unit with 80W CO2 laser power
- 2″ lens
- Vacuum table with honeycomb cutting table resp. acrylic grid
Step-by-step tutorial
Step 1: Import Design
Make your own design or import templates and adapt them to your requirements. We engraved a recess out of the base plate to hold the metallic acrylic ring.
Printer Driver Settings:
Process Mode: Standard
Resolution: 500 dpi
Cut Line: None
Halftone: Color
Others: Optimized geometries
Step 2: Engraving Base Plate
Put your black cast acrylic sheet on the acrylic grid of your laser. Engrave and cut the base plate using the parameters below. The parameters can differ depending on the laser machine used and the laser power available.
Laser Parameters for Engraving:
Color: Black
Process: Engrave CO2
Power (%): 50
Speed (%): 80
PPI/Hz: 500
Passes: 1
Air Assist: On
Z-Offset: 2mm
Laser Parameters for Scratching:
Color: Red
Process: Engrave CO2
Power (%): 8.00
Speed (%): 0.8
PPI/Hz: 5000
Passes: 1
Air Assist: On
Z-Offset: 1mm
Laser Parameters for Cutting:
Color: Blue
Process: Cut CO2
Power (%): 95.00
Speed (%): 0.8
PPI/Hz: 5000
Passes: 1
Air Assist: On
Step 3: Design Metallic Acrylic
Send the job for the metallic acrylic ring to the laser using the driver settings below.
Printer Driver Settings:
Process Mode: Standard
Resolution: 600 dpi
Cut Line: None
Step 4: Engraving Metallic Acrylic
Put your metallic cast acrylic sheet on the acrylic cutting table and engrave the job using the parameters below.
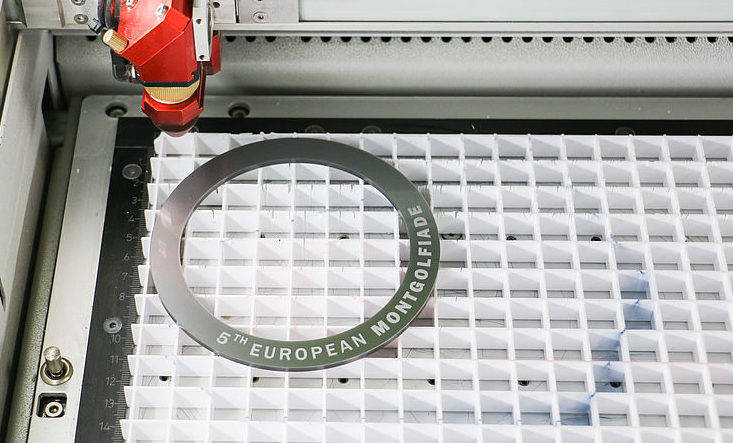
Laser Parameters for Engraving:
Color: Black
Process: Engrave CO2
Power (%): 16.00
Speed (%): 20.00
PPI/Hz: 600
Passes: 1
Air Assist: On
Z-Offset: 1mm
Laser Parameters for Cutting:
Color: Red
Process: Cut CO2
Power (%): 50.00
Speed (%): 0.2
PPI/Hz: 5000
Passes: 1
Air Assist: On
Pro tip: For optimized quality, we used the JobControl parameters.
Step 5: Design Relief Engraving
Finally, send the files for three-dimensional wood engravings and the other wooden parts to the laser.
Printer Driver Settings:
Process Mode: Standard
Resolution: 500 dpi
Cut Line: None
Pro tip: Use a relief mode for processing if it is an option within your software.
Step 6: Laser Process Relief Engraving
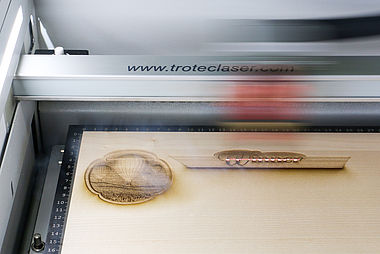
Laser Parameters for Engraving:
Color: Black
Process: Engrave CO2
Power (%): 100.00
Speed (%): 30.00
PPI/Hz: 500
Passes: 3
Air Assist: On
Laser Parameters for Cutting:
Color: Red
Process: Cut CO2
Power (%): 100.00
Speed (%): 1.0
PPI/Hz: 1000
Passes: 1
Air Assist: On
Pro tip: When engraving deeply into the wood, it can help to cut the job first and engrave the job afterward.
Step 7: Cleaning and Assembly
Clean the two acrylic pieces with a damp cloth. Clean the wood relief engraving with some water and a toothbrush.
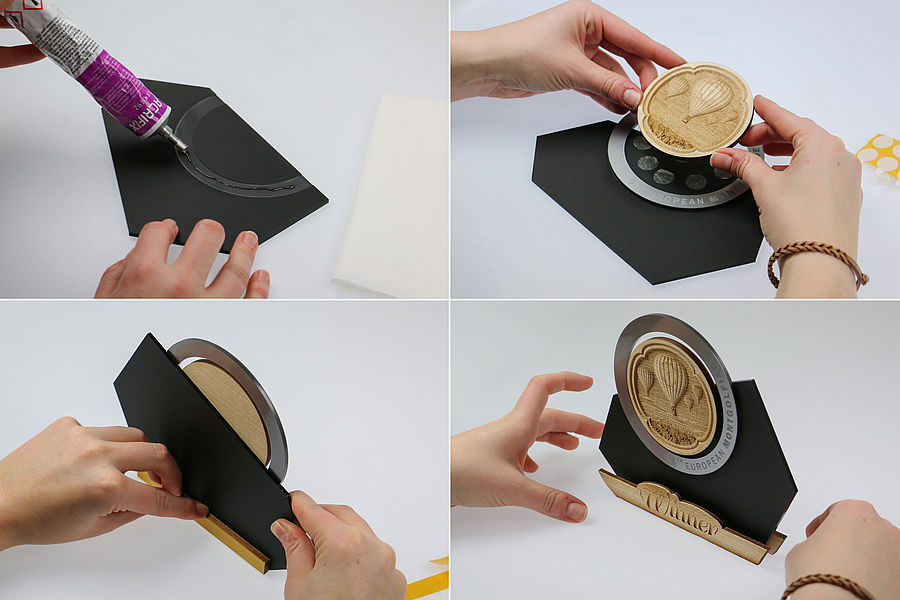
Put the acrylic glue on the engraved ring of the base plate and position the metallic cast acrylic ring on it. Press down firmly and allow the glue to cure. Put double-sided adhesive tape or dots where the wooden relief should be positioned and fix it.
Take the wooden spacer and apply double-sided adhesive tape on both sides. Position it on the left and the right of the black base plate. Make sure to have a rectangular contact surface so that the trophy stands upright.
Finally, fix the lettering “winner” and the corresponding back on the spacers to complete this elegant trophy.