After you get the vehicle prepped and ready for application, it’s time to gather the right tools for the job. You’ll need the following:
- Squeegee with a felt tip
- Heat gun
- Utility knife
- Tape primer
- Knifeless Tape Fine Filament Edge Cutting Tape
- Cotton gloves
- Masking tape
- Tape measure
- Infrared thermometer (optional)
First, understand that applying vinyl takes practice, skill, and, most of all, patience. For large projects, like vehicle wrap installations, we recommend having a second set of hands.
- Now, plan your method of attack. We recommend applying the film to flatter areas first, just because these tend to be simpler and more convenient to get out of the way.
- Check to make sure nothing is hindering your application, such as logos, hood ornaments, and other bulky objects that won’t be wrapped—research how these objects stick to the car and the best method of removal.
- Using your tape measure, roughly measure the surface of the panel you are applying to, leaving extra material (at least 4-6″) on either side.
- Unroll the desired amount of film and cut using a utility knife. Try not to unroll or place the film on the floor, as this will leave dust and debris on the film, causing scratches when applying with a squeegee.
- With someone helping you, carefully remove the backing paper while applying some tension to the film, so that fewer creases appear. Have that person help you position the vinyl and drape the film over the panel. At this point, make sure to cover the entire panel without any edges of the panel exposed.
- When placing vinyl on moderately curved surfaces, carefully reposition the vinyl to create tension over the entire surface.
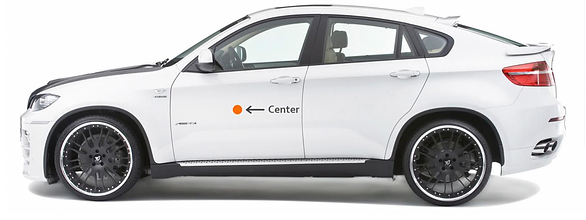
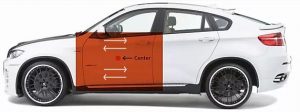
- Visually identify the center of the panel. It serves as your starting point.

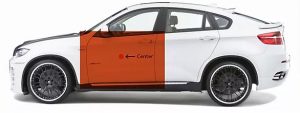
(All images courtesy VVIVID Vinyl) - Once you have a starting, peel back the liner and place the vinyl wrap onto the target surface. Make sure your material is larger than needed for easier handling.
- Using moderate pressure on your squeegee, apply the film while pushing out trapped air from beneath, starting from the middle outward. In every swipe, make sure to overlap the preceding swipe to remove all air from the area.
- Using felt or an edge buffer will help limit installation damage when applying pressure. If you don’t use the correct amount of pressure, you risk leaving air trapped behind the film. To see if you’re working with the right pressure, use a heat gun on an installed surface. If bubbles appear, apply more pressure.

Pro tip: Another great way to see how different film works is by installing it on a piece of glass and understanding how the air-release channels work according to the pressure you are using.