Pointers for Laser Engraving Curved Surfaces
Engrave curved surfaces with or without a rotary attachment
Preparation for a curved surface depends on how significant the curve is and whether or not you have a rotary attachment.
For the best laser engraving results, it’s crucial that the laser stays in focus. When engraving a curved surface, the laser can start to go out of focus on the sides of the graphic because the surface begins to curve. Generally speaking, you’ve got about 1/4″ of forgiveness on either side, but once the beam goes beyond that, your image will begin to fade as the laser goes out of focus.
For items with a significant curve, or products that are cylindrical, such as a wine glass, it’s ideal to use a rotary attachment that allows the laser beam to fire as the item rotates.
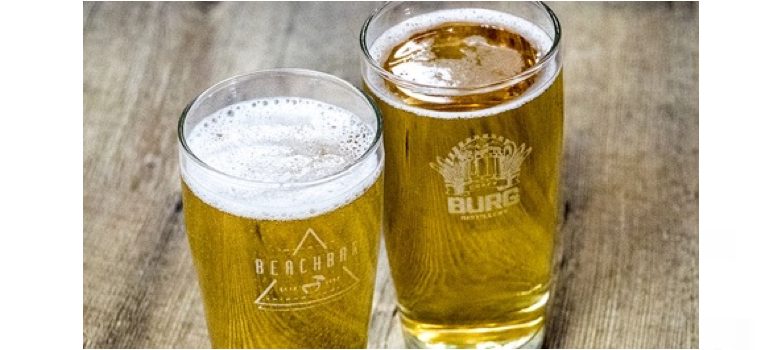
For those without a rotary, there are specialty focal lenses that allow for better engraving over more curved areas. Epilog’s 4″ lens, for example, produces a focused beam over a longer vertical distance, which makes it ideal for engraving items with a larger curve like these pint glasses.
Keep in mind, however, that since the laser still isn’t running over the entire surface at the same focal point as it would with a rotary, you’ll be somewhat limited in your design and placement. The pint glasses in the image above, for example, were done using a 4″ lens, but you’ll notice the logo primarily stays toward the center of the glass.