Adding Artistic Effects to Embroidery Files Created by Vector Conversion
See how you can add artistic effects to files without digitizing experience
Software programs can convert vector art into embroidery files without the need for digitizing. Although the merits of using vector conversion versus digitizing are the subject of debate among embroidery professionals, there is no debate about whether a software program can create an embroidery file faster and more efficiently than a digitizer.
In fact, a well-known professional digitizing software program that I have used for many years includes a feature for converting vector art into stitches. My preference for converting vector art into stitches is a software developed exclusively for that purpose. I am going to show some artistic effects that I added to an embroidery file, generated using software designed solely to convert vector art into stitches.
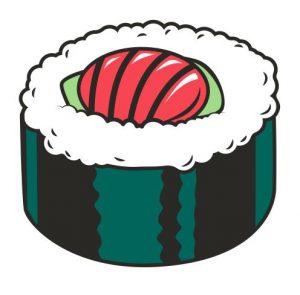
The vector art I used is from a collection and depicts a piece of sushi. Before converting the art into stitches, I deleted the tiny half-moon shapes in the white area because their importance to the design was not great. They were potentially a problem to embroider cleanly at the size of the finished design (3″ wide), and there was a better way to add texture to the stitches in the white area.
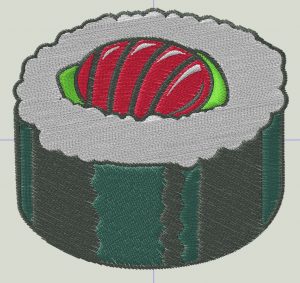
When I imported the art into the conversion software, the result was a combination of satin and fill stitches. Although the auto-generated stitches accurately represented the art, the overall effect looked a bit flat.
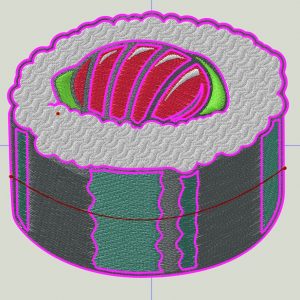
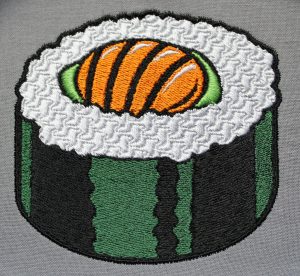
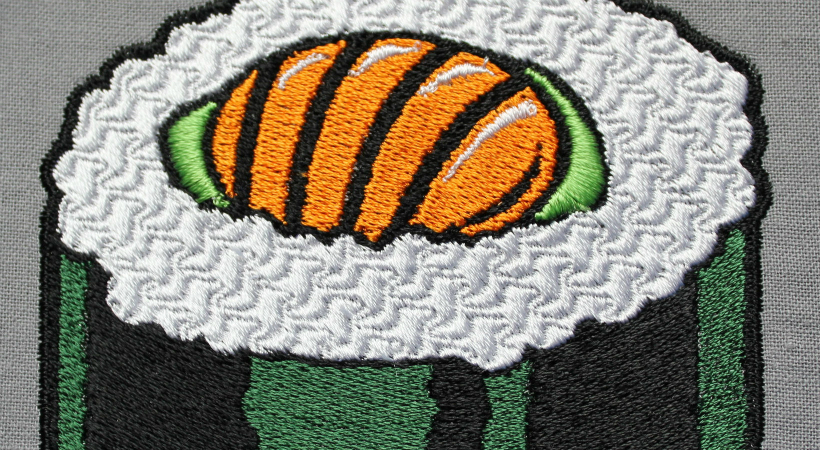
I started adding artistic effects by selecting the white area and applying a fill pattern built into the software that created the appearance of rice grains. Although I liked the design, it was a little busy. So, I changed the stitch length in the pattern from the default value of 4mm to 6mm. I liked the result more than the original, which you can see in the version I embroidered.
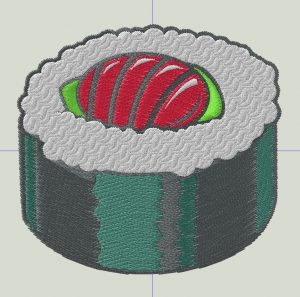
Next, I made the fill stitches in the black part of the nori (the seaweed wrap around the sushi) follow the round edge of the nori to create a more dimensional look. I was quickly able to do this by extending a line with my mouse from one side of the nori to the other (which created a horizontal stitch angle) and then pulling the middle of the line down. Next, I changed all of the green objects in the nori to fill stitches and changed their angle to match those of the black object.
As a finishing touch, I used the auto-border feature of the software to create a 1mm satin outline around the perimeter of the sushi.
Because the software did the tedious work of creating the objects in the embroidery file, I could spend my time using my imagination and applying artistic effects to the stitches in those objects. Applying the added effects did not require my digitizing skills and was relatively easy to do.
Can you encounter problems with vector conversion? Yes. The default values for stitch length in the software are a good starting point for applying artistic effects. However, it is possible to change default values and create designs that will not embroider well, or at all. So, it is a smart idea to stitch a sample of what you create. Also, well-designed vector art will increase the likelihood of getting a workable embroidery file. I have converted poorly designed vector art, and the results were awful.
In summary, software for converting vector art into stitches allows one to generate embroidery files and creatively apply artistic effects to those files without digitizing experience.