

Laser engraving photographs continues to be a popular laser application, especially on substrates like wood, leather, marble, or painted canvas. However, laser operators sometimes get discouraged when they can’t produce the same quality images with their machines that they see online or at trade shows.
There’s no one right way to engrave photos. A lot of it is personal preference learned through experimentation, but there are a few techniques that virtually anyone who laser engraves photos finds useful.
- Starting out: If you’re new to photo engraving, the first thing you should do is set aside some quiet time to practice and get familiar with the process. As with any technique, photo engraving takes time to perfect.
- Image quality: Not all photos are going to engrave well. Photos that laser best are photos that contain a wide range of light to dark shades and everything in-between. Photos with large areas of a single color typically do not engrave well, especially when working with wood.
- Substrates: Photos are going to engrave differently from one material to the next, and your settings will vary as well. A photo that engraves beautifully on marble may not look as good on glass. Something that looks stunning on wood may not produce the same contrast on slate. As you become more adept at photo engraving, determining which substrate engraves the best will become more intuitive.
So, what makes a photo ideal for engraving? There are several considerations that need to be taken into account when determining whether a photo is suitable for engraving:
- Ideally, a photo shows many gradations of color from light to dark
- The photo shows good focus and definition of detail
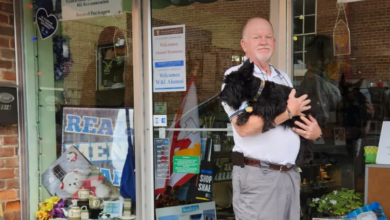
Shading: Make sure you have a variety of colors from light to dark within your photo. A single-color photo that has a lot of sky won’t provide much visual interest when engraved, and neither will one with large dark areas. Take the picture of the couple standing in the shadows (Fig. 1). While it may look visually interesting when printed, it will lose a lot of that detail when engraved.
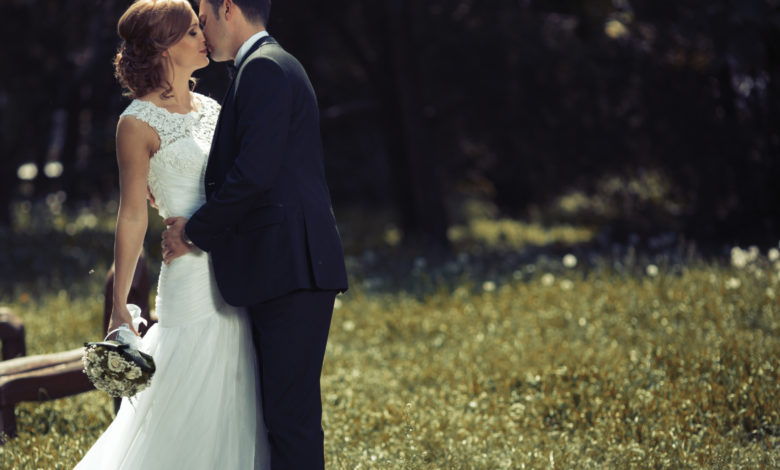
Close-up subjects: Your photo’s composition is an integral part of the quality of the etching. Take a look at Fig. 2—the engagement photo of the couple holding hands in the meadow looks great artistically but will lose detail when etched on wood. Fig. 3, on the other hand, features a variety of shading and close-up figures, which makes it much more suitable for engraving.
Additional tips:
Get the highest resolution digital image you can. Low-resolution photos from the internet are almost never suitable for engraving.
Convert your photo to black and white. This modifies the dot pattern that is in the image and makes it more suitable for laser engraving.
If you are engraving a photo on dark material like black marble or black anodized aluminum, you are going to need to invert the photo before sending it to the engraver. When you invert an image, you are essentially creating a negative. The laser will fire wherever there is a dot in the artwork, so for most engraving materials like wood or acrylic, you are creating a dark mark wherever the laser hits the material. However, on material like black marble, you do the opposite—creating white wherever the laser fires, not dark. Inverting just changes all of the black dots to white and vice-versa.