Children have an innate fascination with the alphabet. They learn to craft words-spelling, enunciating, writing-and develop a familiarity with diction. Though these skills may be labeled as basic, work with letters is certainly not child’s play. Just ask the channel letter experts in the sign market.
“We build multiple lit signs every day,” says Dan Wett, senior technical writer, Gemini Sign Products. Channel letters “come in many types, shapes and forms-especially now that LEDs have been introduced to lighting.”
No matter the level of capability, one must start somewhere, whether it’s in a classroom learning or on a shop floor handling product. Once the proper skills are developed, letters can be used to make the plainest of contexts come to life.
Letter types
In simplistic terms, there are a few different ways a sign maker can configure a channel letter. In most instances, this is determined by how the light is displayed within the letter. Let’s take a look at each of these types to get a better understanding of the arrangements.
Front-lit (Face-lit)
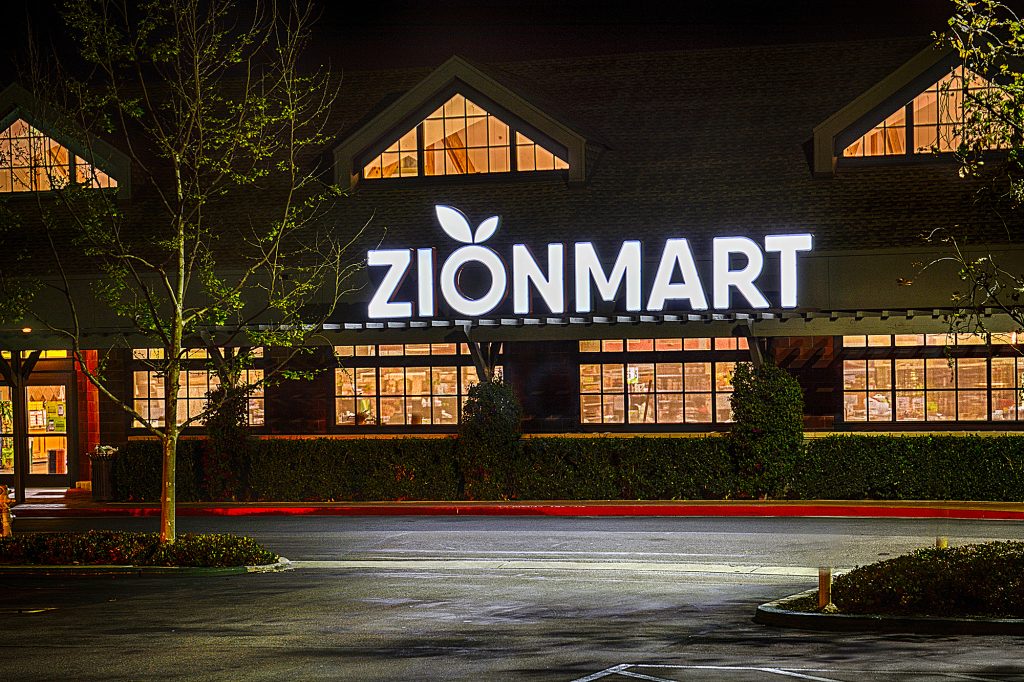
“Front lit channel letters are pretty much what the term implies,” says Ron Eppert, vice president of operations for US Sign and Fabrication. “Illumination is projecting through an acrylic lens onto the face of the letter.”
With these applications, an acrylic face is used most predominantly-though polycarbonates, and flex faces are also options-but there can also be challenges when colored acrylics are introduced. Some LEDs may have a different appearance than intended. For example, “a blue acrylic illuminate with blue LEDs can appear blurry to a person’s eye,” Eppert says.
Along with the face, it’s important to keep the lighting aspect in mind as well.
“For the standard, front-lit letter, the most common variables that will determine the LED to be used for illumination are the width of the stroke of the letter, the depth of the letter, and the face material of the letter,” says Principal LED’s VP of Sales, Daryl Foreman. “The height of the letter, while one of the variables, is not as much of a determining factor as the other factors.”
For the most part, “Front-lit channel letters, or face-lit channel letters, typically have acrylic faces with trim-cap material and large letters can be fabricated with aluminum retainers,” explains Travis Popp, owner of Sign Partners USA. “These could also be a trim-less style without any retainer. Face-lit letters have an aluminum return (.040 – .063) and an aluminum or aluminum composite letter back. These are typically LED-illuminated, but historically these were neon-illuminated.”
Just like neon has given way to LEDs, other changes in front-lit channel letters have occurred.
“These types of letters have gone through some changes over the years as to how the face is held in place,” says Eppert. “Trim cap fasteners were the standard method for many years. In the late ’90s, fabricators began stencil-cutting the letter face leaving a lip (1/8-inch to 1/4-inch) and setting the acrylic behind the lip. This was a cleaner look than the trim cap and is still used today. The newest method is to shoulder-rout the acrylic, so it drops into the letter form, providing a retainer-less look.”
Back-lit (Reverse)
An alternative option to front-lit, back-lit channel letters offer a much different look.
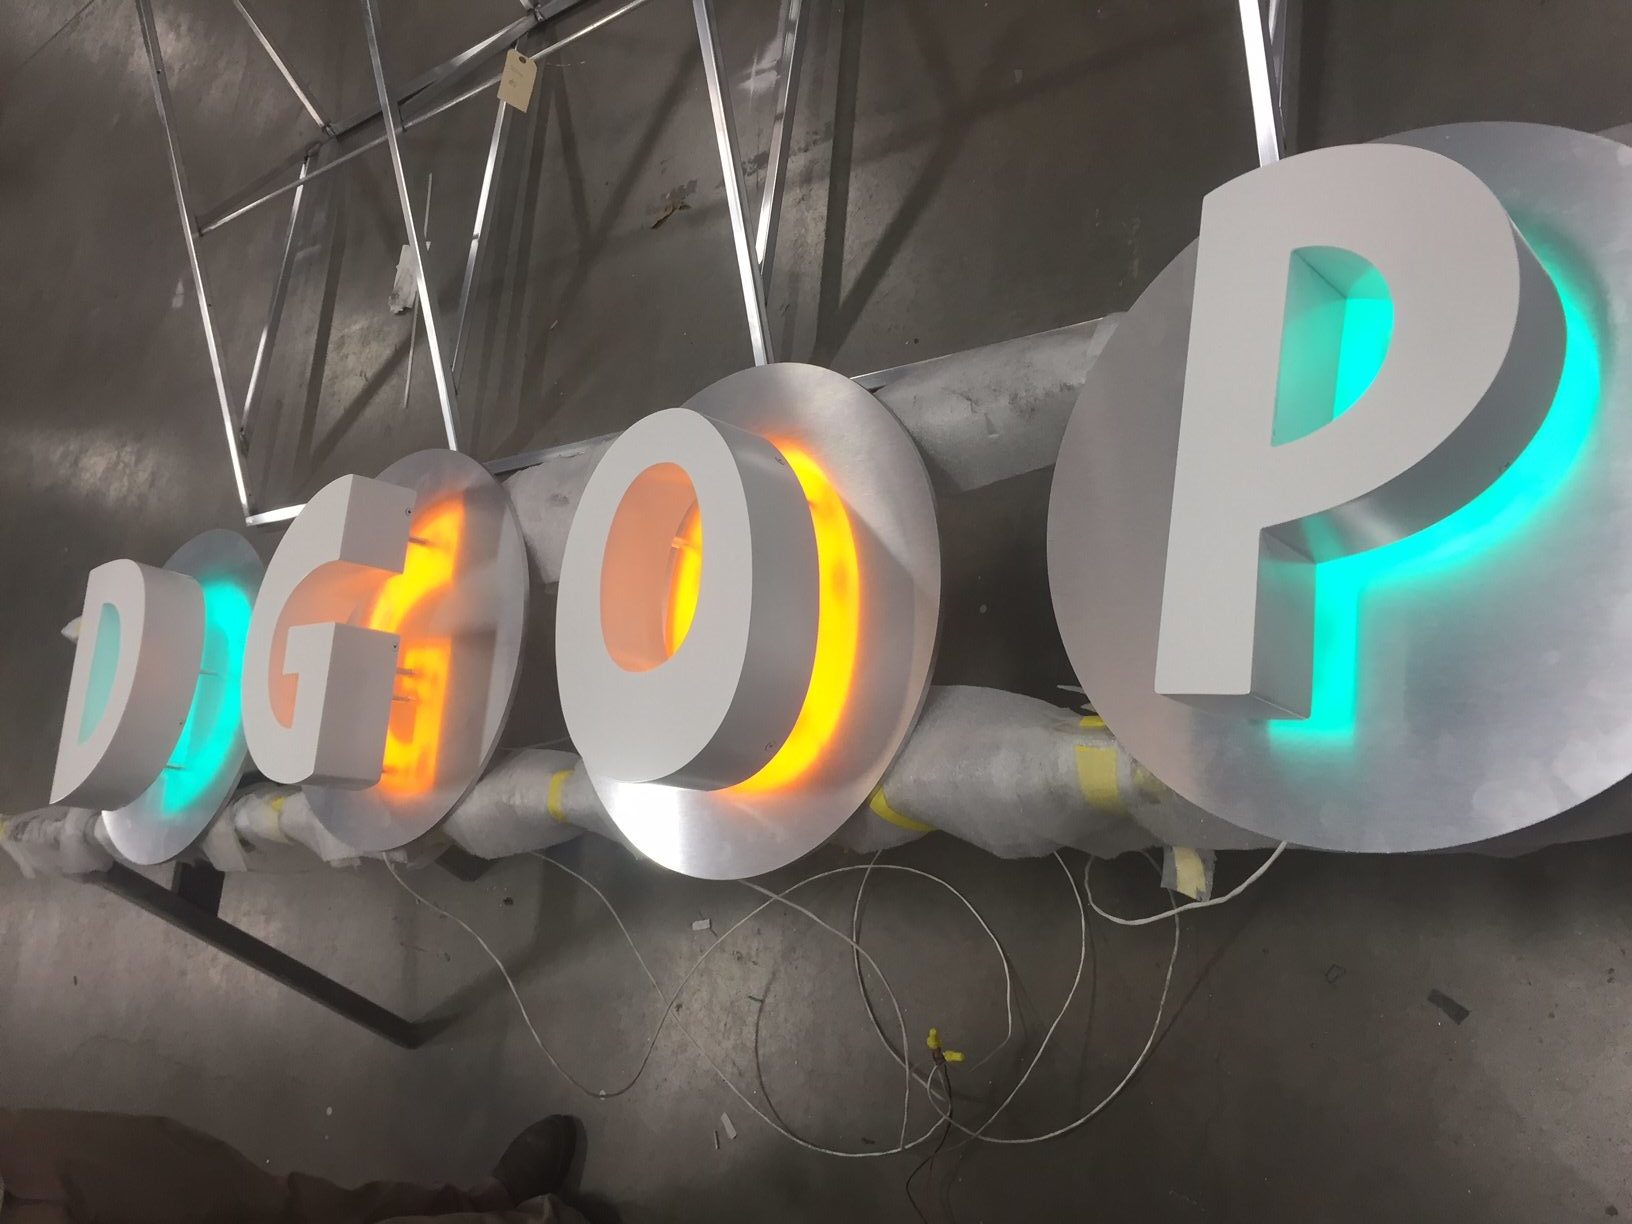
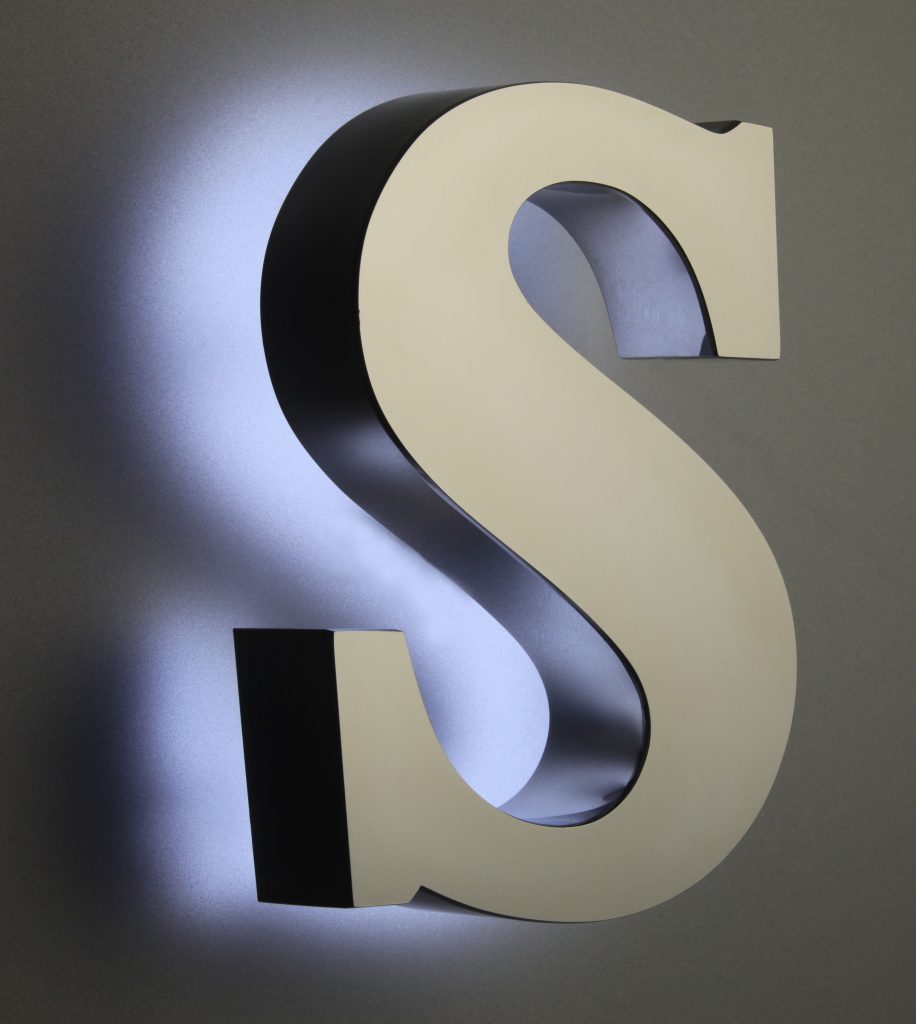
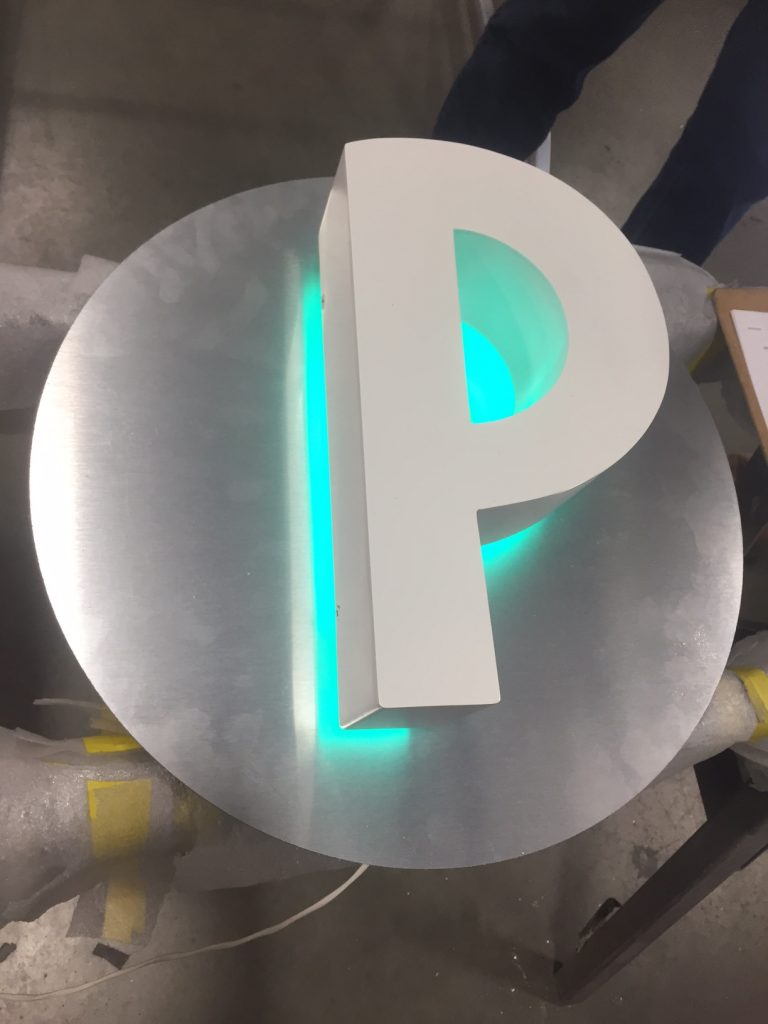
“Reverse back-lit letters provide a more elegant illumination. They frame the letter profile in light,” Eppert says. “Depending on the distance that the letter is mounted off the substrate, you can have a very tightly defined halo effect or a wider washing effect.”
For a company like Gemini that offers both front- and back-lit options, an emphasis is placed on the fabricated letter’s material choices.
“LED-lit fabricated letters are available in aluminum or stainless steel,” Wett says. “Functionally, both metals will light the same. Construction-wise, the stainless letters have a removable can to wire and service the LEDs, while the aluminum letters have a removable trimmed face. Our goal is to produce a consistent light output with both options and metals-and both metals are available in all standard fabricated metal finishes.”
To state it clearly, “Reverse/back-lit channel letters are letters manufactured with thick aluminum faces and returns and polycarbonate letter backs,” Popp says. “They are typically welded but can be fastened by other means. The interior of the letter is painted white, and the opaque faces and returns trap the light and flood the light through a polycarbonate letter back to halo-illuminate the letters on the wall or background.”
When determining illumination methods for back-lit, the same considerations are in play with a front-lit application except for the face material.
Foreman suggests examining “the depth of the return on the letter, the substrate upon which the letters will be mounted, the intensity of the halo desired, and whether the LEDs will be mounted to the face of the letters.” The last point will determine whether the light will shine backward or shine into the letter and create the halo effect.
Open-face
This is where we get into some of the less introductory, more complicated methods of channel letters.
“Open-face letters probably present the biggest challenge for illuminating with LEDs,” admits Foreman. “Usually, the desired look is that of scripted neon. This look is almost impossible to achieve with regular LED modules. Several LED companies offer flexible LEDs that simulate neon, and these are the best choices for open-face channel letters.”
The lighting aspect of open-face letters is the main consideration with these projects.
“Open-face channel letters were originally designed to house exposed neon and were typically fabricated to a three-inch depth, which would provide a shroud around the exposed neon but at the same time be readable from an angle,” explains Eppert. “While these types of letters fell out of popularity with the arrival of LEDs, they have been making a comeback within the design and specification community. Many of the LED manufacturers now have developed simulated neon products using LEDs.”
The process of putting an open-face letter into place includes using a combination of fastening and choosing the proper light source.
Open-face letters are “any channel letter where the returns are fastened to the letter back, and the face of the can is open to expose a light source,” Popp says. “Often exposed neon is used for the artistic/retro effect. It can also be non-illuminated or have bulbs.”
Specialty letters
With specialty channel letters, there is a bit of vagueness. Typically, it is classified as something close to one of the above letter types, but with some differentiator.
“Specialty could be considered a combination of both halo and front-lit,” says Eppert. “We have done many jobs like this, and it requires a minimum depth of three inches and a baffle set into the letter can (we prefer it at two inches from the face) to separate the LEDs, providing the face illumination from the LEDs providing the halo illumination.”
These types of projects can also include different materials or colors.
“Specialty channel letters are built like the face-lit channel letter, but have a clear or white polycarbonate letter back,” says Popp. “This allows the face to illuminate, and the halo effect reflects off the wall or background.”
Considerations
Channel letters are becoming increasingly more relevant and popular. This is one reason why sign makers should capitalize on bringing this type of work to their shops. Another good motivator for turning to channel letter projects is that shops likely already have the design capabilities and labor force in place. It’s just a matter of acquiring the equipment and gaining experience.
“Equipment is key,” declares Popp. “Invest in the right equipment, and if you cannot buy good equipment, let a wholesaler build it for you. Wholesalers can build it cheaper than you can as a startup without equipment. Focus on selling signs and wholesaling what you can sell for good margin rather than adding overhead and feeling like you need to sell anything you can to use the equipment you invested so much in.”
Beyond choosing the proper equipment, there are elements to consider when tackling these projects. Here is a categorized list of tips from some channel letter professionals.
Plan ahead
Of course, it’s always wise to make sure a sound plan is in place for any work. This is especially true with channel letters due to all the pieces of the puzzle coming together accurately.
“Make sure building or association restrictions are reviewed,” says Wett. “Many have a limit on the square foot coverage allowed for signs. Make sure you know how this is calculated. Understand the local building codes and plan to secure the required permits. Be sure to know and understand all electrical requirements-codes, restrictions, limits, etc.”
Specifically, Wett suggests inquiring about UL certification with your sign and if a master electrician is needed for the wiring.
“Are there any other electrical issues to prepare for, such as lead wire requirements or enclosures?” Wett asks.
Popp agrees, stating that unexpected issues are nearly certain to arise. He cites challenges such as “the sales, permitting, and the design phase before a wholesale manufacture would receive the order.”
Design accurately
The design phase, as Popp mentioned, is essential to a successful channel letter sign. “The process starts with design.”
He further explains how design kicks off the project. “When we receive a pre-designed art file, we import, clean, and size the file. Then supply the customer with an approval drawing and produce production files for cutting, bending, and fabrication of the channel letters, raceways, backgrounds, vinyl, and other ancillary pieces. Once the customer accepts the approval drawing, we cut, bend, and fabricate the product.”
At this initial stage, sign makers should address the questions associated with all aspects of the sign, including location, the environment, and more.
“During the design process,” Wett says, “be sure to evaluate requirements such as visibility (how far away does the sign need to be read) so you can determine what size letters are needed. Also, review color contrasts. Are you mounting red letters onto a brick wall, which ends up being unreadable? Does the design allow enough space between letters, so they are readable from the side, especially if they are deeper letters?”
If sign makers are new to this process, there are ways to receive assistance.
“Most LED module manufacturers provide either an online layout service or do in-house layouts for the sign companies that can help with these considerations, so the best choice for the proper LED can be made,” says Foreman.
In many instances, it is the lighting that will ensure the success of a sign.
Lighting the way
“While one may define ‘successful’ in a number of ways, I always like to think of a successful project as one that meets or exceeds the expectations of the customer,” says Wett.
However, most end-users are not experts in LED lighting, so it’s safe to assume they will lean on the sign maker or LED manufacturer for advice.
“Important factors to consider for halo-lit signs are the mounting substrate and distance the letters are pinned off that surface,” suggests Eppert. “The distance you mount a halo-lit letter from the substrate has a significant effect on the type of halo generated. A shallow distance promotes a tight, isolated halo. A wider distance promotes a wider wall-washing halo.”
Foreman agrees that mounting distance is a factor. “In considering the depth,” he says, “the lumen output and the beam angle of the LEDs are most important. In a shallower application, one-and-a-half inches to three inches deep, a wider beam angle helps to spread the light better and avoids hot spots at the face. This holds true also when you go from a five-inch depth to, let’s say, an eight-inch depth. The deeper the letter, the more lumens you need at the light source.”
A variety of elements impacts the lighting effect. Others include the sign face, backing, and material finishes.
“A glossy or highly reflective service is going to act like a mirror making the backs of the letters visible,” Eppert says. “If a clear Lexan back is used, you will be able to see the LED modules in the background. To alleviate the problem, you can either modify the background to a matte finish or, if that is not possible, use a white Lexan back instead of clear.”

