Typically, decorative sandcarvers apply masking tape beyond the edges of the photoresist mask to protect their substrate during etching. The application and removal of that masking tape is time-consuming and especially onerous during high-volume production runs. So, savvy operators use tapeless sandblast ports to eliminate tedious taping.
I’ll share two creative approaches: cut rubber and molded silicone. Both materials can be reused indefinitely since they are resistant to the grit and pressures used in decorative sandblasting. While both approaches work with many types of substrates, I’ll refer to glassware in this article.
Option 1: Rubber membrane
The rubber option is versatile since the same rubber membrane can be used to mask multiple substrates. The flexible rubber is also the optimum port for light glassware.
To use the rubber membrane tapeless port option, follow these simple steps:
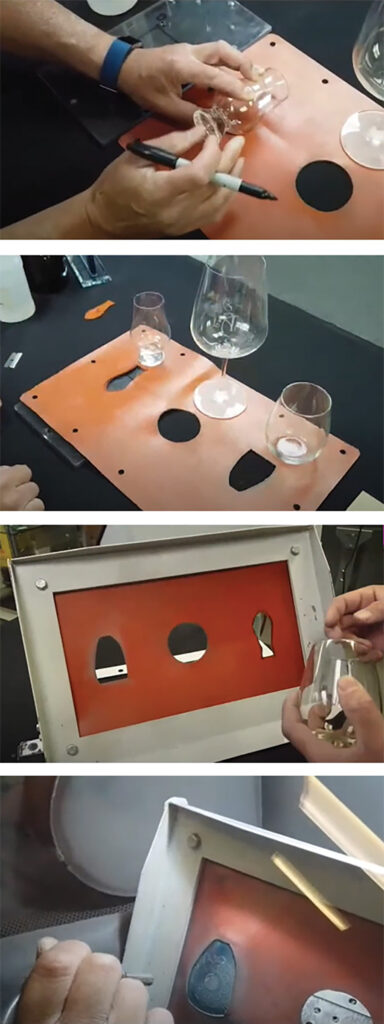
- Cut hole: Place the surface to be etched on the rubber membrane. Trace the edges of the glassware onto the membrane to ensure the right size window for your glassware. Cut the shape out of the rubber with a sharp razor blade.
- Mounting: Stretch the rubber membrane over the pegs of the retention frame. Secure the corners of the membrane to the frame with wing nuts. Finally, mount the retention frame itself to the tapeless sandblast port frame.
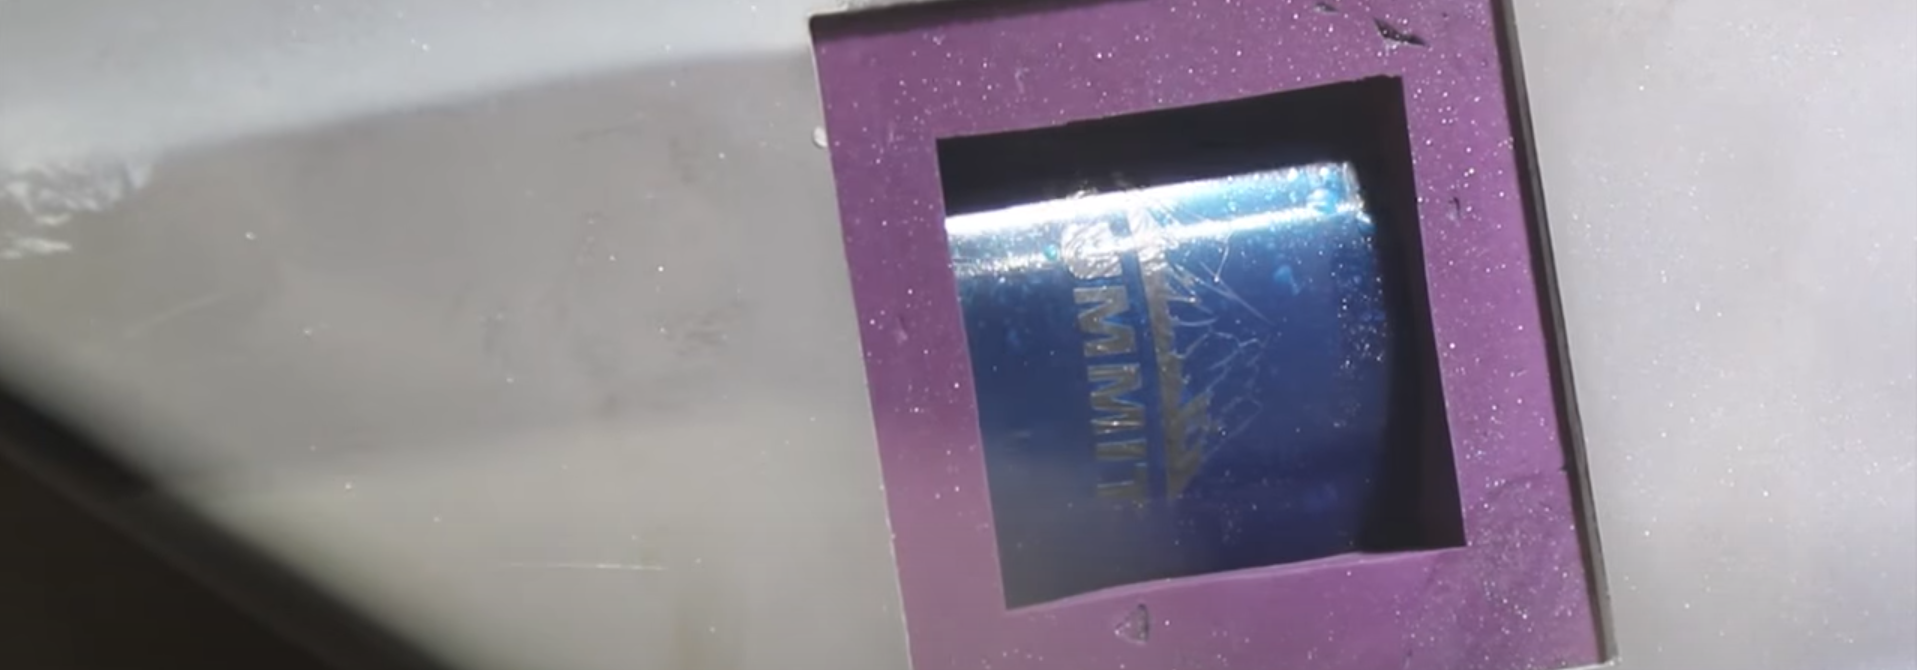
- Sandcarving: Reach around the back of the retention frame and press the glassware into the rubber membrane so that only the imaged photoresist mask is showing. The flexed rubber will provide a seal that protects the unmasked portions of the glassware. Voila, no masking tape required!
Option 2: Silicone mold
The tightest fits are achieved with silicone molds. Here’s another clever approach that works quite well:
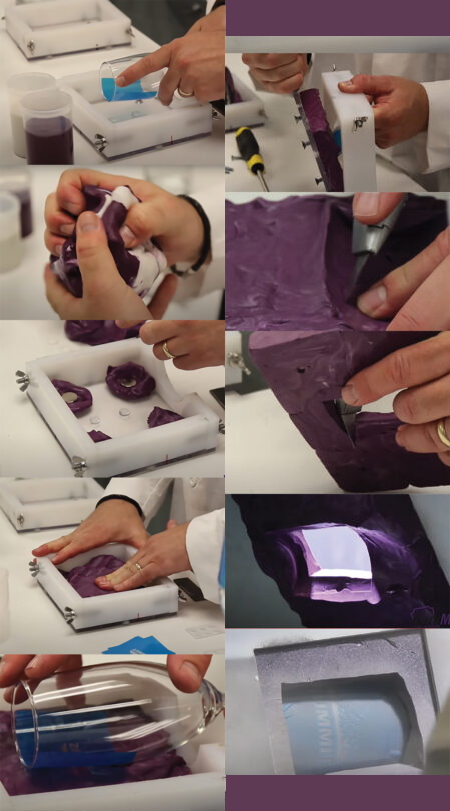
- Size it up: Apply your photoresist mask accurately to the glassware prior to creating a silicone mold. Be sure to choose the appropriate size mold box for your glassware.
- Install spacers: Prepare the mold box with rubber spacers within the intended zone of the sandcarving window. These spacers elevate the glassware from the wall of the mold box, ensuring sufficient room for the silicone. Spacing them evenly will ensure that the glassware remains stable during mold creation.

Silicone mold: Steps 1-9 (Image courtesy IKONICS Imaging) - Activate silicone: Quickly knead together equal amounts by weight or volume of components A & B. In this case, part A is purple and part B is white. It will take you one minute of kneading to blend the two colors into one uniform color. The silicone continues to harden until completely hard in about 20 minutes.
- Add magnets: Place small pieces of silicone on each of the four screws. Place one magnet over each of the four pieces of silicone.
- Add all silicone: Place remaining silicone into the mold box pressing it down to get complete coverage over the magnets and flattening out to get even with a small block of wood.
- Imprint substrate: Press glassware into the silicone until it reaches the rubber spacers. Leave the glassware in the mold while the silicone hardens. In 20 minutes, the mold will have hardened completely. You can then remove the glass.
- Remove silicone: Loosen the four screws from the back of the mold box. Remove the back of the mold box from the mold body. The silicone mold should then come free of the mold housing.
- Cut window: Cut away the window with a cheese knife. Be sure that the window is just large enough, so as not to cover any of the sandblast image.
- Sandcarving: The magnetized mold will quickly secure the completed mold to the back of a metal window port within the sandblast cabinet. The operator simply places the glassware into the perfect fit of the silicone mold with only the imaged photoresist mask is showing. Shazam, no masking tape!
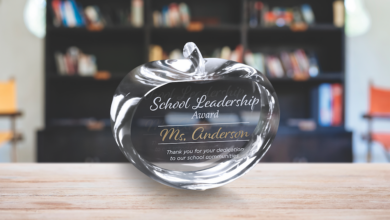
Again, these techniques work great with a wide variety of substrates beyond glassware including wine bottles and ceramic mugs, as well as awards. You can be creative and make your own tapeless sandblast port, or you can source one of these turn-key solutions. Either way, you’ll work faster and earn more on your next large-volume order by going tapeless.