Shop tools and accessories make every decorating job that much easier to execute and with better results. But what items do you actually need to make the most of these extra accessories, and which are just extra? Industry experts weighed in on the goods they deem essential to any shop’s toolbox. Below are a few “shopping lists” of sorts for some of the most popular apparel decorating disciplines. And while these lists are not exhaustive, they will get you ready to roll!
Screen Printing
Art preparation and separation software: Key software includes Photoshop, Illustrator, and CorelDraw.
Inkjet or laser printer: This will be how you create your film output.
Washout booth: This keeps the mess contained and helps set you up for better screens.
Pre-stretched screen frames and cap frames: A great investment and affordable option.
Exposure system: Find one that utilizes a UV black light system to gain perfect frequency and minimum exposure time with a pin registration that allows artwork to be pre-registered for a faster setup.
Tension meter: A well-tensioned screen equals better prints.
Inks: A variety of inks for various jobs should be on hand. For example, bleed-resistant, high-opacity, general-purpose, athletic, glitter, metallic, and day-glow cover a broad range of options.
Ink mixer: The best shops thoroughly stir their ink before putting it on their press. Available as either an automatic mixer or a drill attachment.
Squeegees: A variety of thicknesses will help various jobs.
Scoop coater: It’s used to coat a screen—manufactured with aluminum and a sharp edge with plastic ends to help control the coater’s angle during the coating process for excellent results.
Dual-tack platen tape: This double-sided sticky tape costs less per platen than the alternatives and is better for the environment.
Split tape: Everyone has to tape their screen, and split tape is easier to apply and remove.
Spot cleaning gun: A must-have to get out accidental pinholes, stray ink spots, and smudges.
Exposure calculator: Exposure times vary by mesh count, emulsion type, and application method. An exposure calculator helps set the perfect exposure time for your screens.
Flash-cure dryer: This should be free-standing with a minimum 1,800-watt heating element to flash dry prints or process the garments’ final curing. It should feature an infrared heating element, adjustable height, easy positioning wheels, and an energy-saving heat sink.
Conveyor dryer: Find one that is 5′ or more that includes a control panel with an analog variable belt speed controller, thermostatically controlled oven temperature, digital heat controller, and a variable air speed controller to adjust airflow volume within the oven chamber. This will help achieve the best results.
Screen cleaning products: Soy-based and citrus-scented products that are ideally biodegradable are a great start. Products required include:
- Degreaser
- Press wash
- Screen wash
- Screen prep
- Haze remover
- Emulsion remover
- Permanent and/or water-soluble blockout
- Emulsion hardener
- Ink degradant for plastisol
- UV solvent-based ink
- Spot cleaning fluid
High-pressure washer: Look for one with a trigger gun control and fully adjustable nozzle with a minimum 26″ hose.
Water filtration system: Find one that can fit under the washout booth and is drain-ready to save space in a limited floor room. A dual filtration system leads to cleaner septic and plumbing systems through the use of an efficient and cost-effective method to dispose of emulsion and ink byproducts.
Dip tank: This system is designed to save you time and money without the mess of traditional reclaiming methods, without hazards and toxicity. It can also be used to develop screens after exposure.
Heat-applied graphics
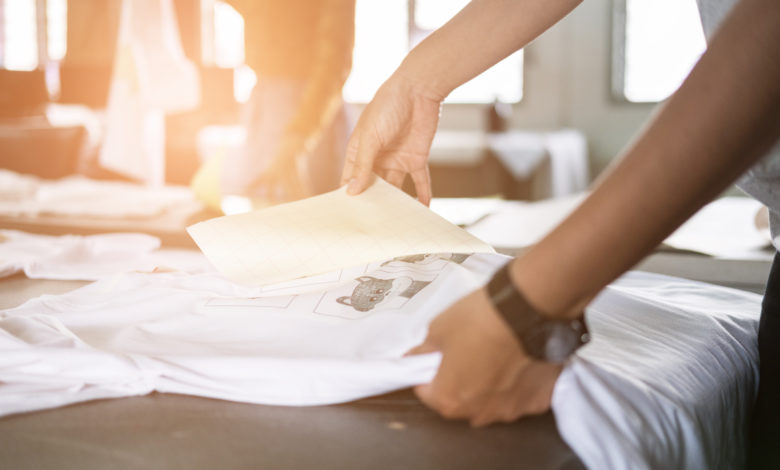
Heat press: This goes without saying but is the core item needed for heat transfers.
Inkjet of laser printer: Look for lasers with printing consistency, brilliant colors, and the ability to print CMYK and designs with white in them. Inkjet printers with dye- or pigment-based ink are also good choices.
Inkjet or laser heat transfer papers: This will depend on the type of printer you choose.
Vinyl cutter: Easily and cleanly cuts transfer materials.
Cutting software: This will communicate with your vinyl cutter to plot the points that will be cut to create the transfer.
Parchment paper: This is used in the transfer process to protect the platen from the chance of overlapping the design transfer onto the platen.
Vinyl material: Carried in various colors and local team colors to quickly make customized pieces for different markets.
Heat transfer foil: Available in a range of colors, this cheap material adds bling and value to garments when heat pressed on top of a design/image.
Specialty presses/platens: Whether designed for caps, mugs, or pockets, these specialty items expand your offerings.
Weeding tool: This will help get the tiny pieces of vinyl out for a clean transfer.
Cutting mat: This squishy surface will protect counters and help when weeding.
Teflon sheet cover: Protects your heat press.
Embroidery
Scissors: You will need a variety of scissors for different functions. Start with:
- Fabric shears
- Paper scissors
- Nippers
- Appliqué scissors
- Bent embroidery scissors
Fabric rotary cutter/self-healing cutting mat/straight edge ruler: This trifecta allows for cutting backing in the shop, saving money, and reducing waste.
Tweezers: Great for pulling out excess thread tails from designs, clearing bird nests from the throat plate, and so many other uses. Get multiple pairs—some with a slanted tip and a pair with micro tips.
Seam ripper: There will come a time when this is necessary. It is unavoidable.
Snag tool: Use this little tool to move a loop of embroidery thread or a snagged loop in the fabric to the garment’s backside.
Design placement templates/guides: Templates help you locate designs on shirts consistently and accurately, based on the shirt’s size.
Tape measure and rulers: Get small tape measures that are flexible, as well as clear, flexible 6″ rulers.
Hooping aid: This tool makes it quick and easy to get designs in the same place consistently. It also helps reduce the stress on your hands and wrists.
Hoops/frames/clamps: Get multiple sets of the ones you use the most.
Hand-held steamer: This works well to remove hoop marks.
Heat press: It can help set designs, secure appliqués, add names and numbers to team apparel, and add transfers, vinyl, and rhinestones to your roster of decoration offerings.
Tack iron: This wand iron is excellent for securing appliqué fabric quickly with a few touches.
Small toolset: This should include a small screwdriver set, needle nose pliers, small crescent wrench, Allen wrench set, and a small flashlight. These will all come in handy when changing needles and adjusting equipment.
Thread: Keep a variety on hand for various types of jobs and finishes. Here are some that will always be useful:
- Polyester 40-weight thread
- 60-weight thread
- Metallic thread
Needles: Like thread, different needles will work better with specific fabrics and for different types of work. Always make sure you have fresh of the following:
- 75/11 Ball
- 75/11 Sharp
Needle threader: This will make your life much easier.
Stabilizers: Again, a category that requires variety. The most important types are:
- Cutaway
- Tearaway
- Performance fabric backing
- No-show backing
- Adhesive-backed stabilizer
- Soluble toppings
Spray adhesive: This limits how much the fabric can move when the pressure foot comes down to form each stitch. Only use adhesives specifically designed for embroidery and apparel decoration applications.
Canned air: Great for clearing out the bobbin case and basket, removing lint from bird nests, running thread through the tubes, and annoying a coworker on the phone.
Grease and oil remover: Dawn dish soap will remove any small oil spots that could occur after oiling the machine.
Stitch remover: This tool is invaluable when you have to remove stitches. It is like a hand trimmer that barbers use, but it is modified for embroidery.
Straight pins: Pin a collar out of the way or any fabric that flops as the machine moves
Fabric markers or tailor’s chalk: These are designed to disappear when heated, moistened, or brushed, making them great for marking the center of a design.
Lint roller and lint brush: Thread scraps seem to multiply and cling to products. Tame them with the lint roller as needed or clear out the bobbin case basket.
Editor’s Note: Special thanks to those who contributed to this list of essential accessories: Jennifer Cox (NNEP), Taylor Landesman (Lawson Screen & Digital), Mario Fajardo (Florida Flexible), Shelley Marcus (RhinoTech), and Taylor Loeber (Easiway).


