I have always been amazed at how quickly one can forget some of the functions of a design program if they are not frequently used. One of the ways I have learned to stay current on my skills with CorelDRAW is to spend some time drawing some objects that commonly exist around the house or in the shop. I have included some of the drawings I have done over time as a possible inspiration for others to just create drawings that are intended to enhance one’s skills with the program. Most of these images were drawn at my leisure for amusement, but all of them have helped me learn how to keep sharp with the program. I will not do a detailed description of each, but I will give a brief explanation of them and how they helped me enhance my skills and stay current with them.
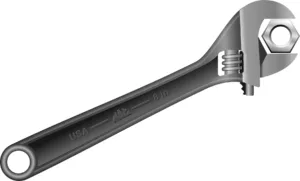
Figure 1
Figure 1 depicts an adjustable wrench. I put the wrench in my scanner and scanned it into CorelDRAW. I was then able to draw the various shapes of the tool using mostly the Bezier tool. When all the basic shapes were completed, I began adding the details to each with fountain fills and contours for a realistic look. This particular wrench had a black anodized finish, so I used darker shades of gray throughout. If it had a chrome look, as most wrenches do, the colors would have been lighter tones to show that. I later drew the hex nut with some fountain fills. Oddly enough, though intended for my own amusement, I was able to use this image for vehicle markings on a maintenance department’s vehicle.
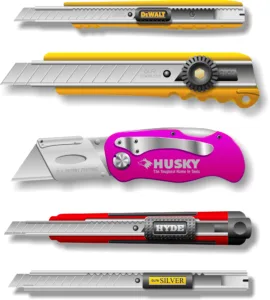
Figure 2
Figure 2 was a fun exercise in drawing a collection of the various utility knives in my shop. Each of these images were drawn separately, paying close attention to the differences in the details of each. Most of them began with a rectangle which was converted to curves and nodes edited to get the necessary shapes. Then details were added with a major reliance on fountain fills. Also, the Weld, Trim, Intersect and Combine tools were largely used to create these images.
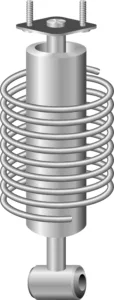
Figure 3
Figure 3 began by drawing a coil spring wrapped around a shock absorber. When I was happy with that image, I chose to add some additional details to the image. The fun of this kind of drawing is that you can include as many or as few details as you wish because it is intended for your own advancement, not for anything else.

Figure 4
Figure 4 is a made-up drawing of a camera. It was purely created from my imagination to use some of the different tools available in the program, such as fountain fills, transparencies, and other drawing tools. This camera does not actually exist and was drawn strictly for my own amusement. This kind of thing can easily be something that enhances one’s drawing skills.
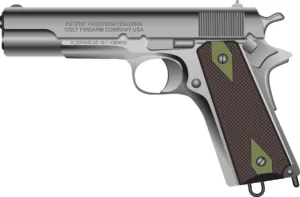
Figure 5
Figure 5 is a drawing of a Colt 45 pistol. I downloaded the image from the internet and chose to redraw the highly pixelated bitmap image into a vector image. Each part of the image was manually drawn, trying to be as accurate to the original as possible. It’s just another example of how to use the various drawing tools in CorelDRAW to depict an object with as much detail as one chooses.

Figure 6
Figure 6 is much like the previous drawing… images downloaded from the internet, then redrawn into a vector image. In this case, two different derringers, one a flintlock style and the other a more modern over-and-under two-shot .41 caliber standard Colt model. On the flintlock image, to get the woodgrain look, I used a bitmap woodgrain fill from the X5 fills included with the program, then duplicated it on top and used a mesh fill to add the necessary highlights, transparencies and shadows for a 3D look to get a somewhat realistic depiction of the image.
The other, later-model derringer, used mostly fountain fills for the visual details it included.
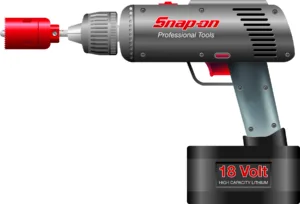
Figure 7
Figure 7 is another imaginative drawing. It is drawn from the memory of my cordless drill and is not a true representation of the actual object it pretends to depict but is only a possible alternative. Actual details are at a bit of a variance to the actual drill. Nevertheless, all the tools used in the program to create this image are valid. Tools used here are mostly fountain fills and a mesh fill for the handle.
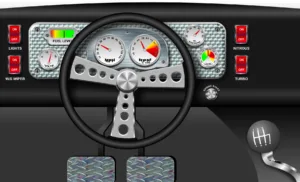
Figure 8
Figure 8 began as a simple drawing of a steering wheel. When it was completed, it occurred to me that I could add more details and the steering wheel image quickly evolved into a more complex drawing of an entire dashboard of a fictitious race car as viewed from the driver’s seat. I used several fountain fills and texture fills to reach this final image. As with most of these kinds of drawings, the intention was not for production, but only to enhance my skills with the program. Other details could be added… maybe a fire extinguisher and a gas pedal or some such thing… the limitations are only in the imagination of the designer.
Many years ago, while traveling in Europe, I was fortunate to have visited a lot of the great European art museums in Austria, Germany, France, Belgium, Italy, Spain and other countries. Viewing all the artwork of the masters was an inspiration for me to strive for excellence in my artistic endeavors. Though not on the same scale as their fine art, as graphic artists, we have a certain legacy in the art world. My hope is that the images I have included here inspire some to reach a new level of creativity in their production of the visual arts.
For many years, I painted signs and designs by hand. When I first encountered CorelDRAW, I found a whole new way to create the drawings that had previously taken hours to produce. It seems only prudent that one would take advantage of the numerous tools available in the program to enhance one’s creative abilities.
As always, I appreciate hearing questions, comments, and insights at dezender1@gmail.com All questions will be answered as soon as possible unless I need to search out an answer, then will be addressed as soon as I procure the answer.