Do you have a pair of plain canvas shoes that need a little pop? You are in luck! Canvas is one substrate that you can hydro dip directly to, but the prep before printing is critical!
What you need:
- Clean, untreated canvas shoes
- Painter’s tape or masking tape
- Application tools (we suggest a cuticle pusher)
- Hydrographic film
- Fixative intercoat lacquer
- Activator
- Large container of water
- Thermometer
- Well ventilated area
- Respirator face mask
- Gloves
- Rinse container or sink
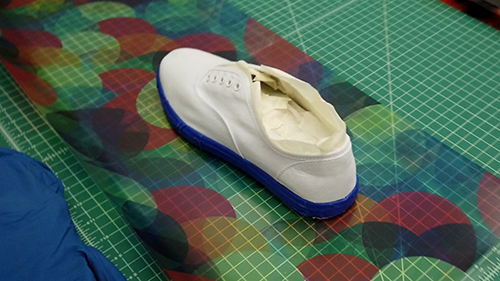
Choose a pair of canvas shoes that is untreated, unwaxed, and light in color. The base color of the shoe affects the outcome of your dip. I suggest white for most dips. However, experimenting with different base colors can always be fun too. Typically, priming with a base coat is needed when working with hydrographics. That is not the case with canvas.
Once you have a pair of shoes, prepare them for dipping. Remove the shoelaces and tape the sections you don’t want to be decorated. After taping the outside of the shoe, be sure to stuff or securely tape off the inside to avoid air bubbles. Remember to use precision tools to make sure the tape firmly adheres to the substrate. We suggest using a cuticle pusher for the hard-to-reach spots, but any tool that gets the job done will work.
Once your shoes are properly prepared, it is time to prepare the film.
10 steps to prepare your hydrographic film
- Choose a watertight plastic, glass, or aluminum container that is deep enough to fully submerge the shoes you are hydro dipping. It should also be long and wide enough to leave 5-6″ (approximately 12-15 cm) between the edge of the container and the shoes.
- Measure the size of the shoes from every side you wish to cover and include an additional 4-5″ (approximately 12-15cm) of the hydrographic design on each side. Be sure to account for the curves and height, or thickness, of the shoe from sole to tongue. With clear backing still attached, position pre-printed film over the shoes to be sure the design will cover the whole surface. Cut the film accordingly. Make sure the film remains dry during this process, as getting it wet could cause the image to warp. If using pigment-based inks, apply a light coat of the fixative intercoat lacquer to the printed side of the hydrographic film.

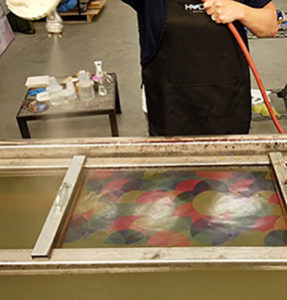
(Image courtesy Hydrokon) - Fill the container approximately ¾ full with water. Water temperature must be around 90 F. Be sure to use a thermometer to maintain this temperature.
- Remove the clear backer from the film.
- With the printed side up, carefully pick up the film and bring the opposite sides together, creating a triangle and holding it like a sling.
- Place the bottom of the sling onto the middle of the surface of the water, and slowly allow the sides to lay flat on the water.
(Image courtesy Hydrokon) - Use dams or masking tape to create a containment area around the image. (Note: If using masking tape, you can either place tape around the edges of the film or lay tape gently on the water around the film. If taping the film, cut the tape at the corners and every few inches to allow for film expansion.)
- With dry hands, push down lightly on the film if any air bubbles appear between the film and the water.
- Using a stopwatch, let the film dwell on the water for 60-75 seconds. This allows the film to properly hydrate.
- Next, put on your respirator and spray a “cool” activator evenly over the film. Once coated, the film should take approximately 5-10 seconds to turn into liquid ink on the surface of the water.
When the film is fully activated it will have a distinct glossy appearance and will expand to fill the containment area.