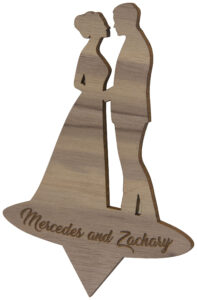
The products you can make with wood are only limited by your imagination. Signage, wall decor, cake toppers, magnets, and ornaments are just a few ideas — and there are so many options available to you, depending on how you want the finished product to look!
First, choose from cherry, walnut, or maple wood. Next, begin laser cutting the shapes you need using the following settings as a starting point:
| 35-watt | Raster | 40S, 90P, 600 DPI |
| Vector | 15S, 100P, 1,000hz | |
| 60-watt | Raster | 70S, 50P, 600 DPI |
| Vector | 20S, 50P, 1,000hz | |
| 80-watt | Raster | 85S, 70P, 500 DPI |
| Vector | 2S, 75P, 1,000hz | |
| 100-watt | Raster | 85S, 50P, 400 DPI |
| Vector | 20S, 60P, 1,000hz |
Note: Every laser machine is a little different, so you’ll want to dial in the best settings for your specific laser to achieve optimal results.

Below are some other tips and tricks to keep in mind:
- You can use double-sided tape or wood glue to create layered pieces for variety
- If both sides are unfinished, they can be lasered, printed, painted, or stained to get the finish you want
- To reduce smoke residue when lasering, use a mid to low tack tape to mask the wood for vector cutting
- If your laser offers the option of air assist, setting it on low can help prevent the spread of residue, as well as lasering from the bottom of the design to the top
- Use a damp cloth to wipe off any residue you may encounter
It really can’t get much easier than that! Deciding on your initial designs will probably be the most difficult part of the entire process.
In the end, you may create a design that becomes very special to someone.
Learn more
If you have questions about lasering natural wood, call 1-855-537-2228 to speak with a member of the JDS fabrication team.


