With the many print and graphics shops now expanding into car wraps, I thought it would be a good time for a refresher on plotter blade selection and setup. The key items in the plotter setup include: blade angle and offset, blade depth, and blade pressure speed.
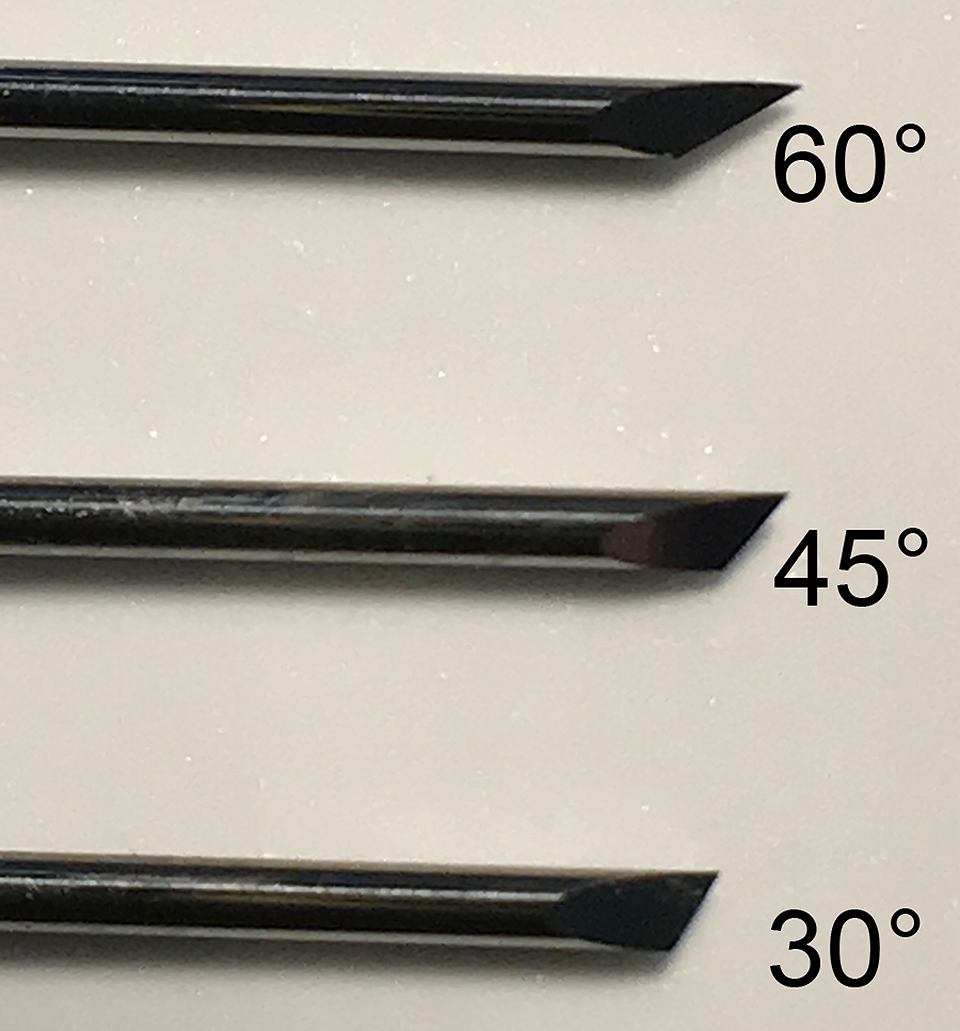
The first step is to choose the correct blade angle. Depending on the type of media you are cutting, you want to change the blade’s angle to optimize the quality of the cut. Without a nice, clean-cut, the result will be a graphic that is difficult to weed. The blade angles available vary by manufacturer. The three most common that I see are 30-, 45-, and 60-degree angles. However, some angles fall between these, such as a 37-, 54-, and even a 57-degree blade. Here, I’ll focus mostly on the 30, 45, and 60.
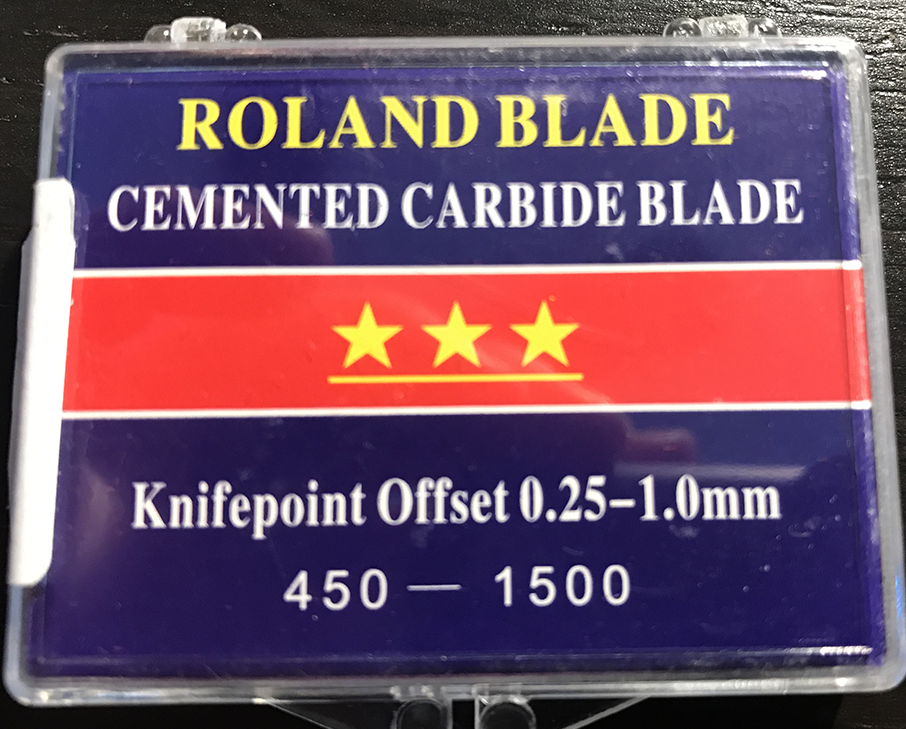
Blade selection
The 30-degree blade has the lowest angle with the least amount of blade exposed. The 60-degree blade has the sharpest angle and has more cutting surface on the blade, making it ideal for thicker materials.
When choosing a blade angle, the goal is to select one that will cut through the material and adhesive. If the blade angle isn’t high enough, the blade can actually drag through the material and create “vinyl ears,” causing a poor quality cut. Inversely, using a 60-degree blade on everything is a waste of a blade, as not all of the blade’s cutting area is used. You will also need to change blades more frequently since the sharper angle blade will dull faster.
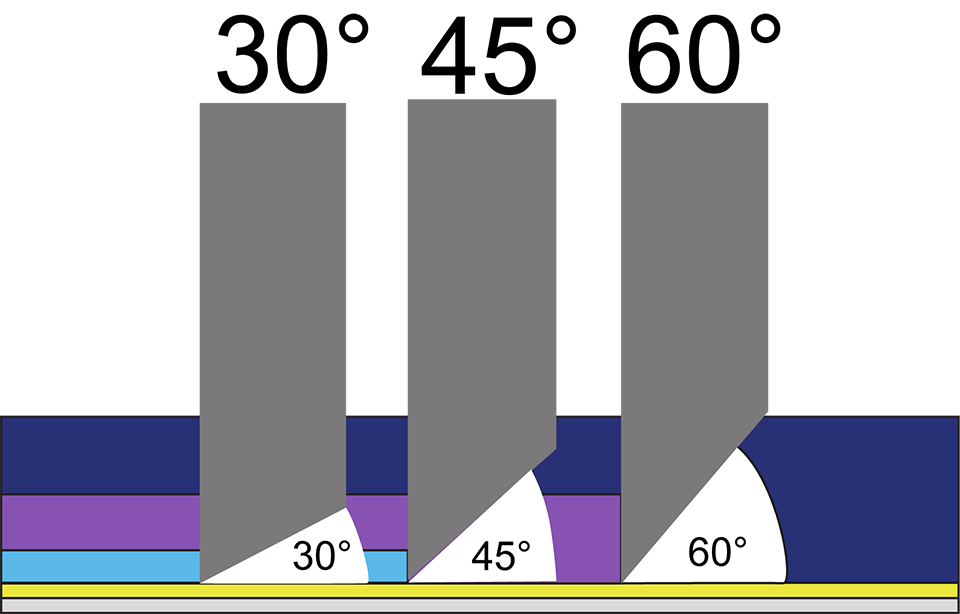
A good rule of thumb is to use a 30-degree blade for films that are in the 1-2 mil range. A 45-degree blade would be good for films that are 2 mil up to around 5 or 6 mil, and then a 60-degree blade is good for films that are thicker than 6 mil. Beaded or prismatic reflective films are best cut with a 60-degree blade. If you switch a lot between 2 mil cast films and 3-4 mil calendered films, the 45-degree blade might be a good all-purpose blade for everyday use.
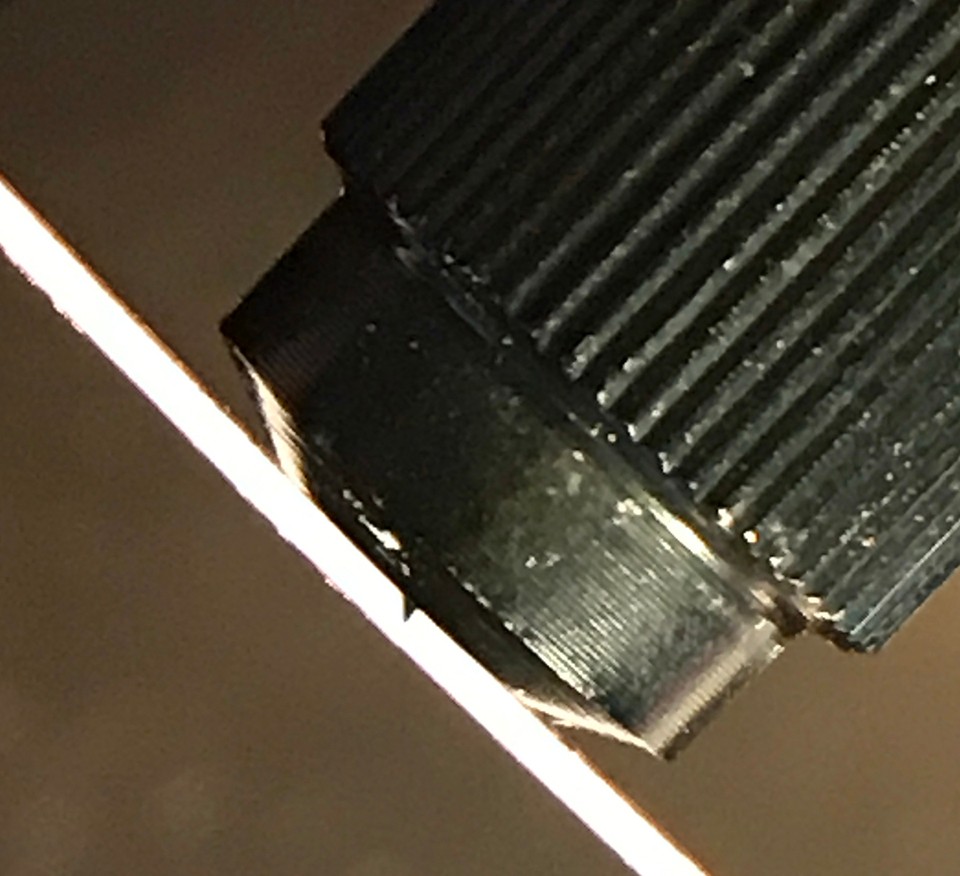
It is important to note that when the blade angle is changed in your cutter, you need to also change the offset. This information is generally noted on the blade package.
When the blade is placed in the holder, you must manually adjust how much of the blade protrudes from the blade holder. It is a common mistake to have too much of the blade exposed. A good starting point for blade depth adjustment is approximately ½ of the thickness of a credit card. The most important thing is to have enough of the blade exposed to cut cleanly through the film and adhesive. If you are cutting thicker materials, you may have to expose slightly more of the blade.
Once the blade depth is adjusted, the blade can be put back into its holder, and then the blade pressure needs adjusting. Since every cutter is different and pressure varies based on blade age and angle, I recommend starting with the cutter manufacturer’s default settings and adjusting from there. You can use the test cut that is embedded in the cutter software. There is usually a “cut test” option. The objective is to set pressure where the blade is going through the film and adhesive layer but not cutting into the liner.
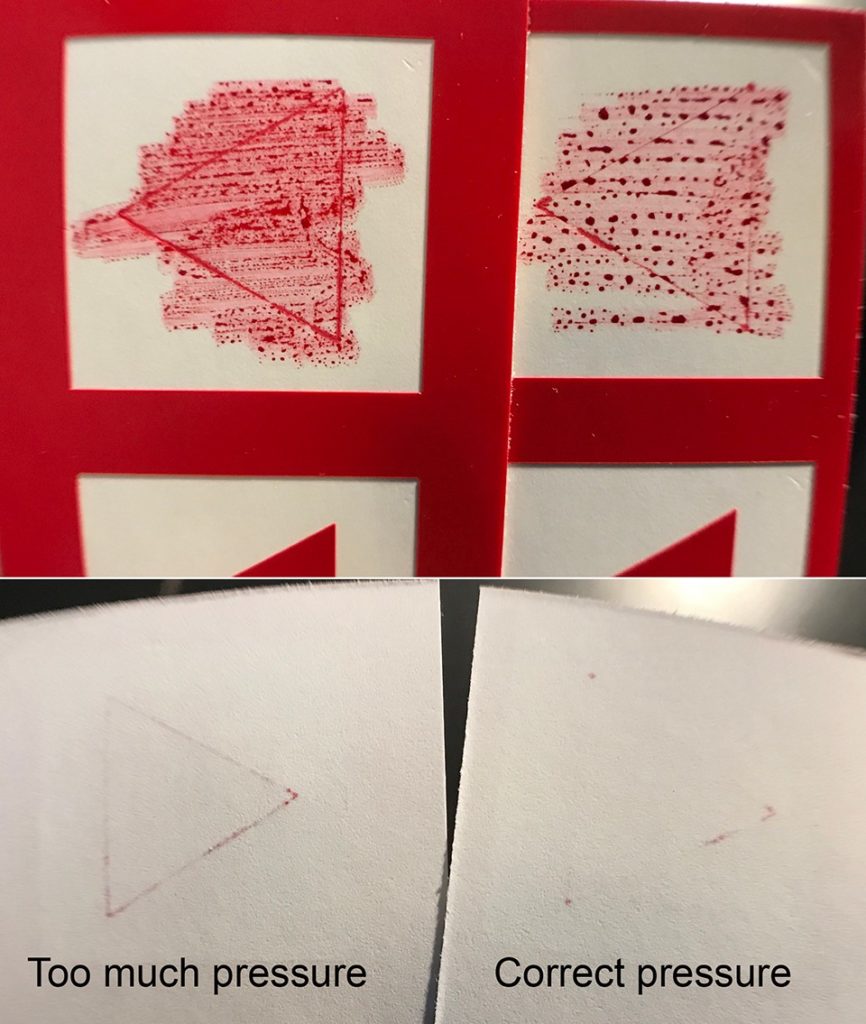
If the blade pressure is too high, you can score the silicone release layer on the liner. When this happens, the adhesive may grab or adhere to the paper fibers and cause the paper to split at the release layer (see below). If this happens, the pressure needs to be reduced.

Start by using the test cut feature on your plotter. You should be able to weed away the square and leave the triangle behind without lifting any corners of the triangle. You can see in the image below that I was able to pull the square away cleanly. However, when I tested the cut depth with my felt-tipped marker, I found that I had actually scored the silicone release layer. Note how the ink bled through to the paper. I made several adjustments reducing the pressure each time until I got to the point that the film did not weed properly. Then, I went back to the last setting that cut well. I also tested each cut with the felt-tipped marker to see if the ink was bleeding through the paper.
As with the blade pressure, the actual number for speed is likely to vary by plotter model and the blade’s age and angle. My recommendation is to start with the default setting, and if you notice the blade skipping or edges lifting, you should decrease the speed.
If you go through this process and cannot get a good cut, I recommend trying a fresh blade and going through the setup process again. It is also important to note that you should run a test cut each time you put in a new roll of film to ensure you have the cutter set up correctly.