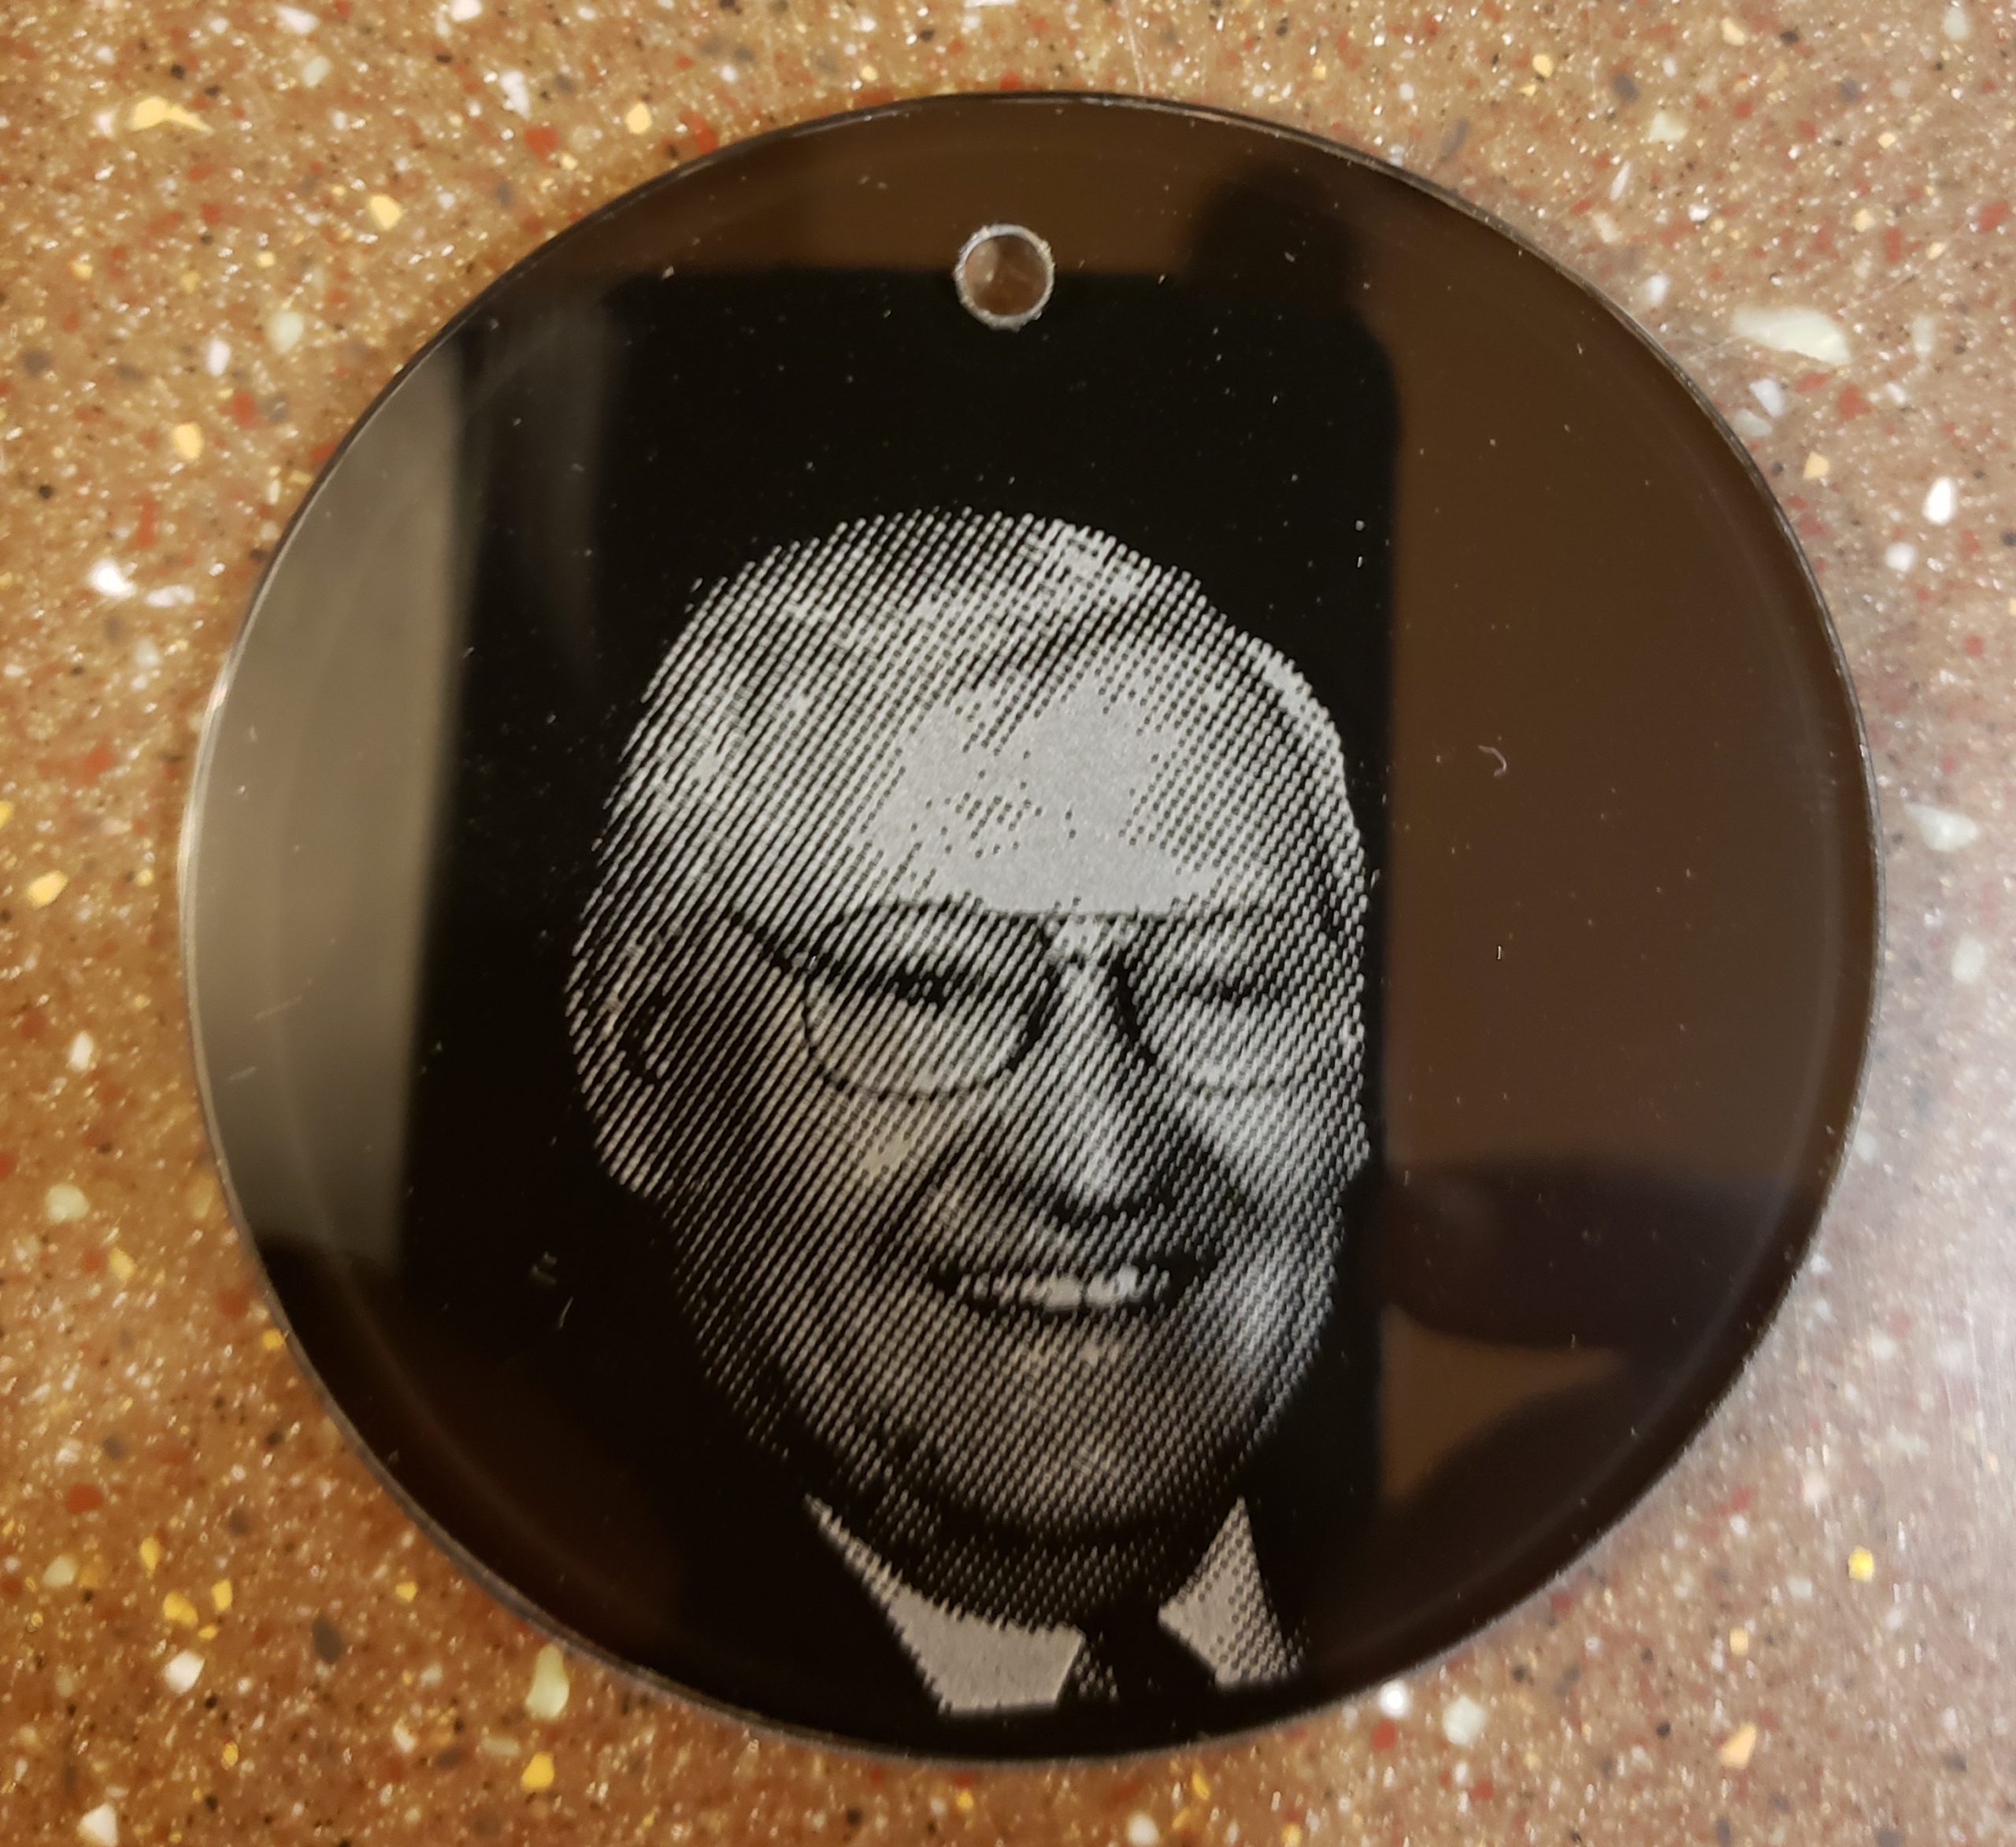
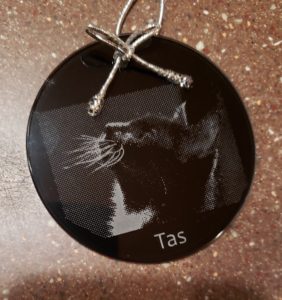
Over the last few years, I have been etching photographs onto ornament and sun catcher blanks made of jade glass or optical crystal. Topmost PRISM Crystal has some nice options, including ones with a color coating permanently adhered to the back. These became available about the time I started getting requests for memorial mementos, small items with photos of departed loved ones. The effect of the etched face on the front of an ornament with a black background is superb. They have become the single most popular special-order item in my portfolio. Here is how I do it:
The stencil
First off, I work up a photograph in Photoshop and print it onto a use-specific transparency. I then shine a UV light through the transparency to a film created for the purpose. Several companies provide the equipment, supplies, education, and technical support for this process. I use IKONICS Imaging.
The blank
Glass and crystal ornaments are the most popular choices, but the developed stencil can be applied to a wide selection of items. Glasses, plates, and glass for picture frames are great options. Compound curves do not lend themselves well to this process.
The procedure
- Protect the back with tape or film to avoid scratches.
- Remove the protective film on the adhesive side of the developed stencil.
- Mist lightly with distilled water to help with positioning adjustments and air bubble removal.
- Position the stencil carefully on the blank, then squeegee from the center to each edge to remove air bubbles and excess moisture.
- Let stand 5 minutes, then remove the stiff carrier B-sheet.
- Allow it to set. I like to leave the project for 1-2 hours, but do not let set for more than 6 hours.
- Mask edges with tape, sealing well.
- Etch using 120 grit (or finer) silicon carbide, delivered at approximately 30 PSI (will vary depending on etching equipment). I strongly recommend an enclosed unit with interior lighting, a significant vacuum unit, and pressurized abrasive flow.
- After the flow is established, keep the nozzle perpendicular to the glass between 4-6″ away. Move the spray evenly and slowly across the glass in a smooth, overlapping pattern. Be patient. It takes a bit for the stencil to set and for the clear parts to break down. You will start to see the subject emerge. Carefully etch until the photo is complete, being mindful not to overcook the stencil.
- Clean by dropping into a bath of medium-hot water with a few drops of dish soap. Soak for 5-10 minutes. The masking will usually fall off, but the stencil may need a bit of a rub. Fingers work best to avoid scratching. Dry and polish with a soft cloth.
Finally, add a hanger. It usually comes with the ornament blank, and the treasure to commemorate a lifetime has been created.
This process lends itself well to multiples. I find that batches of 12–18 pieces are comfortable to work through. I’ve done as many as five batches in a day.