When working on your designs, one key element type that is often used is the fill stitch. These fills are used to cover larger areas within your designs and generally have a rather flat look to them when against more sculptural satin stitches. Fills are created by running a series of straight stitches near one another until the area is fully covered. Imagine using a pen and drawing lines back and forth to fill in your shape. This is exactly what a fill stitch is doing for you. It is coloring in the region using lines of thread.
In the most basic form, a fill is created by defining (1) a wireframe shape, (2) a start and stop point, and (3) a stitch direction. When these three things are combined with the default properties of your software, you have provided enough information to create a basic flat fill. But what do you do when you want to add some definition to a filled area so it is not quite so flat? In a previous article, we covered using pattern fills and even creating custom pattern fills. Now let’s take a look at some more options that can be used to add some life to the fill areas so they are more dynamic and visually appealing.
Using a fill island to define a separate fill region
The fill island tool creates a closed shape within a fill element. Instead of removing stitches from this shape, the stitches are defined within a closed shaped. The fill island properties can be changed by accessing the object properties page while the island is selected. You can modify some of the fill parameters within the defined closed shape by accessing the object properties of the shape.
To add a fill island to your fill area:
- Select the fill you want to add the island into
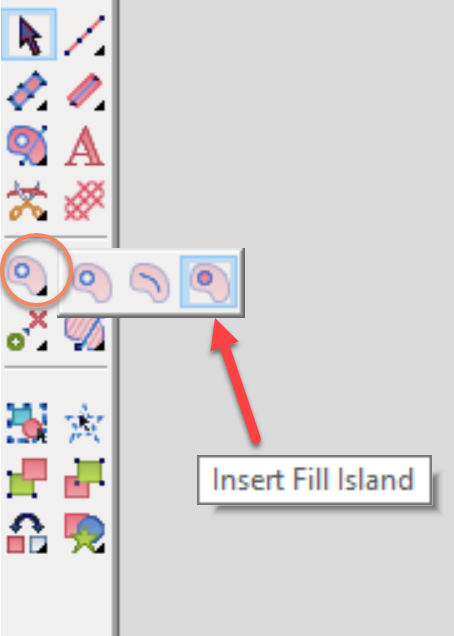
- Left click and hold the insert hole icon
- Select the third icon which is the fill island tool
- Draw the fill shape within your fill area
To edit the fill island, select the island with a left click and then double click on the region. This will bring up the object properties for you to adjust the region.
Adding split lines
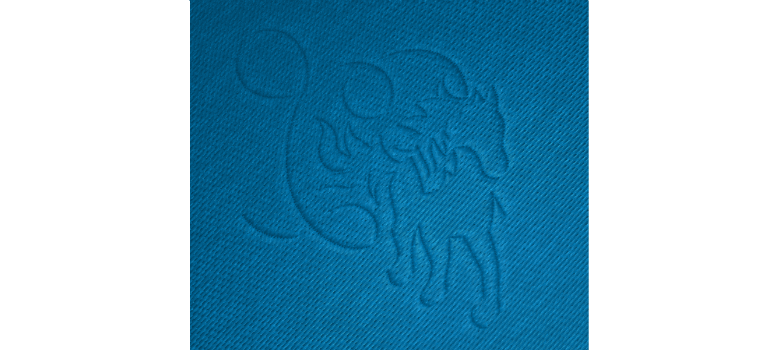
The split line tool creates a line inside an element. The needle penetrations of the stitches are forced to fall along this split line creating a visible, almost debossed line in the stitching. To add a split line to a fill region, you select the fill, click on the insert split line icon in the toolbar, and draw the line you want to be created in the fill region. From something as simple as a curve to a more complex shape like the horse, you can add a lot of detail and definition to the fill area using this tool.
Take some time to play around with the fill island and split line tools to see what they can do and explore what you can create by adding these to your toolbox. Beautiful fills await you. Enjoy!


