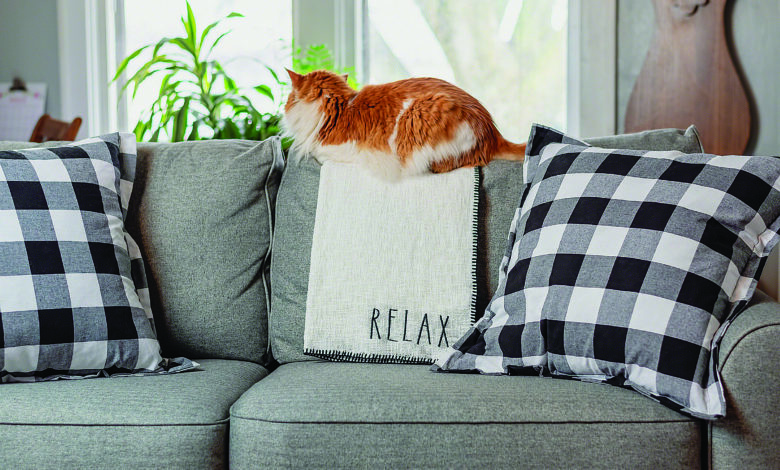
With the holiday season comes a lot of red-and-black buffalo check pattern items, ranging from blankets to shirts, decor, ornaments, and even down to the little gift tags. Gingham and buffalo check are similar, but the difference is that the buffalo check (or buffalo plaid) has a larger pattern size as compared to gingham prints. Gingham is typically a smaller check pattern.
Buffalo check, when used with white and black, becomes more trend-worthy. It gives a hint of farmhouse roots (which remains popular) while still appearing in clothing on the fashion runways of Dior. Buffalo check can be an easy addition to your dye-sublimation options to show customers you are on point and have ever-changing great products to offer.
How to create a buffalo check pattern
You can search around and purchase a commercial-use version of the buffalo check pattern, take a chance and download a free version (hopefully sans virus), or make your own. I’m going to show you how to create one. This basic method for creating the pattern in Adobe Illustrator can also be applied to CorelDRAW.
Step No. 1: We’ll begin with a new file that is 12″ X 12″ in dimension. In your colors on the toolbar, select black for the fill and the stroke to be empty (with the red diagonal line). Select the Rectangle Shape tool, then click on the page for the window dimensions to pop up. Type in 1″ for the width and 1″ for the height, or if you are working in pixels, try 75 X 75 px size. This square should be filled with black and have no stroke on it.
Step No. 2: Now we are going to make two copies of this box to form an upside-down capital L shape. Hold down the shift + alt keys to drag to the right of the other box. This should line up exactly on the top and between the boxes. You can use the Align function to double-check by selecting boxes, then click on the Line Up at Top icon (it’s two boxes with a line at the top), the icon that shows the two shapes touching each other horizontally.
Step No. 3: Now we’ll add in our third box. Select box one, hold down your key combo again to copy and drag a copy of it down so they are right on top of one another. Again, you can double-check with the Alignment function. Once you have your three boxes, change the transparency of two of the boxes. Have your Black Arrow (general selection tool from the main toolbar) selected, and from the top menu of Windows, go way down to the bottom to find Transparency: Windows>Transparency. A new window should now be open.
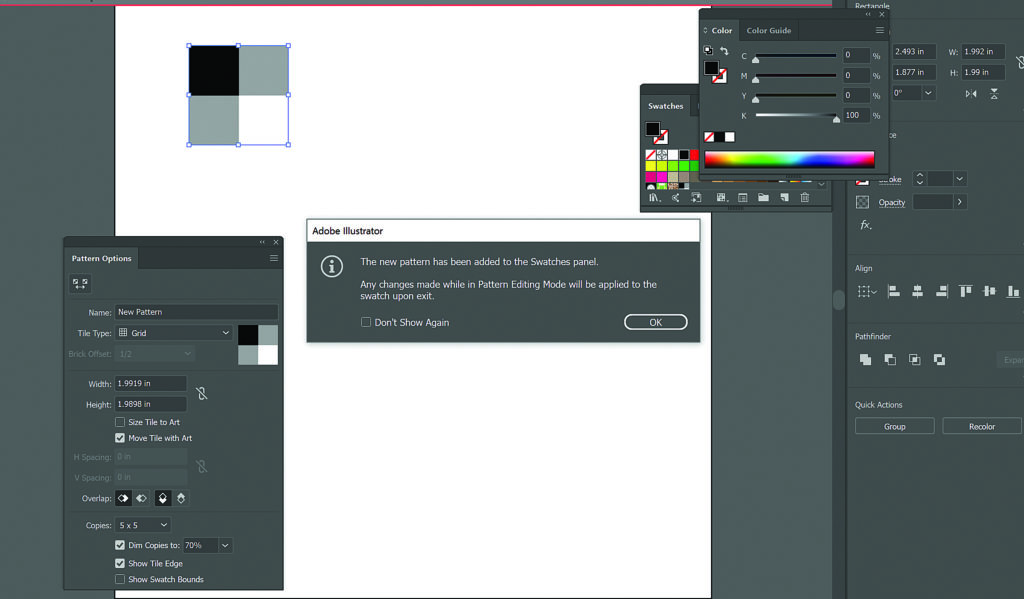
Select the second- and third-created boxes and lower the opacity to 40%. At this time, confirm the Swatch palette is open. If not, go to Windows>Swatches. Back to making the pattern, select all three boxes and from the top menu bar scroll to Object>Pattern>Make.
Two windows will pop open, asking if it is okay to add this as a Swatch to the Swatch menu. Click OK, and another pops up with Swatch Pattern details. Name your pattern; in the example shown here, I called this BW (black and white) Buffalo Check Pattern. Set the Tile Type to Grid (if it is not already). The sizes should be the exact same in the box for dimensions, so if it’s off by even a little, now is the time to type in any adjustments so they are the exact same.
You’ll want to check the following boxes:
- Uniform 50%
- Transform patterns
- Preview
- Move tile with art
- Show tile edge
- Dim copies (I use 60% but use whatever you’d like to preview the pattern)
- Copies 5 X 5
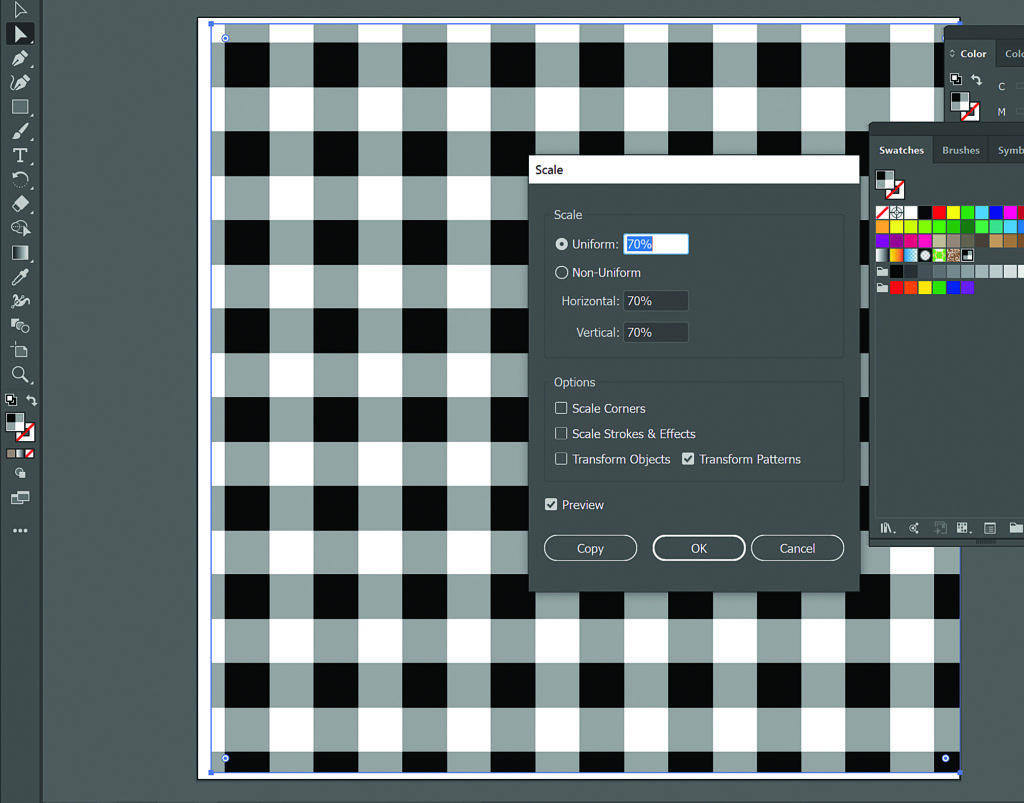
Step No. 4: Once you’ve gone through this window, you can simply close it by clicking on the X in the top right of it. Now go out of that workspace area. See the gray text on the top of the bar? Go to the far left to exit out of the editing mode or just keep clicking on your background page. You should see the pattern loaded in the Swatches menu.
Select the Square/Rectangle Shape tool, double click on the page, and punch in 12″ for the width and height. Then with the box selected, change the color to the swatch pattern by simply clicking on the pattern in the Swatch menu.
Now what?

Now that you have the steps on how to make this popular pattern, what are some products and ways to give it a different feel? First, stick to more of the black-and-white combo, or go for a color that’s not red. Try different color combinations associated with seasons, holidays, or whatever the customer prefers.
Take the buffalo pattern and put it inside a silhouette shape. Use the pattern as a frame around a photo on a metal print or the background with a family name on top for a great-looking serving tray.
The buffalo check pattern is not one to be dismissed and it’s surely not going away any time soon. If you haven’t already, get a hold of this trendy pattern and use it as an opportunity to grow your business and test out some new markets or dye-sublimated products.