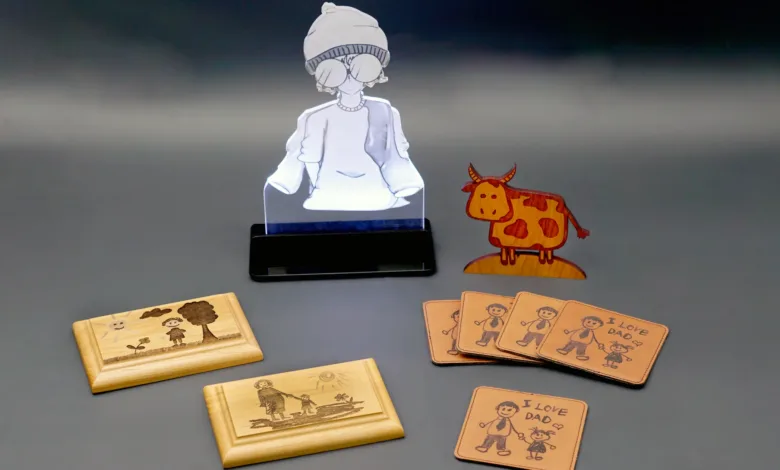
There are lots of ways to use a laser engraver to personalize gifts, but the most sentimental gifts can be created by converting children’s drawings and engraving them onto various products and materials. See how easy it is by following the examples below.
Creating a custom keepsake product
- Take a straight-angled photograph of your drawing so that it can be properly scanned and digitized. Good lighting is key, so be sure to adjust brightness and contrast on the phone if necessary. Save the image to an easily accessible location.
- Optional: Use an online software that will remove the white background from your design and covert it to a PNG file.
- Place your workpiece into the laser machine and focus the laser.
- Open your laser software and import your image file. If you’re using Ruby laser software, you can easily drag the photo into the “Prepare” screen, and the image will automatically be converted into grayscale to show it will be engraved.
- Position and scale your graphic how you want it to appear on the object. If you’re using a laser with an overhead camera, like Vision Design & Position, having the white background removed from the image will make it easier to position.
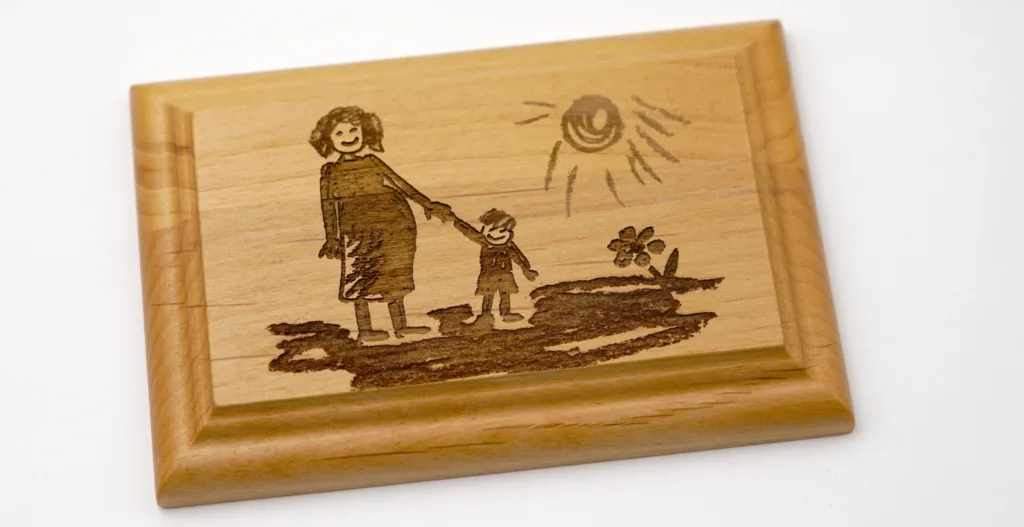
- Select the correct material parameters in your laser software and send the file to the laser for processing. In this example, we are using a small wooden plaque. The laser will begin engraving the design into the plaque automatically.
- Once the laser has finished processing, remove the sheet from the laser device and wipe the wood with a lightly moistened cloth. This will remove any dust or debris created during the engraving process.


This idea can be easily replicated on a number of products or materials, including coasters, gift boxes, cards, canvases, and more.
Make a freestanding art piece
- Follow steps 1-2 in the previous section.
- Open your design software and import the drawing. Use a trace feature to produce a traced line around the outside of the graphic. If you’re using Ruby software, select the “Trace” feature at the top of the page and then select “Outer Contour Only.” This will produce a traced cut line around the outside of the design.
- Next, create the base for the drawing so it can stand on its own. In Ruby laser software, this can be done by drawing an oval at the bottom of the cow image.
- Then select the oval and the cow outline and weld them together by choosing the “Union” button at the top of the page in Ruby. Proceed to draw a rectangle halfway down the oval and select the letter C on the keyboard.
- Finally, select all of the graphic, base, and rectangle and click the “Difference” button at the top of the page. This will trim a flat base into the red outline. Select the Esc key to turn off the dash line of the rectangle, and then select the rectangle and use the Delete key to remove it.
- Fit the graphic to the design, create a job, and send it to the “Prepare” screen.
- Take the graphic and scale it to the wooden piece using the overhead camera system.
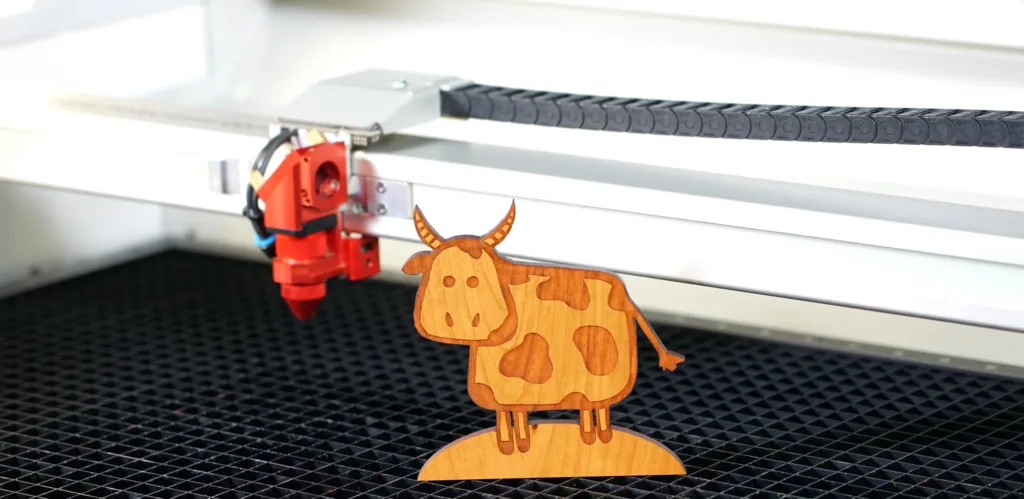
- Select the correct materials parameter from the database in the laser software. In this example, we’re using a solid cherry wood sheet. Push the drawing file to the laser and press “Start.”
- Once processing has been completed, clean the surface of the wood with a lightly moistened cloth and remove the application from the laser. Now you have a special piece of freestanding art to showcase!


From digital drawing to custom LED-lit art display
- Open Ruby or your preferred design software and drag the saved digital design file into the “Design” screen. Since this image will be engraved into acrylic — and cast acrylic engraves white — the graphic will need to be inverted. This can be done by selecting the drawing and then selecting the “Invert”
- Next, select the “Trace” button and “Outer Counter Only” and proceed to trace the graphic.
- Add an oval at the bottom of the image to create a piece to fit into a light base. Position the oval so that the image is centered. Select both “Red” layers.
- Next, select the oval and the drawing outline, and weld them together by choosing the “Union” button at the top of the page. Proceed to draw a rectangle part way down the oval base on the screen, choose the “Red” layers, and weld them together using the “Union” button once more, then select “Create the Job.”
- Place your acrylic in the laser. Scale and zoom the image to fit using the overhead camera system.
- Select the correct acrylic materials parameter from the database in the laser software and send your file to the laser for processing. Once processing has been completed, remove the application from the laser and clean the surface of the acrylic with a lightly moistened cloth.
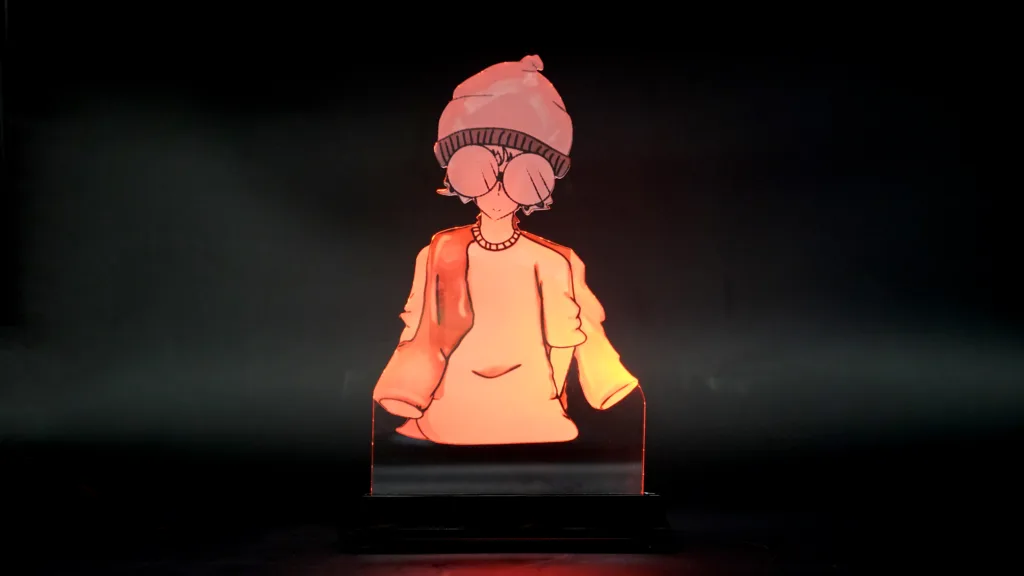
- Finally, place the acrylic application into a light base and turn it on to display the completed project!


There you have it; three easy ways to make long-lasting keepsakes with a laser engraver that stand the test of time. Use these examples as inspiration to create your own mementos for friends, family, and customers! You can watch the full video tutorial here.