Fiber Laser How-To: A Summertime Project
Braden Todd of Glassmith2 covers how to personalize BBQ sets and bottle openers just in time for the start of summer.
Now that it is finally the season to enjoy the outdoors and grilling, it is a great time to gear up for the sales that come along with the beautiful weather. A few of the possible items we can all market as awards and personalization shops are BBQ sets and bottle openers.
In the past, our bottle openers have been strong sellers and our customers love that they are all made in the USA. Previously I avoided making a lot of BBQ sets because I couldn’t mark the metal well, and I did not like the idea of selling a food-related item that required a chemical to create a mark. Granted, I could have been overly cautious, but flipping organic beef burgers with something other than pure stainless steel just didn’t sit well with me.
Now that we have our fiber laser, we can engrave directly onto the metal with no extra chemicals, and we can simply anneal food-related items to help ensure that no bacteria start to grow in an engraved/rough surface. Since we are talking summertime barbeques, I thought a good project for us to walk through is a BBQ set with a nice hexagon pattern on the handles, and some bottle openers with an American flag on them. Note that I use CorelDRAW and a Radian RL-GT3 60-watt MOPA fiber laser; consult your machine’s guidelines for setting recommendations.
BBQ Set Tutorial
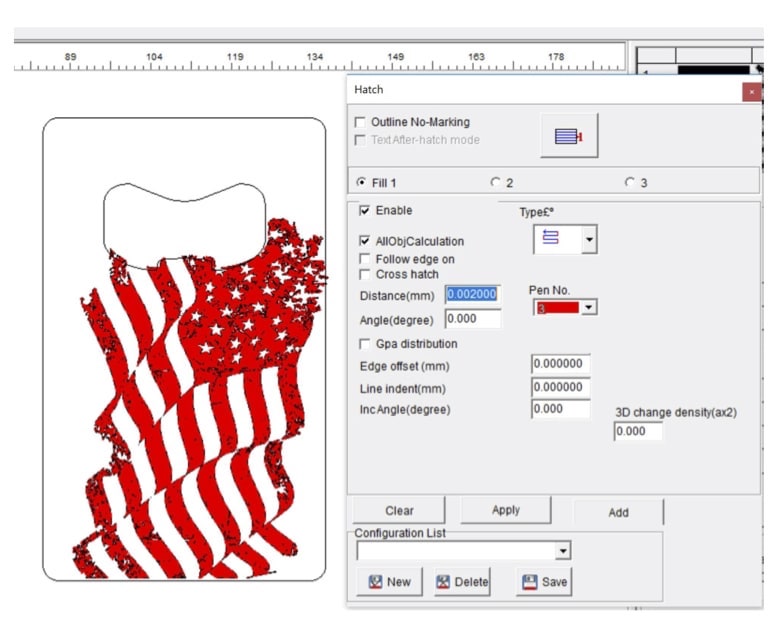
To make my BBQ handle design, I used CorelDRAW and made a pattern from hexagons. I measured the width I wanted the design to be on the handles as well as the length. Then I made a rectangle in CorelDRAW, laid it over my hexagon pattern, and selected both images. With both graphics selected, I then selected Intersect to create an image the same size as my rectangle/desired graphic shape. Once I had the properly sized image, I saved it as an AI version 8 file to then import into my Radian Laser Studio software.
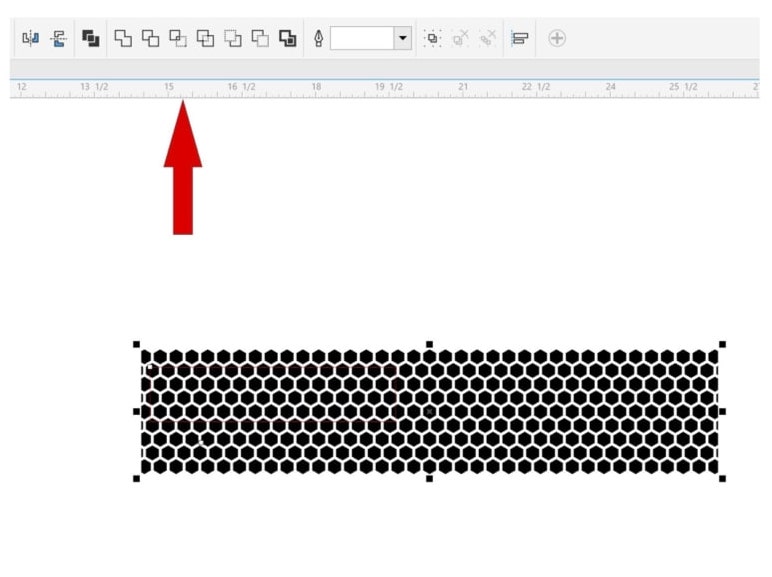
Step one in creating a hexagon pattern for the BBQ set. (All images courtesy Braden Todd)
I wanted to do an anneal mark, so I set my hatch spacing at .002 mm. This spacing is much slower than an engraving, but it worked wonderfully for this project. I found great black results at 900 mm/s, 35% power, 500 KHz, and a pulse width of 5.
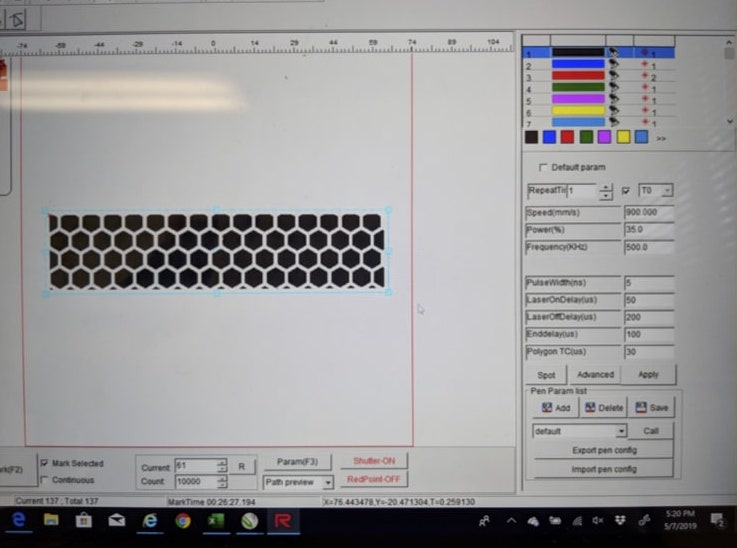
Settings used to engrave the BBQ set.
I originally planned on engraving the spatula portion and the forks of my BBQ set, but I decided to make this project a little harder than that. My original concept was to do a nice black anneal mark on the two pieces – this would have looked great and been food safe, but a flat mark is just too easy. After some thinking, I thought, “What would look better than some hexagon patterns wrapped around the handles and American flags on bottle openers!”
Engraving around the curve on the BBQ set handles is where my fiber laser’s 3-D capability really came in handy. By taking a few measurements and plugging them into the 3-D software that came with my system, I was able to wrap my design around the curve of the handles without needing a rotary device or any other special tools. After approximately 10 minutes, I had my design imported, hatched, and converted to a 3-D file and was ready to anneal my handles.
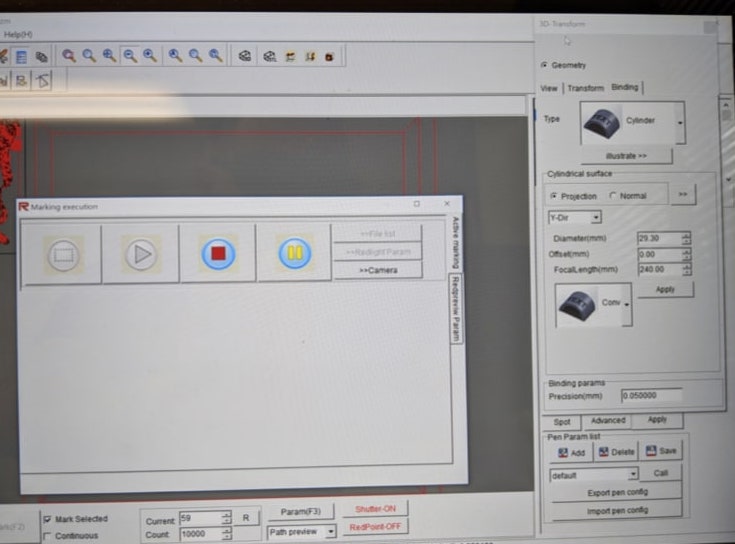
After approximately 10 minutes, I had my design imported, hatched, and converted to a 3-D file and was ready to anneal my handles.
After I had my design ready to go, I aligned each tool using the red dot pointer and path preview option. A little tip on alignment: use the out of box preview mode on your red dot to help align your piece and then use the path preview for a final check. For me the large, steady rectangle made it much easier to initially line up and straighten out each tool.
Luckily, the fork tool laid flat and needed no extra propping for marking. The spatula did not want to lay level at all; to combat the tool’s desire to flip and rotate, I stacked a series of stainless-steel discs up to brace the tool level. I used 2-inch diameter discs that vary in thicknesses and allow us to build our own unique brace solutions.
Once aligned and level, it was time to hit go and watch all my math, stacking, and graphic skills turn into art. I am ecstatic with how this BBQ tool set came out!
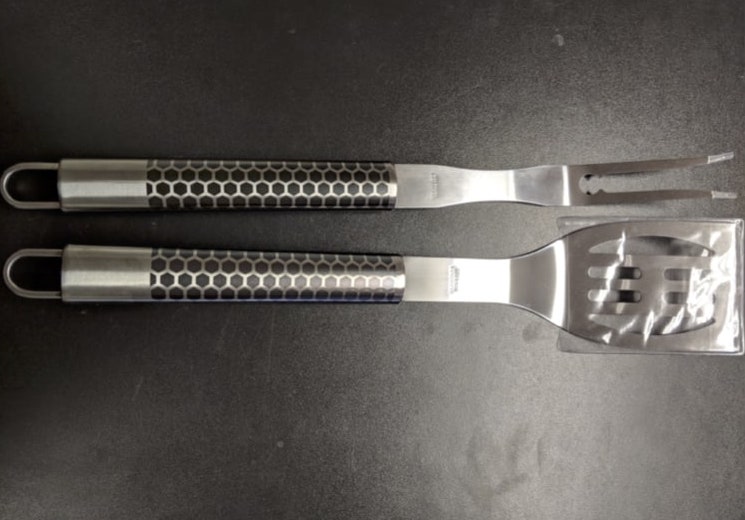
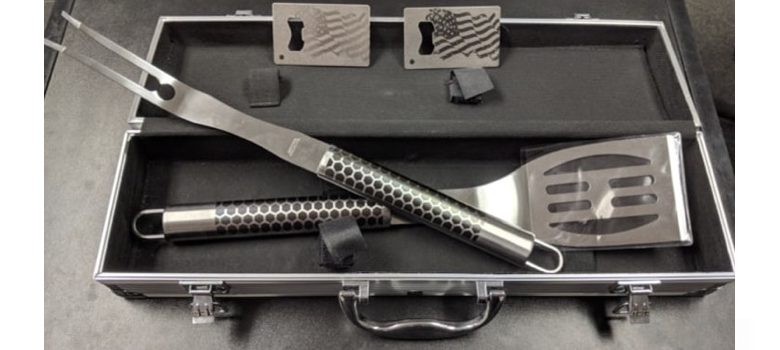
Final outcome of the BBQ set project.
Bottle Opener Tutorial
Next up were the bottle openers. I decided to make a set of openers that we cut in-house and engrave them as a “his and hers” set. To accomplish the difference, I engraved one opener black and then did some testing and engraved the other opener pink. That’s not a typo. Utilizing the MOPA features in our laser, I was able to control the beam enough to make my mark pink.
To set up the art, I used the same Intersect process as before, but I used the opener’s outline to trim the flag design.
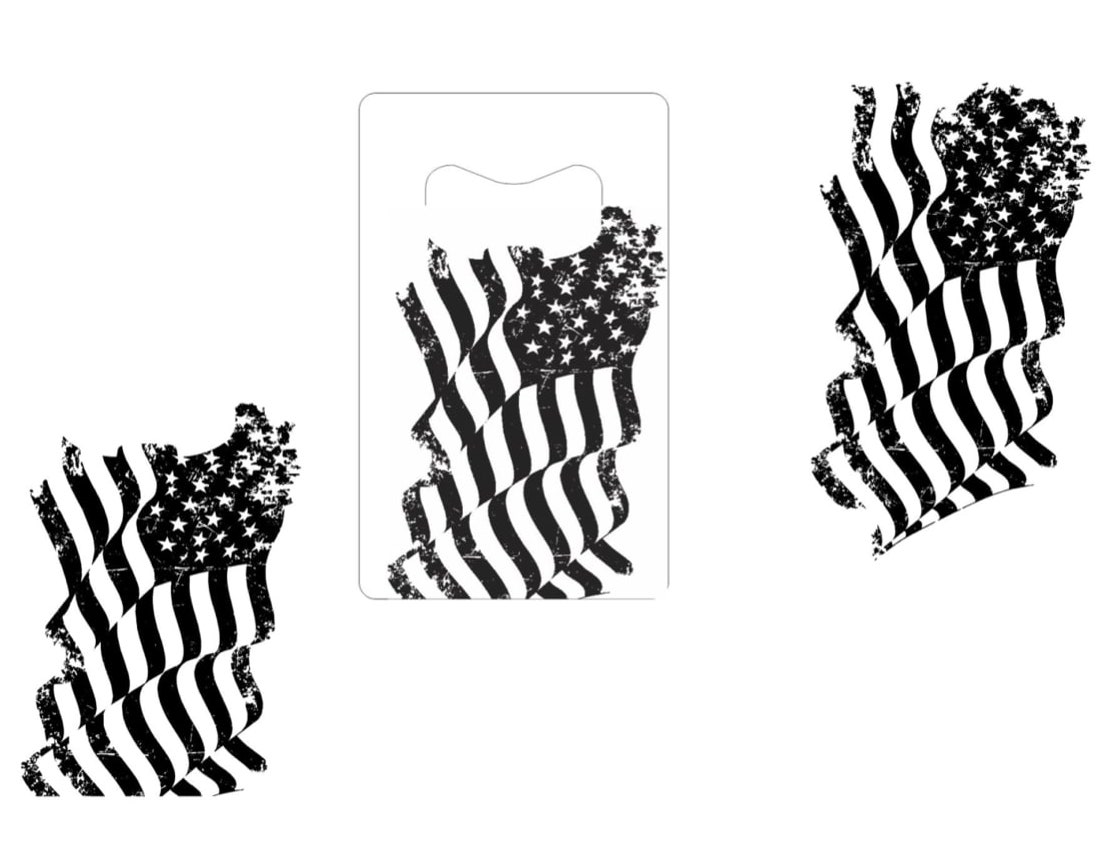
Artwork for the bottle opener project.
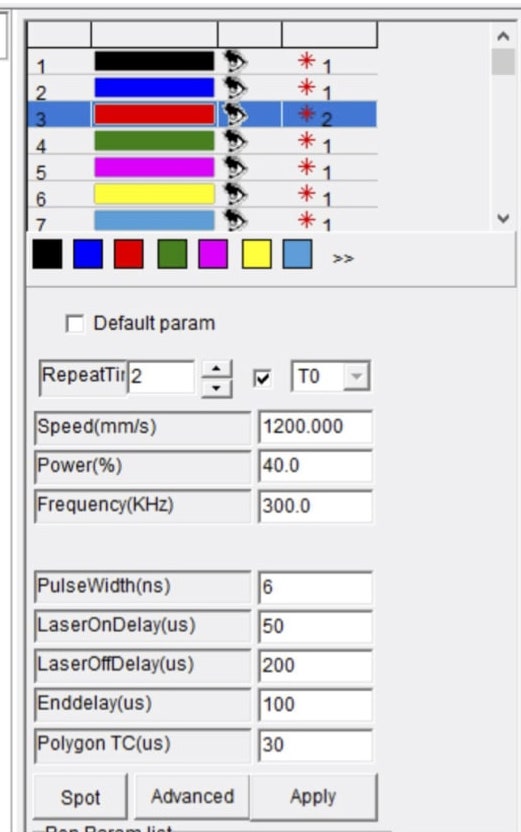
When I imported the file into the laser system, I used a .002 mm hatch again, but had to do a lot of other testing to find the correct color marking. I wish I could give everyone the key to pink on stainless steel, but the settings will vary between machines and even just by material thicknesses. The only way I was able to find and use this color was by testing different power, speed, frequency, and pulse width settings.
When you are experimenting, make sure to only change one variable at a time and make sure to note what settings made each result. As you test your material, you will notice some correlations between settings and color results – this helps you finetune your colors and discover new tones. In all my testing, I did not go over 500 KHz in frequency. I found the higher my frequency went, the less color was achieved and the result was generally blacker. As you can see from my testing (in the images below), there were a number of other colors found while attempting to create pink.

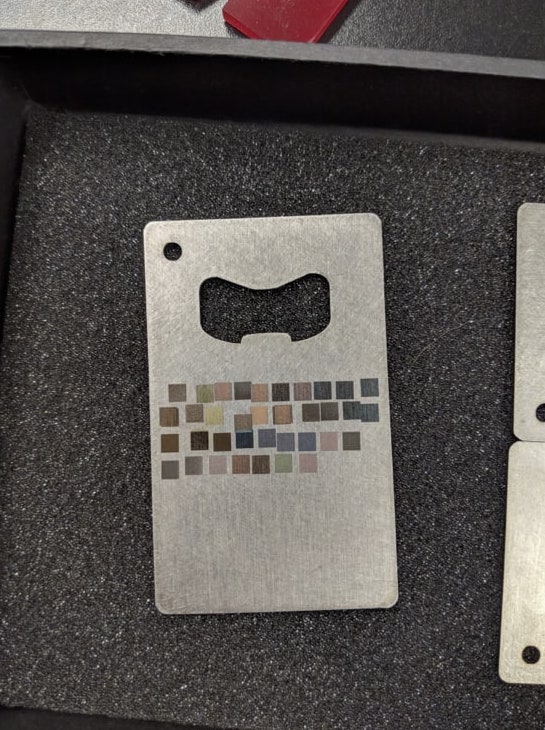
As you can see from my testing, there were a number of other colors found while attempting to create pink.
I also noticed that a small test square worked well to see some colors, but because my design was larger than my test squares, my colors changed as well. When testing, it is a good idea to use a test mark close to your pattern size to ensure your final mark stays true to your test marks.
As you can see, the testing was well worth the effort. Not only did I achieve my desired pink, but I also found a number of other colors to use later on too. It was at this moment that I was glad that I chose to upgrade to a MOPA unit.
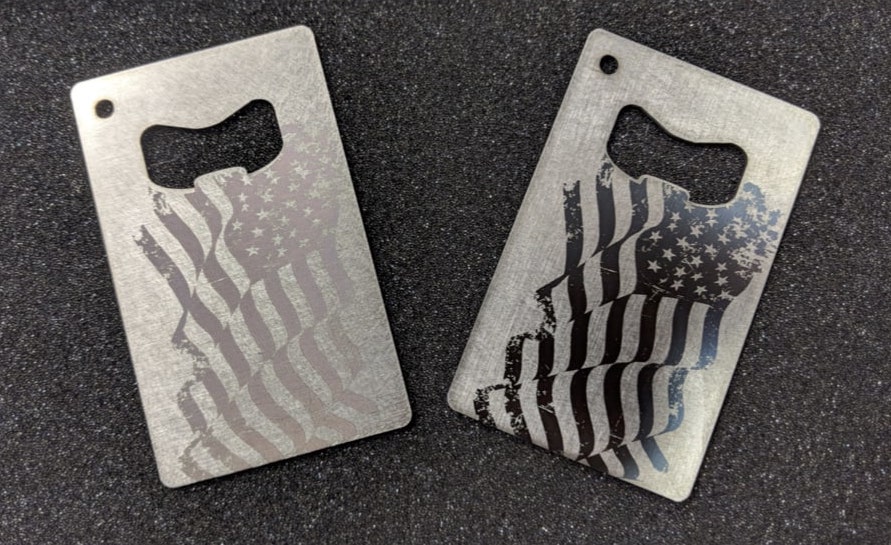
The finished bottle openers.
I hope everyone enjoys their summer and gets to make a bottle opener work for their customers as well!

A few of the possible items we can all market as awards and personalization shops are BBQ sets and bottle openers.