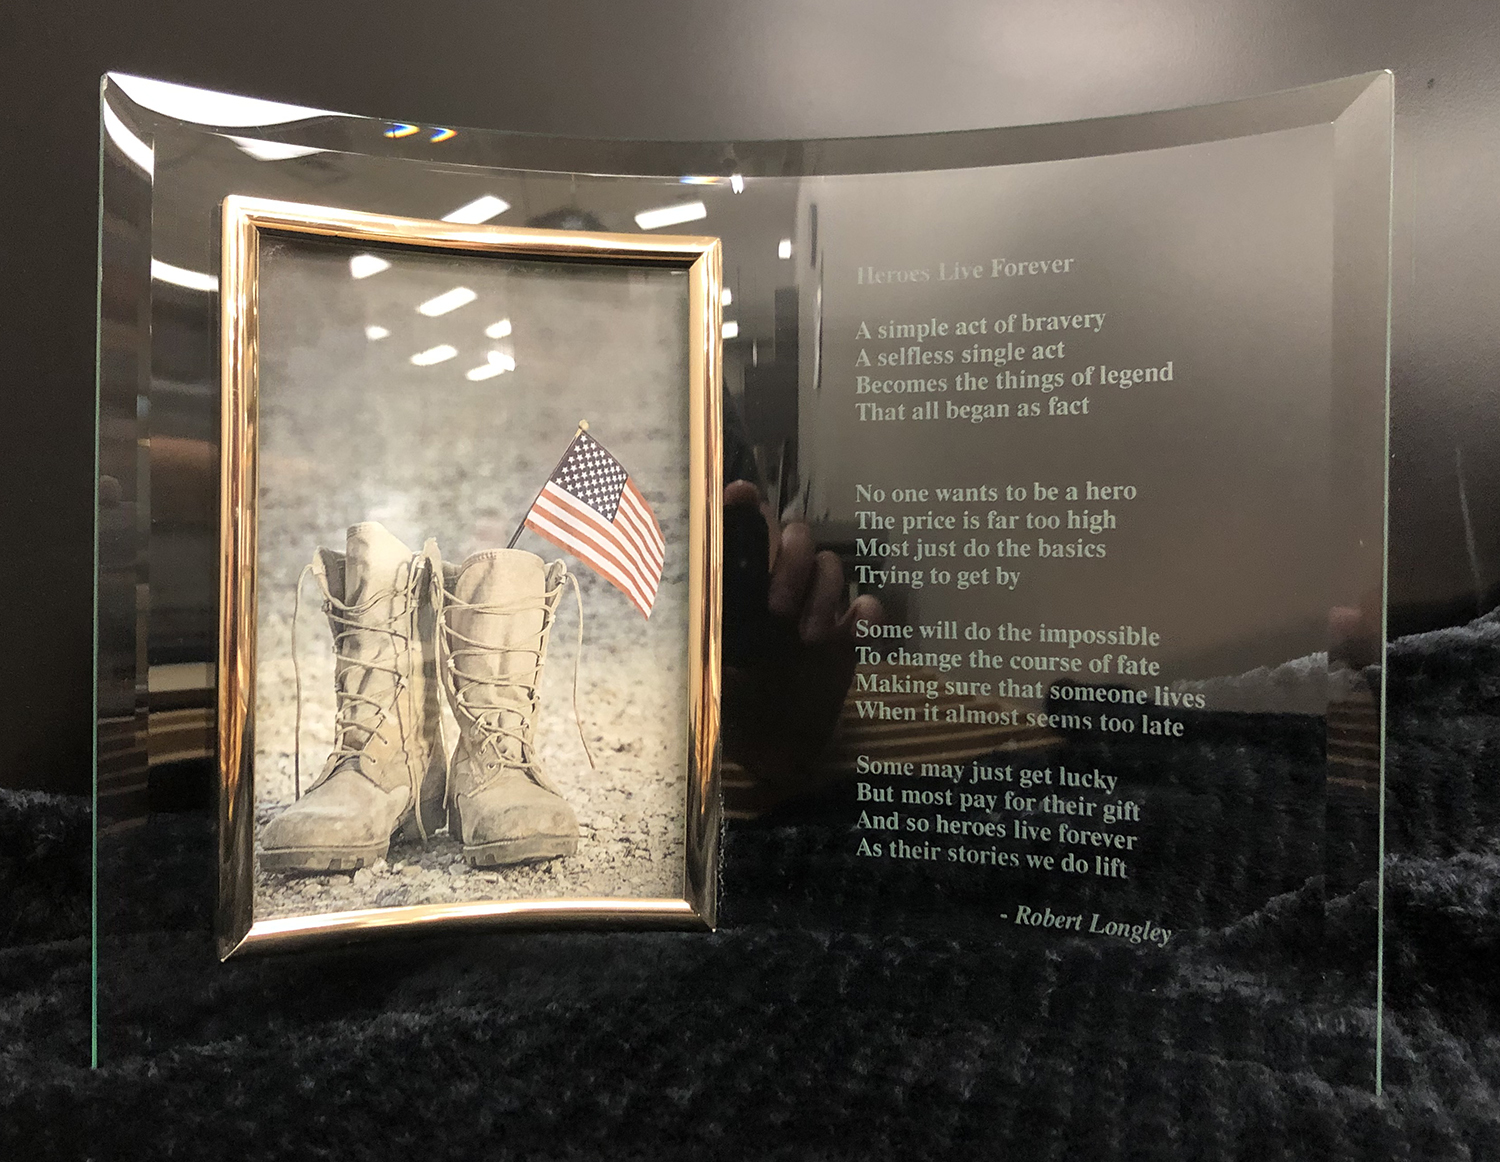
Personalized picture frames are a great way to preserve memories and pay lasting honor to loved ones lost or celebrate milestones. Following, Dana Keller, JDS fabrication/assembly manager, shows you how to sandcarve a glass crescent photo frame to create a meaningful memorial.
Supplies needed to sandcarve a glass photo frame
- AccuBlack waterproof inkjet film (or equivalent brand)
- Rapidmask (or comparable film)
- Letralite exposure unit
- Sandblast cabinet
Step 1: Begin with negative vector artwork on your computer and print on Accublack photo paper with an inkjet printer.
Step 2: Lay a sheet of Rapidmask in the exposure unit, then place the transfer on the Rapidmask, emulsion side to emulsion side (Fig. 1). Expose transfer for two minutes in the UV exposure unit.
Step 3: Cut your artwork to fit the crescent (Fig. 2), peel off the protective coating, and hand place where you want it located on the crescent. Squeegee out any air bubbles.
Step 4: Peel off the top protective coating. Mask the entire piece around the artwork to avoid any unwanted sandcarving on the piece. (Fig. 3)
Step 5: Place the crescent into the cabinet and blast. (Fig. 4)
Step 6: To remove the sandcarving film when finished, run it under hot water, peel, and rub it off. Your completed sandcarved photo tribute is simply stunning.
This is just one example of what you can do for your customers looking for memorial or milestone gifts. The memorial market is a great way to expand and diversify your business without a large upfront investment.
Find more Try This tutorials from Cheryl here.


