
3 Steps to Add Borders and Grommets in CorelDraw’s X8
Follow these three steps use this CorelDraw X8 feature.
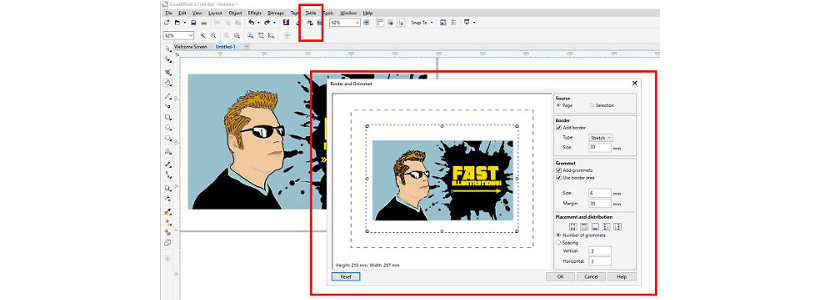
The Border and Grommet feature is great for those who need to apply rings or stripes to textile printed material. For example, a large-format printed textile for a trade show or outdoor advertising.
- Simply open your image or design in CorelDraw.
- In the Border and Grommet dialog (Tools > Border and Grommet), add a border, choose border type, size and add grommets.
- When you are finished with your settings, simply click OK, and the image file will be processed. The new document created is now ready to use.
Authors


OUR DIGITAL PARTNERS
RELATED ARTICLES

Every holiday order needs a place to go
Prepare your shop to keep its promises.

Canvas, fine art & photo papers: Matching the media to the project
A practical look at the three big categories & what each does…

5 questions with Rachel Newman
Rachel Newman joined L.A.T. Apparel in March 2024 as chief commercial officer…

The holiday rush should not be a surprise
Christmas has been remarkably consistent about showing up in December. The fourth…