Working with Transparency in Graphics Software

The ability to control transparency is a special feature in graphics software. Prior to computers, transparency was an elusive feature in printed graphics achievable through the clever manipulation of optics, screens and exposures on a process camera. Fortunately, now transparency can be achieved with relatively little effort, owing to convenient controls in virtually all mainstream graphics software.
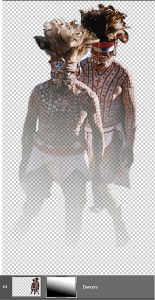
There is more than one reason to make graphic elements transparent. First: to be able to see through them; second: To lighten and reduce their emphasis in the design field (Fig. 1) and to blend elements on consecutive layers to produce realistic composite effects.

Let’s discuss how transparency is achieved on images composed of pixels and look at some of the more creative applications of transparency.
Backgrounds
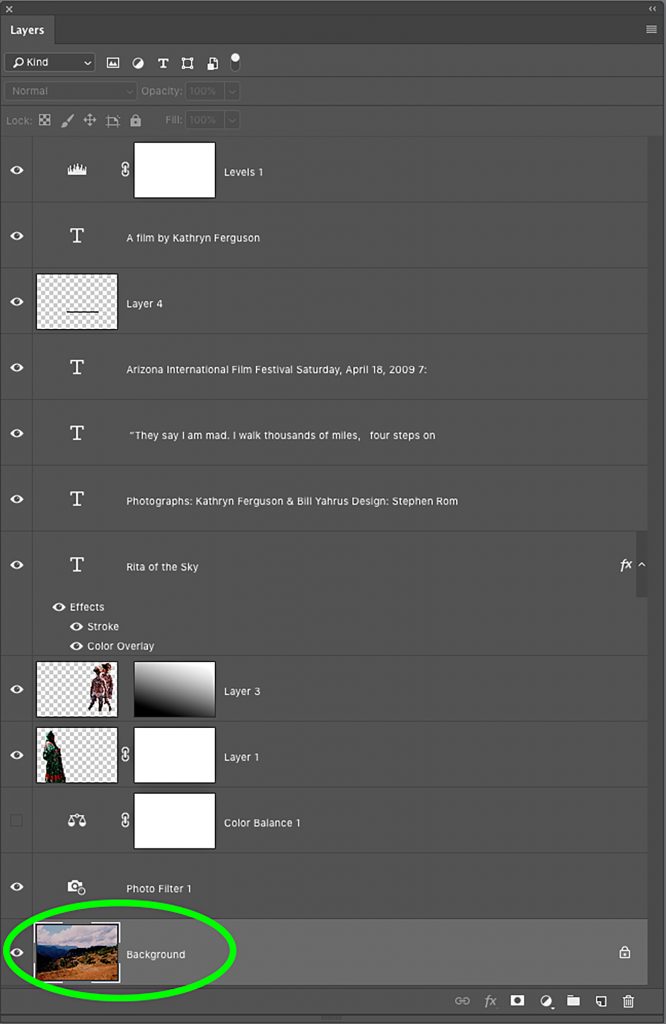
First, let’s examine the mechanics of transparency. I will describe these features primarily using Photoshop, but Corel Painter is very similar with a slight variance in terminology. When a photo is captured with a digital camera or scanned and saved and opened in Photoshop, it resides on the layers panel as a single layer labeled “Background”. (In Corel Painter it’s called “Canvas.”)
A background is a specific type of layer that has three distinctive characteristics. First, it is always the bottom-most layer in the stack and cannot be moved higher (Fig. 2). Second, it cannot be moved horizontally or vertically on the picture plane. And third, it is always opaque. In order to avoid these limitations the background must be converted to a layer.
Converting a Background to a layer is achieved by going to the Layers menu and choosing Layer > New > Layer From Background. A dialog box appears where the layer can be named. As a layer, the content can be moved, scaled, rotated or otherwise transformed. The layer also supports variable levels of transparency. The Opacity slider in the Layers panel enables the content to be adjusted to a percentage; 100 percent being completely opaque and zero percent being totally invisible, and all percentages in between producing semi-transparency.
Checkerboard
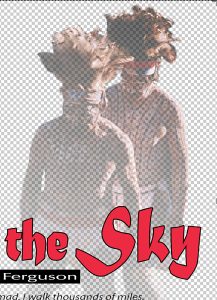
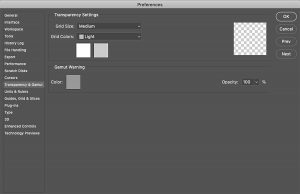
A gray and white checkerboard is the universal indicator of transparency. When transparency is reduced on a layer, the checkerboard becomes visible providing that there is no opaque content below the layer in the stack (Fig. 3). The color and size of the cells of the checkerboard can be changed with the Transparency & Gamut settings in the preferences (Fig. 4). It helps to change the checkerboard colors if you are working on a grayscale image, for example, as it makes the checkerboard easier to see.
Global transparency
Transparency is applied globally to the entire currently selected layer when the opacity slider is dragged. There are instances when you may want to apply the same transparency setting to more than one layer. The best solution for this scenario is to place the layers in a single Layer Group. To create a group, select the layers and choose New Group from Layers from the Layers panel Option menu. Then adjust the opacity slider for the entire group.
Local transparency
The process is a little different when you need to apply transparency to a specific region of an image. The most efficient method is to create a layer mask. A layer mask conceals and reveals regions of the image. The quickest way to make a layer mask is to click the Make Layer Mask icon in the Layers panel. When black is applied to the layer mask, the corresponding area on the image becomes completely transparent, that is, invisible. When white is applied the area is completely revealed, and when any shade of gray is applied the region becomes semi-transparent. The level of transparency depends on the shade of gray that is applied. Lighter shades of gray reveal more and darker shades conceal (Fig. 5).
You can paint directly on the layer mask with a brush, or you can select an area with a selection tool and fill it with the Edit > Fill Command.
Brushes
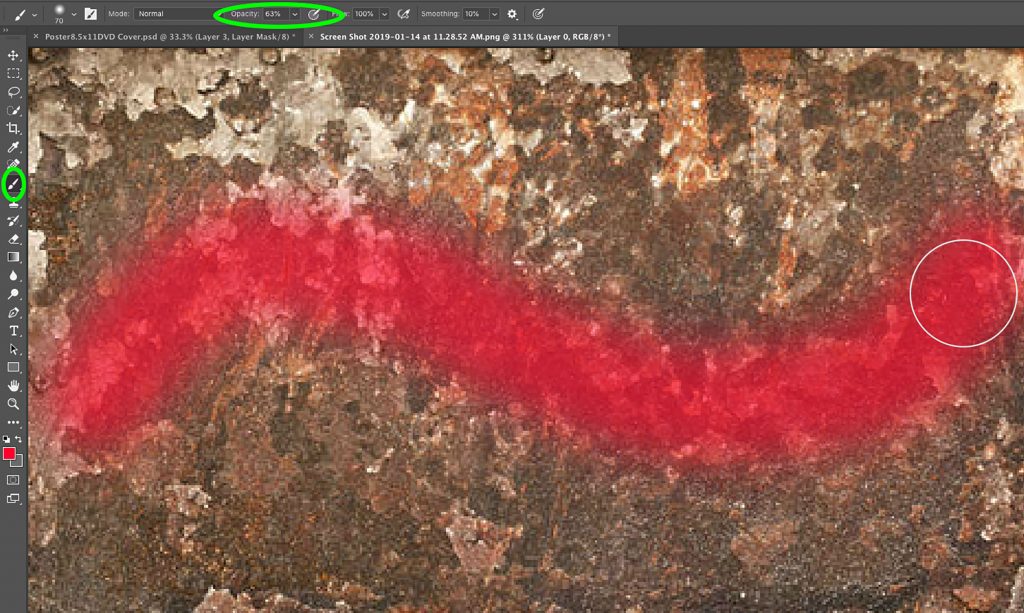
Speaking of brushes, the transparency application of color can be controlled when a brush is selected. Just enter a value in the Opacity box from zero (completely transparent) to 100 percent (totally opaque). A tint of the specific percentage value will be deposited when color is applied with a brush. Transparent strokes of colors can be painted with a single stroke or built up gradually. (Fig. 6)
Gradients
The gradient panel also has controls so that any portion of the gradient, when applied, can be made to appear transparent. When you apply a gradient to your image, I recommended that you create a Gradient Fill layer in order to most efficiently maintain a dynamic workflow. Fill layers can be edited at any time during the image editing process, and therefore the gradient and all of its characteristics can be modified at any time.
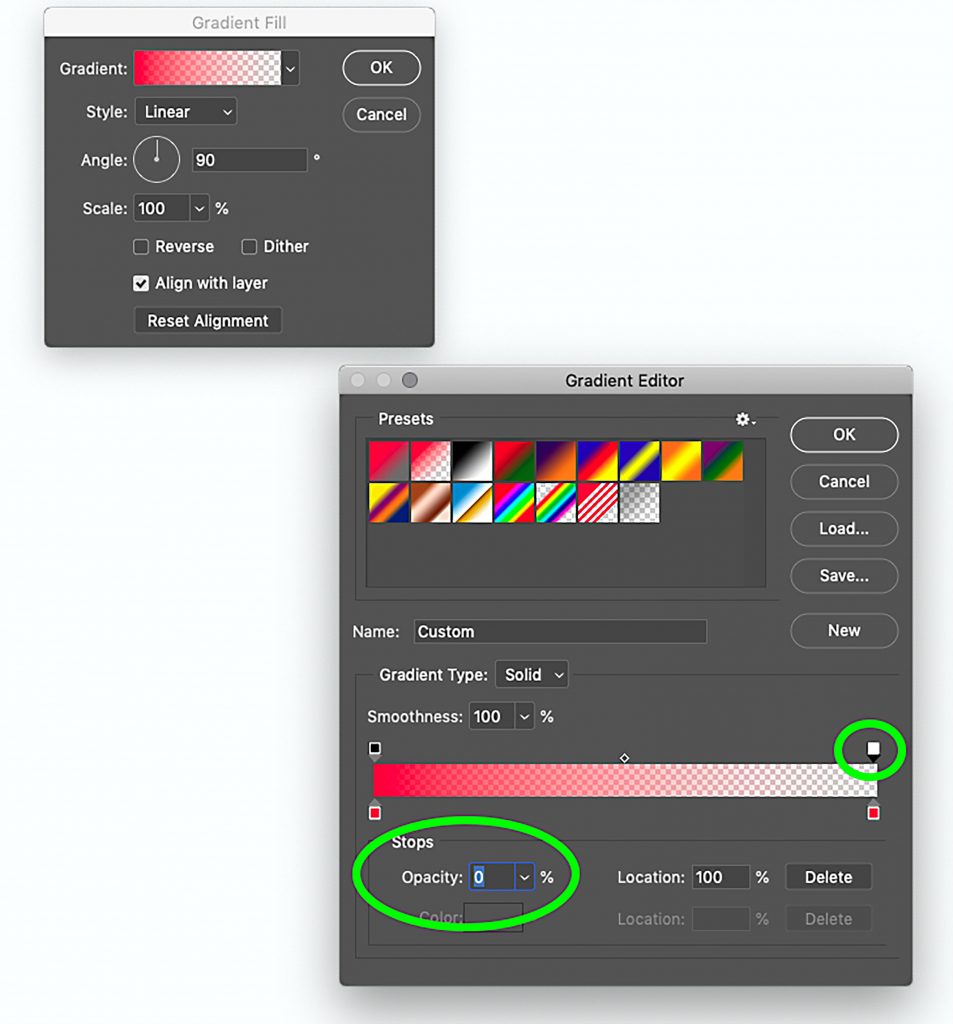
To apply transparency to a gradient, specify the range of color by creating a house-shaped icon called a Stop. In the gradient panel, the color stops are on the bottom of the ramp and the transparency stops are on the top. Click on a stop to select one or above the ramp to add a new one. Choose a percentage in the Opacity box. The range of color on the ramp will display the familiar checkerboard as an indicator of the transparency. From the point where the stop is, the color gradually blends into the adjacent color (Fig. 7). The stops can be repositioned by dragging. You can add as many stops as you like.
Blending content
Transparency is a useful feature when blending the content of two layers. Creating a gradual transition between the transparency of pixels will create a seamless blend between that when viewed, is impossible to detect. Using transparency techniques, you can open doors to creative opportunities that challenge the senses and can make any image, no matter how surreal, credible.
To seamlessly blend the content of two layers, start by stacking them in sequence. The topmost content should be on a separate layer surrounded by transparency and positioned over the bottom content. Click on the Layer mask icon in the Layers panel to create a mask on the topmost layer. Select the transition area with a selection tool. Select the Layer mask by clicking on it. Press the D key to establish the default black and white colors in the tools panel. Choose the Gradient tool and drag on the image in the direction of the blend. On the layer mask, the white region completely reveals the content of the topmost image and gradually conceals it as it blends with the content underneath.
Layer styles
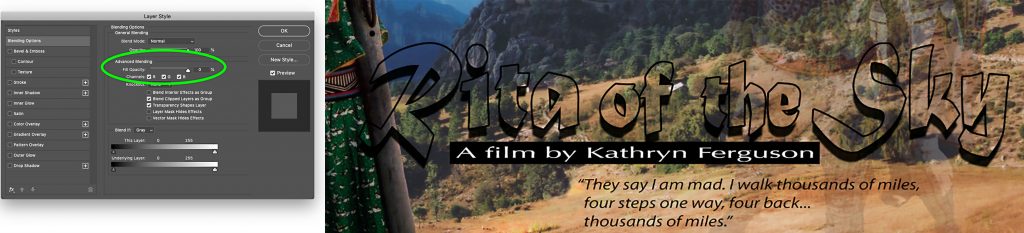
Transparency of content is a major feature throughout the software. You’ll find an option for it almost everywhere you look. Layer Styles are pre-programmed special effects such as drop shadows, glows, bevels and outlines that enhance your artwork. If the transparency of layer content is adjusted with the opacity slider, the effect is applied to both the content and the layer style. The layer style, however, can be protected from the transparency setting by using the Fill Opacity slider found in the Layers panel and in the Advanced Blending options in the Layer Styles dialog box. When the slider is dragged to a specific percentage, the transparency is applied only to the content (or the “fill”) and not the layer style (Fig. 9a, 9b).

When saving images that contain transparency, the file format needs to be considered in order to preserve transparent regions. There are several formats that support transparency. Native formats are the formats associated with software. They include PSD (Adobe Photoshop), AI (Adobe Illustrator) and CDR (CorelDraw). Image formats include PDF (Adobe Acrobat) and TIFF (Tagged Image File Format). Web formats that preserve transparency are GIF (Graphic Interchange Format) and PNG (Portable Network Graphic).
As we have seen, transparency options reside in many of the features of image-editing software. The ability to reduce the visual strength of layer content puts an extraordinary amount of control in your hands. Whether working globally on an entire layer or locally with a layer mask, or with groups of layers, these controls offer extreme precision in the ability to visually reveal, conceal, strengthen or weaken layer content.
Transparency can be applied to content layers and can enhance or diminish the strength of adjustment layers and even smart filters. In all, transparency techniques offer a dimension of control and credibility that endow you with the creative power that has your viewers asking: “How’d they do that?”