


The prints, paintings, photographs, drawings and even the images that you see on your computer screen are flat, yet many images look as though they have depth as their elements recede into space on the picture plane. The depth you see on a flat image is, of course, an illusion created by any of the numerous techniques have been known to artists for centuries that manipulate the eye and the brain by mimicking reality. Nowadays there are even special tools embedded in mainstream graphics software that aid in the process of creating depth in images.
Perspective Elements
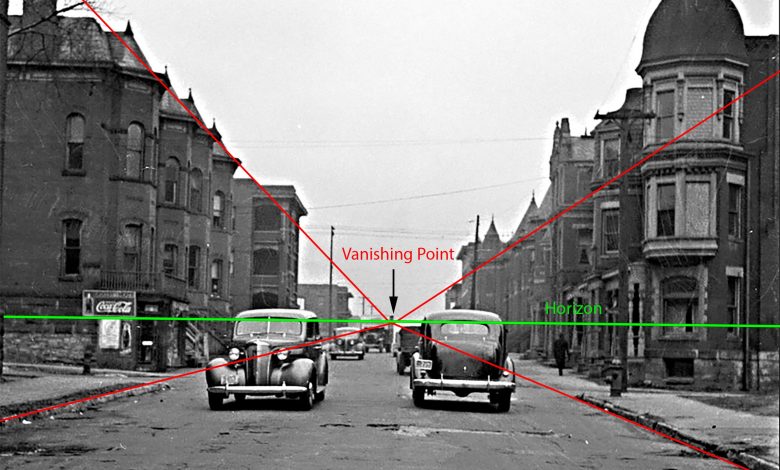
Before we get into the “how-tos” of creating depth, let’s look at the elements that create the illusion. The primary element in all perspective images, whether it be a drawing, painting or photograph, is the horizon. The horizon is a line on the image where the sky meets the earth so to speak. The horizon line, which is often implied, is directly opposite the viewer’s eye and represents objects infinitely far away. When an object is on the horizon, it has shrunk in size to the infinitesimal thickness of the line. The horizon establishes the latitude where the vanishing point resides. The vanishing point is a point on the image plane where the parallel lines in three-dimensional space appear to converge.
One Two Three
There are actually three types of perspective drawings defined by the number of vanishing points on the picture plane. In one-point perspective, all lines converge on a single vanishing point located anywhere on the horizon line. If an object is above the horizon line, its bottom is visible. Below the horizon line its top is visible. By the same token, all lines defining the edges of the object will converge on the single vanishing point.
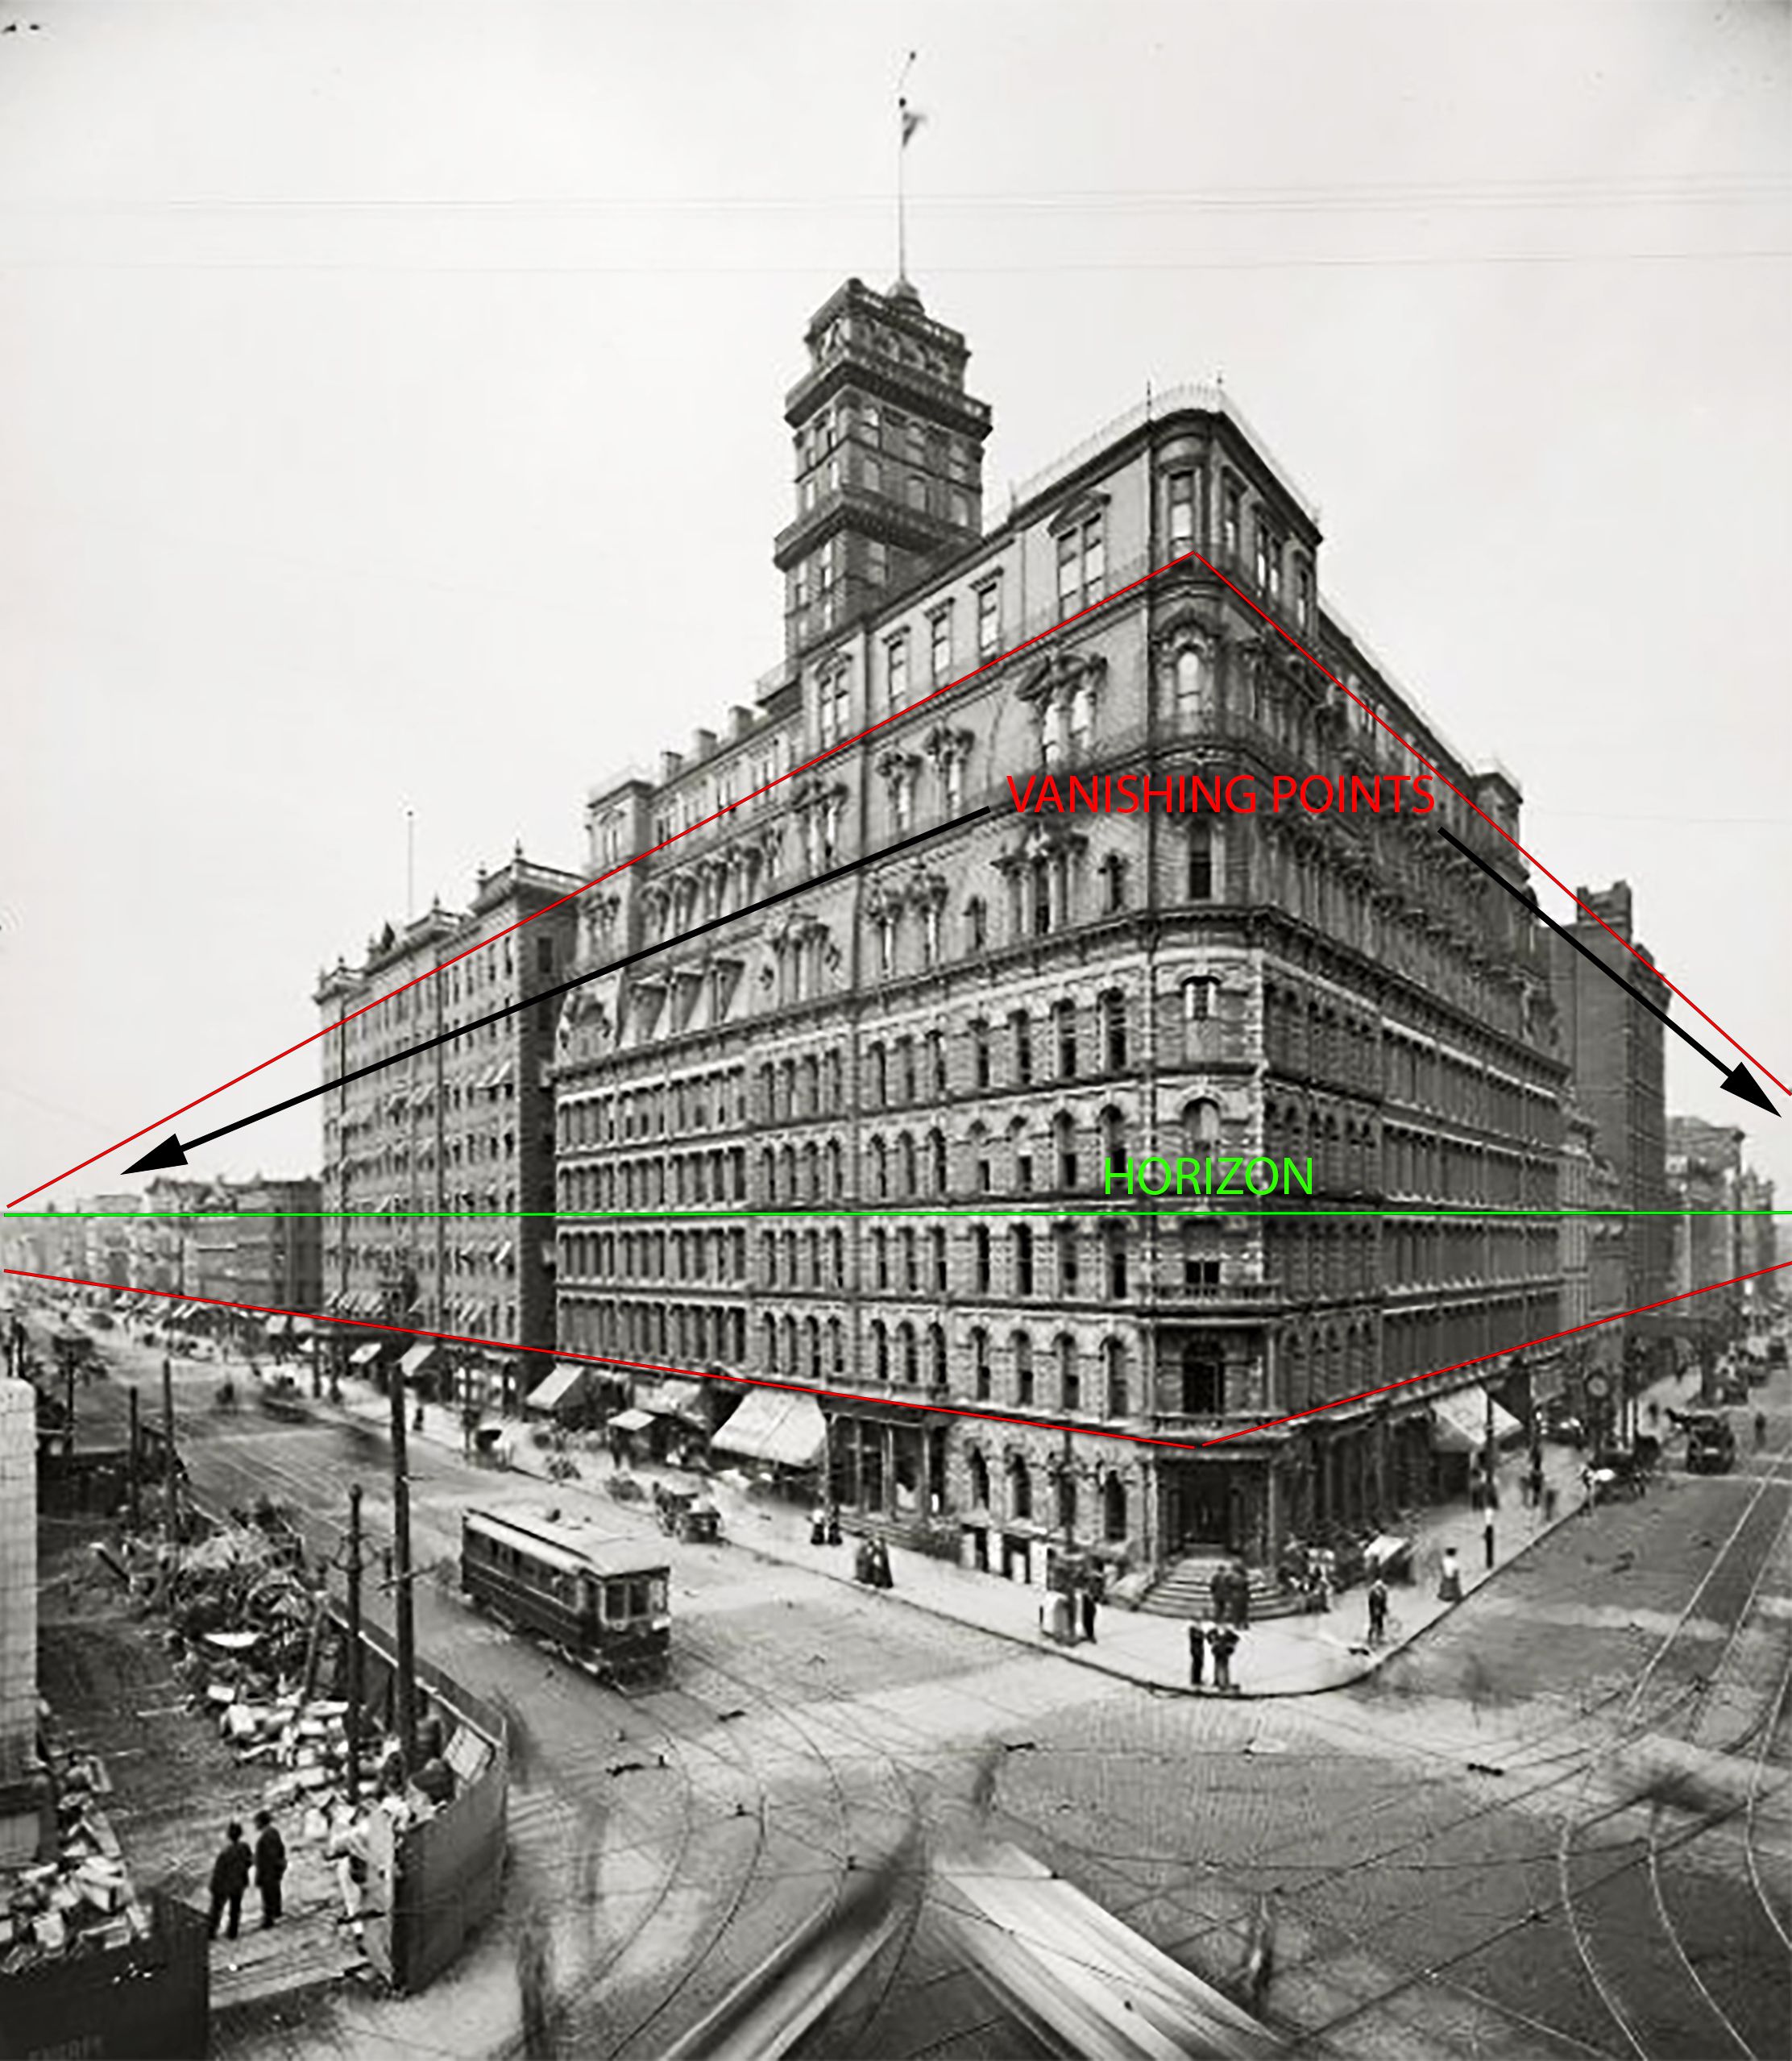
With two-point perspective (sometimes referred to as angular perspective) two sides of the object are visible and their edges converge on two points on the horizon.
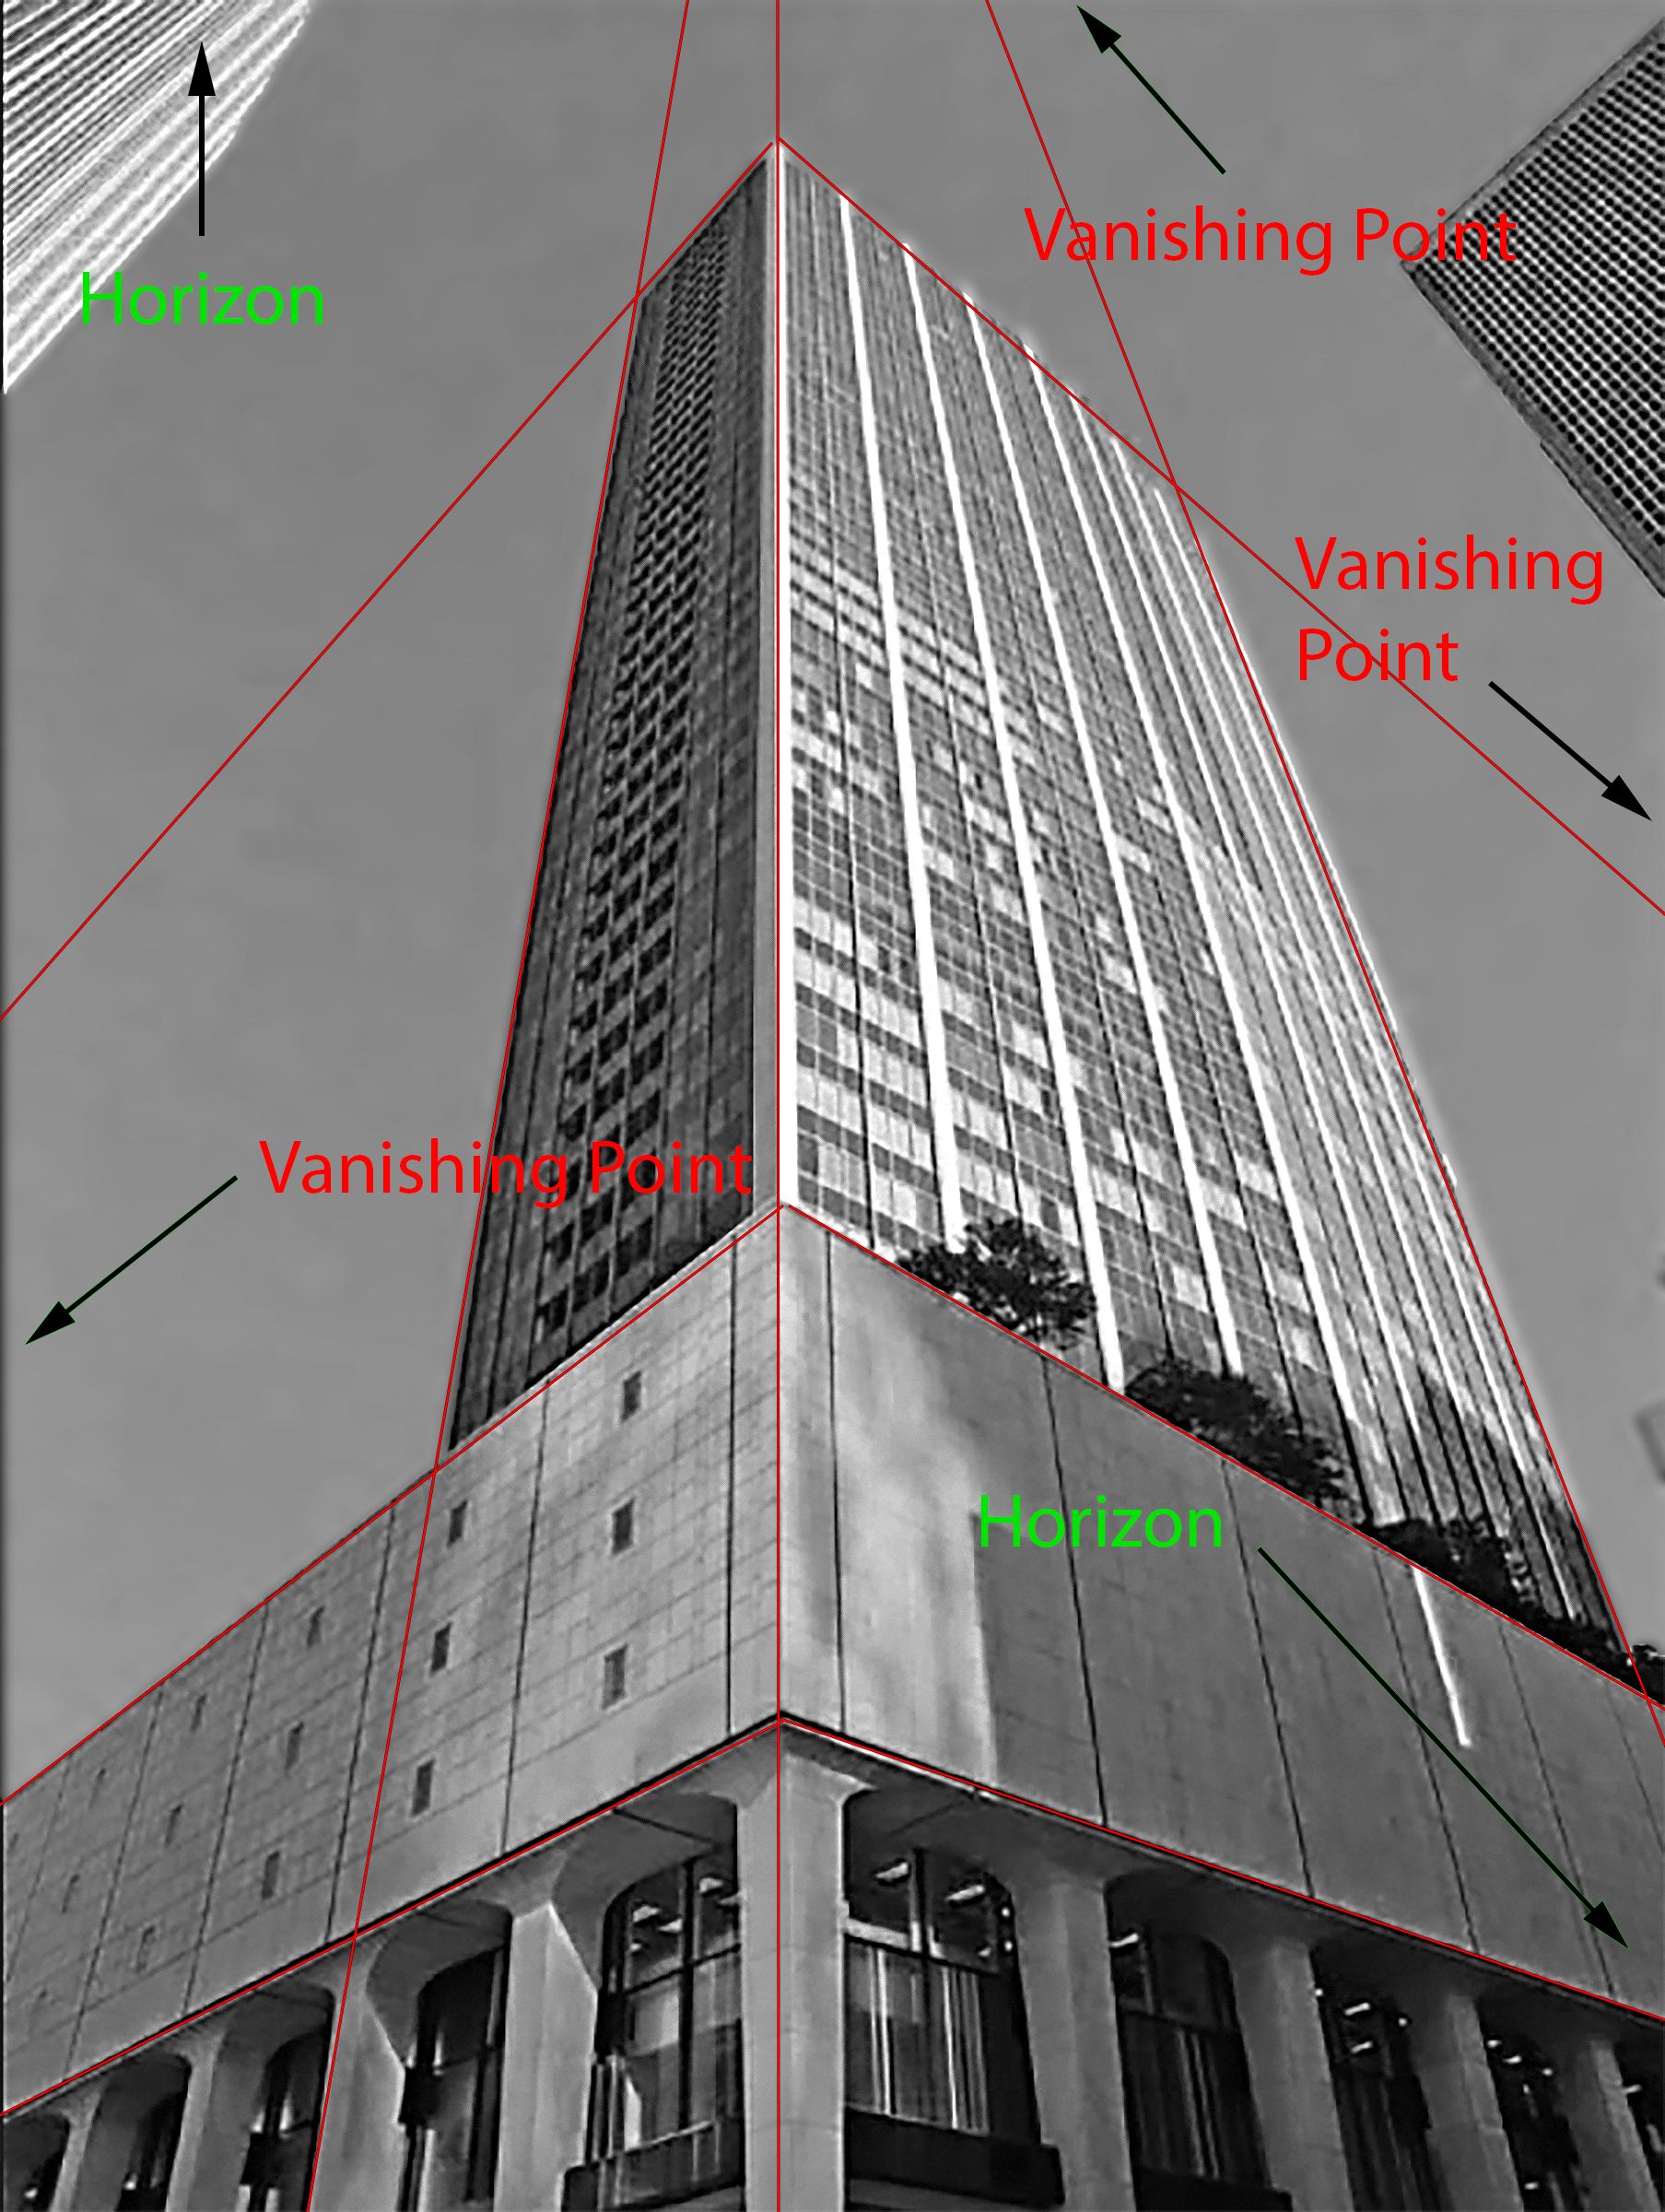
You’ve probably already guessed what three-point perspective drawings consist of. Three vanishing points! But there are two horizons. Try to imagine standing at the base of a tall building. What you see are the vertical edges converging at a point above the building. The top edges of the building vanish into two points on a horizontal horizon. (Figure 1a, 1b and 1c)
Great Depths
Edges that converge on the horizon and vanishing points do indeed create the illusion of depth but there are other elements that enhance the effect. First of all, scaling elements is an obvious way to create depth with larger elements that appear closer and smaller elements that appear further away.
Second, overlapping elements also give the illusion of depth. When a portion of an element is concealed by a shape or object, the eye naturally assumes that it is behind the element that is concealing it.
Third, controlling the atmosphere creates the illusion of distance with areas becoming lighter as they recede in space. (Figure 2)
Everything I’ve mentioned up to now can be easily achieved with software that has built- in tools that help create accurate perspective without measuring or drawing perspective lines. We’ll look at a few of these tools in both vector and pixel-based software. Of course, I prefer using Illustrator and Photoshop to demonstrate these techniques, but similar tools are available in Corel and other mainstream graphics software packages.
Perspective Grid
A pre-defined grid is a valuable tool when generating objects in perspective and back in the days before computers, these grids were commonly used to trace elements onto onion skin to assure their correct position and scale on the picture plane. Nowadays the software version of the perspective grid automatically transforms elements to fit the correct angles of convergent edges. In Adobe Illustrator the perspective tool in the Tools panel generates one-, two- or three-point perspective grids. A two-point perspective grid is the default but can be swapped for a one- or three-point grid by choosing Perspective Grid from the View menu.
Grid Acrobatics
Modification of the grid is performed by dragging the handles on the top, bottom or sides to alter the grid’s shape and relative relationship to the horizon line. The grid is divided into three sections; the ground and two sides, each being assigned a separate color. The ground is green, the left side of the grid is blue and the right side is orange. A side becomes active when the specific color is selected on the widget cube in the upper left corner of the screen. When a shape is drawn, it automatically conforms to the current grid. A shape that has been previously drawn can be selected with the Perspective Editing tool (in the same fly out as the Perspective tool) and it automatically conforms to the perspective lines of the current section when dragged onto the grid. This includes type characters, although the characters are converted to paths when placed on the grid. (Figure 3)
Complex Objects
This system makes creating the correct perspective of complex single or multiple shapes really easy. “But what about photographs?” I hear you ask. That’s a little different. In Illustrator, the perspective grid only works with vector objects, therefore a photo that is composed of pixels, and “placed” in Illustrator needs to be converted to vectors using the Image Trace feature (Figure 4) located in the Window menu. After the conversion, the newly vectored image is “expanded” (Object > Expand), selected with the Perspective Selection too, and positioned on the current selected grid. (Figure 5)
Pixel Perspective
Photoshop has a built-in feature that aids in aligning selected pixel content to a perspective grid. There are also transformation features that manually transform elements into perspective. The first feature we’ll look at is the Vanishing Point filter.
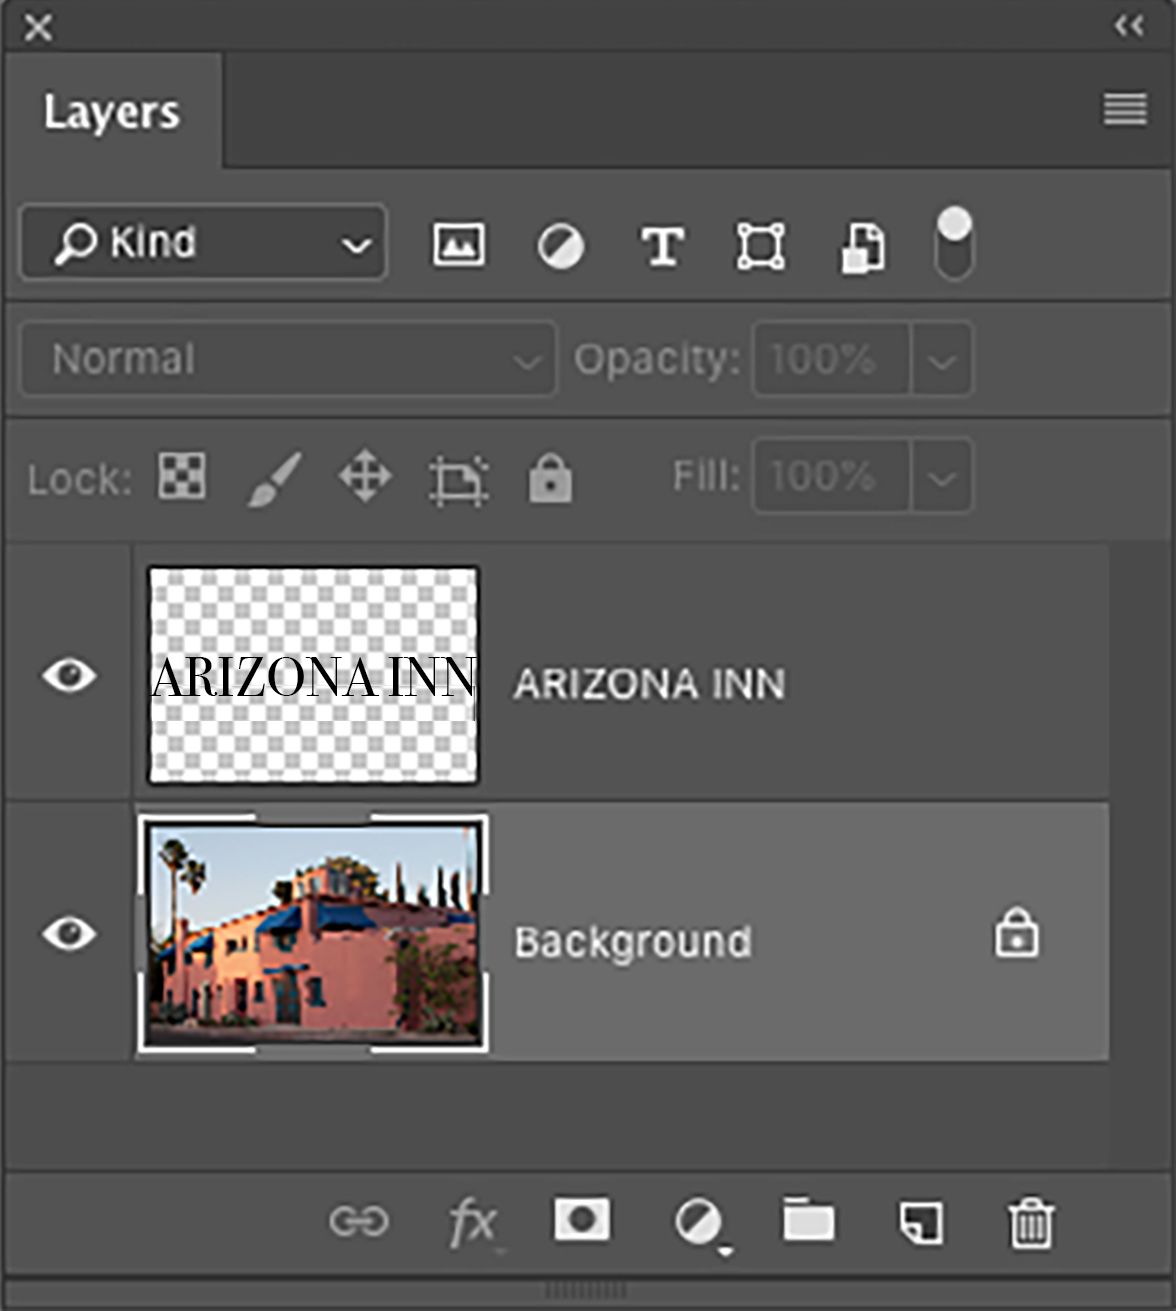
Start by opening an image. The element that you want to put into perspective should be on a separate layer surrounded by transparency. (Figure 6) In the case of this demonstration, I’m placing type that needs to be rasterized first (Layer > Rasterize > Type). Copy the contents of the newly rasterized layer (Cmnd + C {Mac}, Cntrol + C {Win}) and conceal it on the layers panel by clicking on the visibility icon to the left of the layer’s thumbnail.
Go to Filter > Vanishing Point to display the interface. With the Create Plane tool draw a grid that follows the lines of perspective. (Figure 7) Press (Cmnd + V {Mac}, Cntrol + V {Win}) to paste the copied content onto the interface. It is positioned in the upper left- hand corner of the interface. Drag the content onto the grid and position it to the desired location. The content acquires the correct perspective and size in relation to the grid as it is dragged into position. (Figure 8) Choose the Transform tool and scale it to size and reposition it if necessary. If you choose the Marquee tool you can adjust the new content’s opacity with the slider in the Options bar. Click OK and you’re done.
Transformations
A simple way to apply perspective to layer content in Photoshop is the Perspective transformation command. Click on a layer in the layers panel, or select an area with one of the selection tools, then choose from the Edit menu, Transform > Perspective. A type layer will need to be rasterized first. A bounding box appears around the extremities of the elements. To force the elements into perspective, drag one of the corner handles inward toward the center point of the left, right, top or bottom lines of the bounding box. The elements distort and snap into a perspective plane. (Figure 9)
And So …
Although portraying the correct perspective in a flat image requires a complex system of points and lines, it does not have to be challenging. The perspective features in vector and pixel-based software streamline the process. Measuring and drawing horizons, vanishing points and converging lines are a thing of the past because all these functions are provided with simple tools that are easy to use. I hope you’ll explore these options because using them will empower you to produce perfect perspective every time even in the most complex compositions.