Sign restoration work almost always requires a traditional painted approach to make the worn-out sign look new again. Let’s take a look at some of my restoration projects and how I was able to complete the projects.
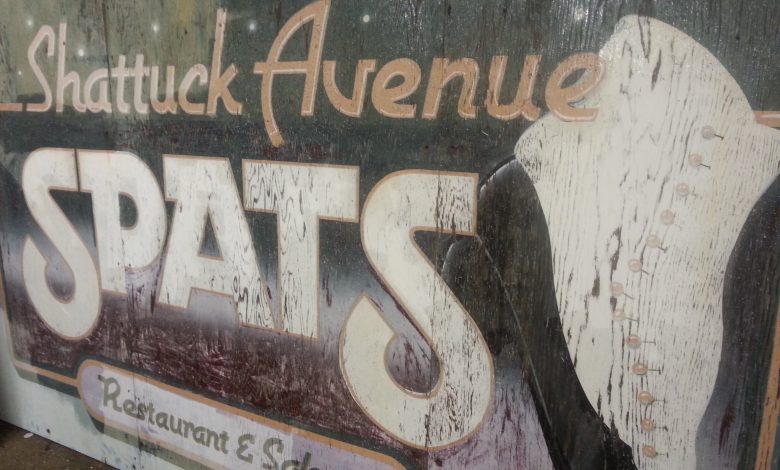
Spats sign
The sign required new MDO plywood to replace the worn A/C panels that weren’t a good choice for a long-lasting sign. This sign was originally drawn out by hand and eye directly onto the boards. Since no digital file ever existed for this masterpiece I traced out the entire sign onto large sheets of tracing paper. The pattern was pounced with an Electro Pounce machine, and then the painting was done with 1Shot oil enamel and some spray paint from a can.

Regalito sign
I measured the original sign and used a reference photo to cross-check the measurements as they aligned with the grid pattern on the wall. My building painter friend who referred this job was able to provide me with a vector file of the artwork that was a close match to the lettering she was going to paint over. Therefore I was able to save time by plotting that design onto butcher paper that I used to create a pounce pattern. The lettering was done with 1Shot chrome yellow that covered relatively well for fast, efficient painting.
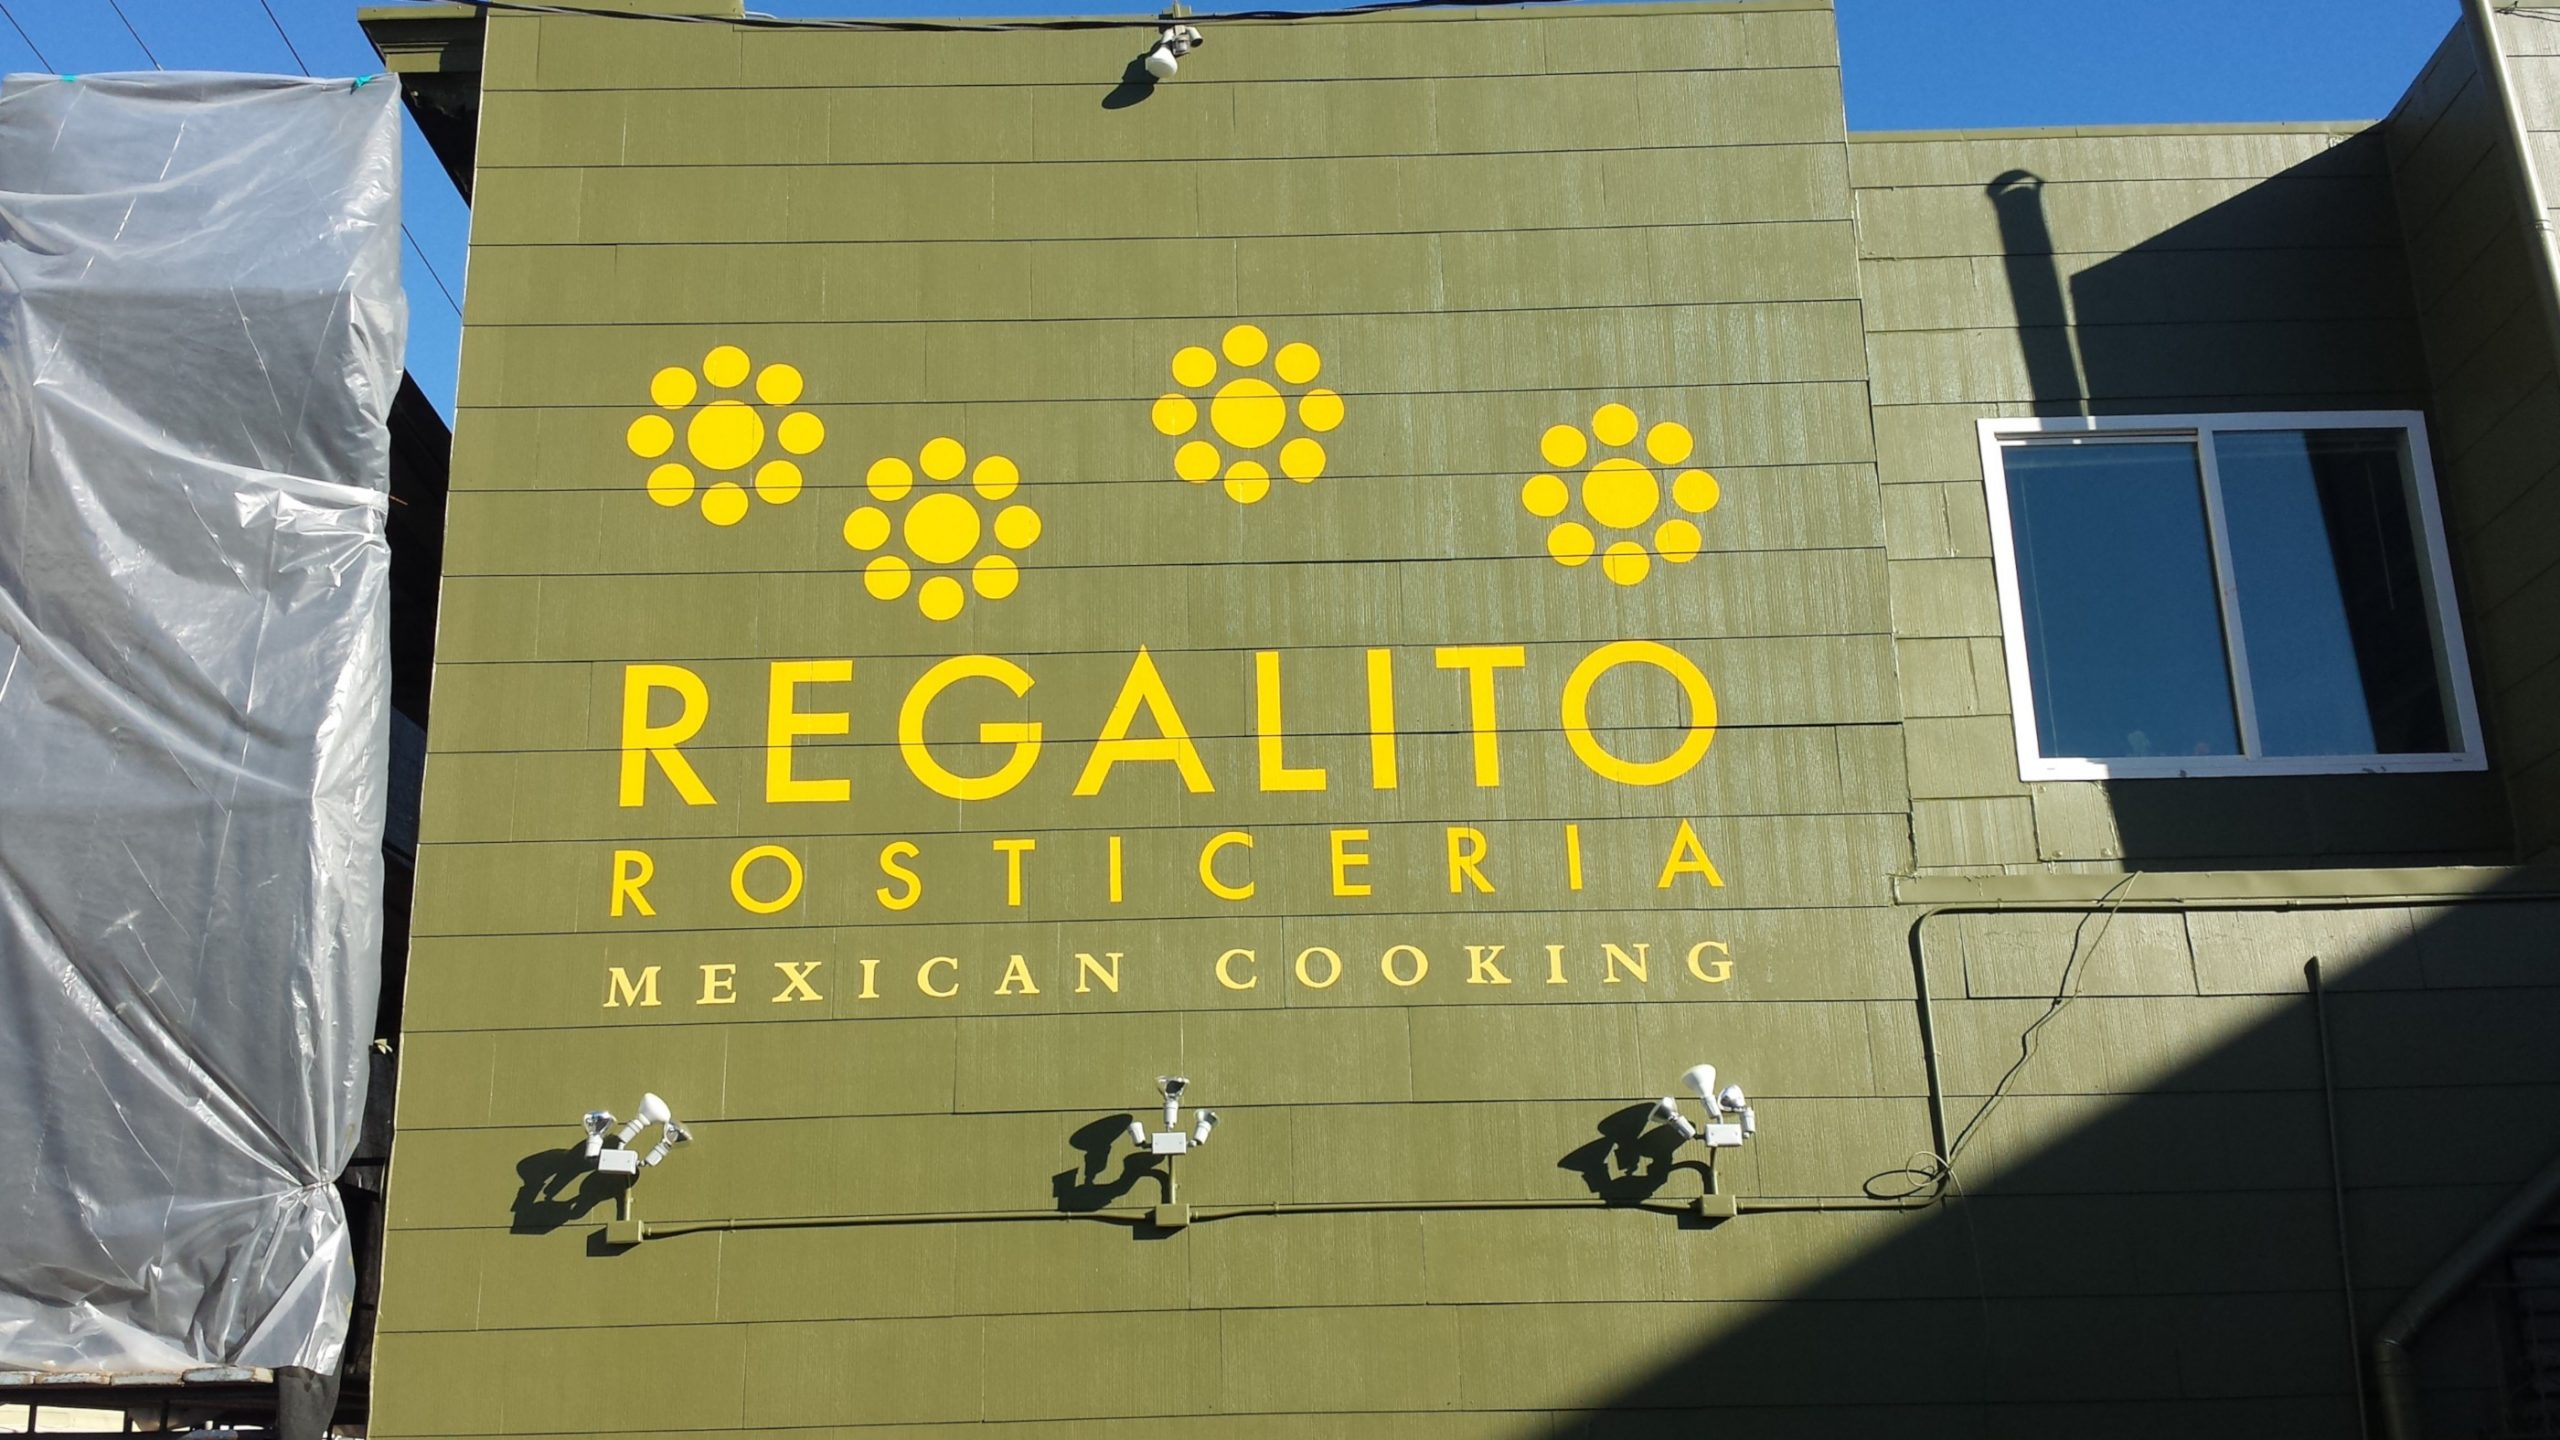
Repaint after the building was painted.
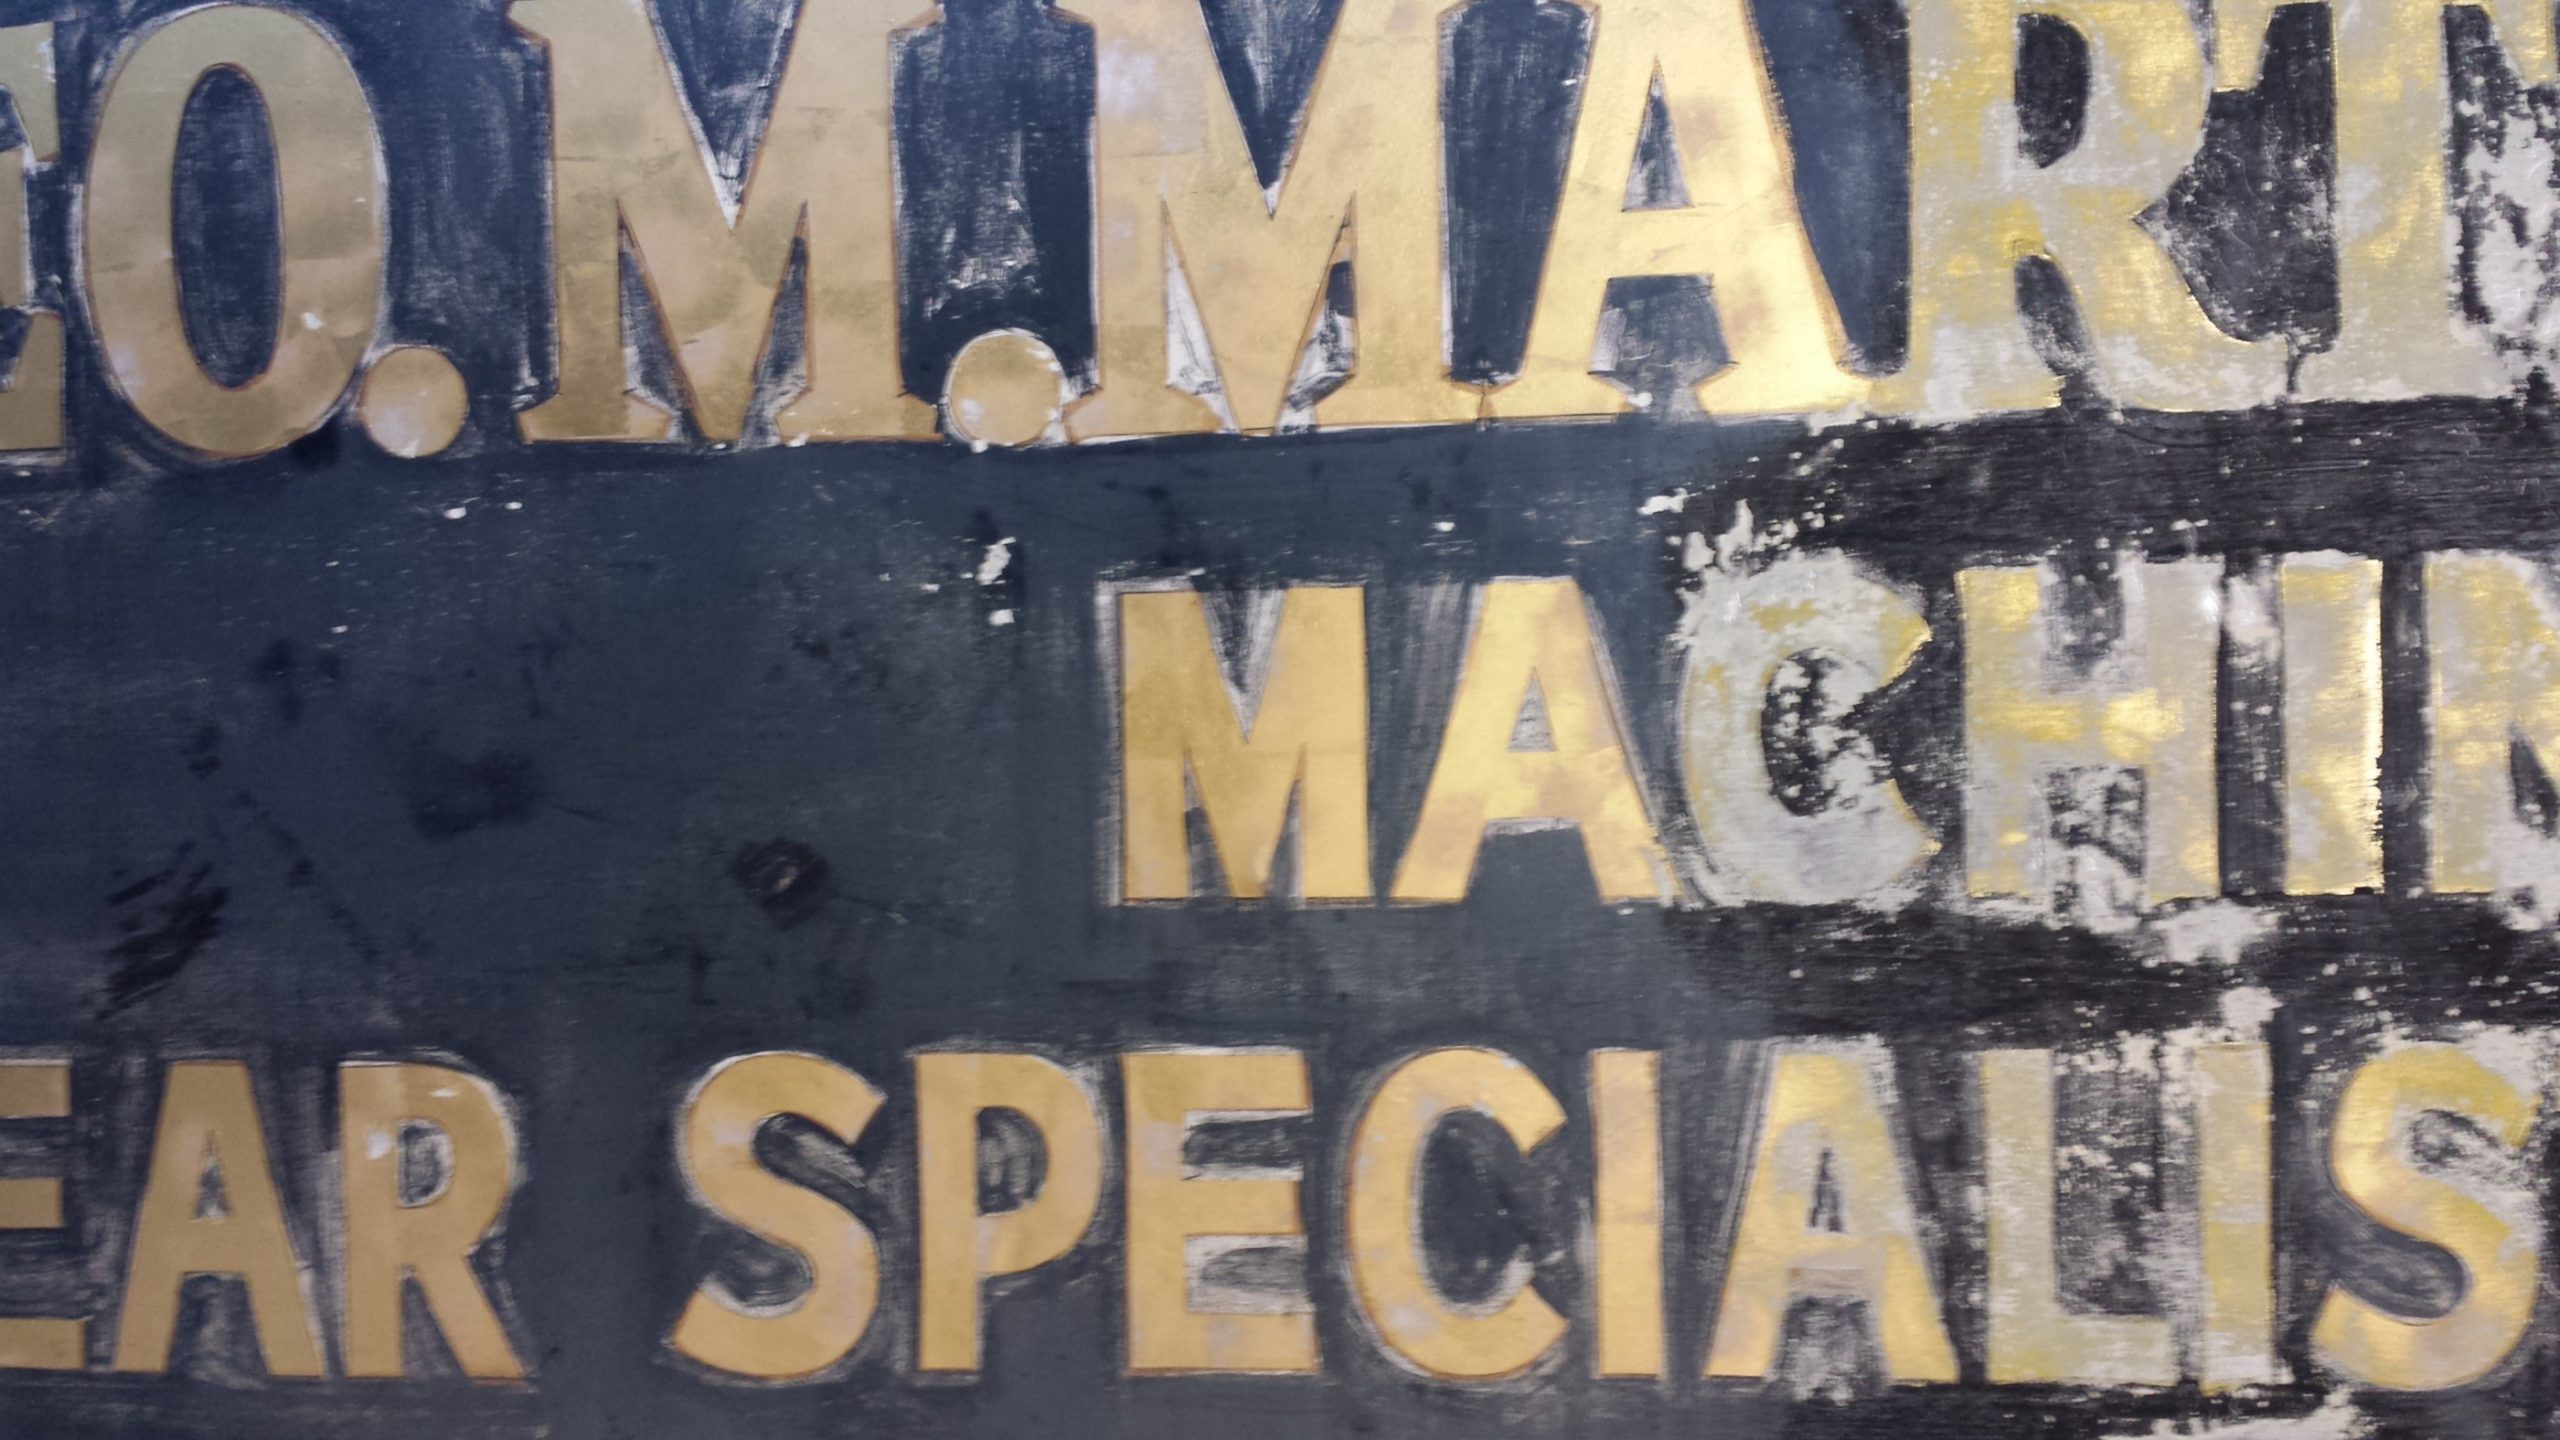
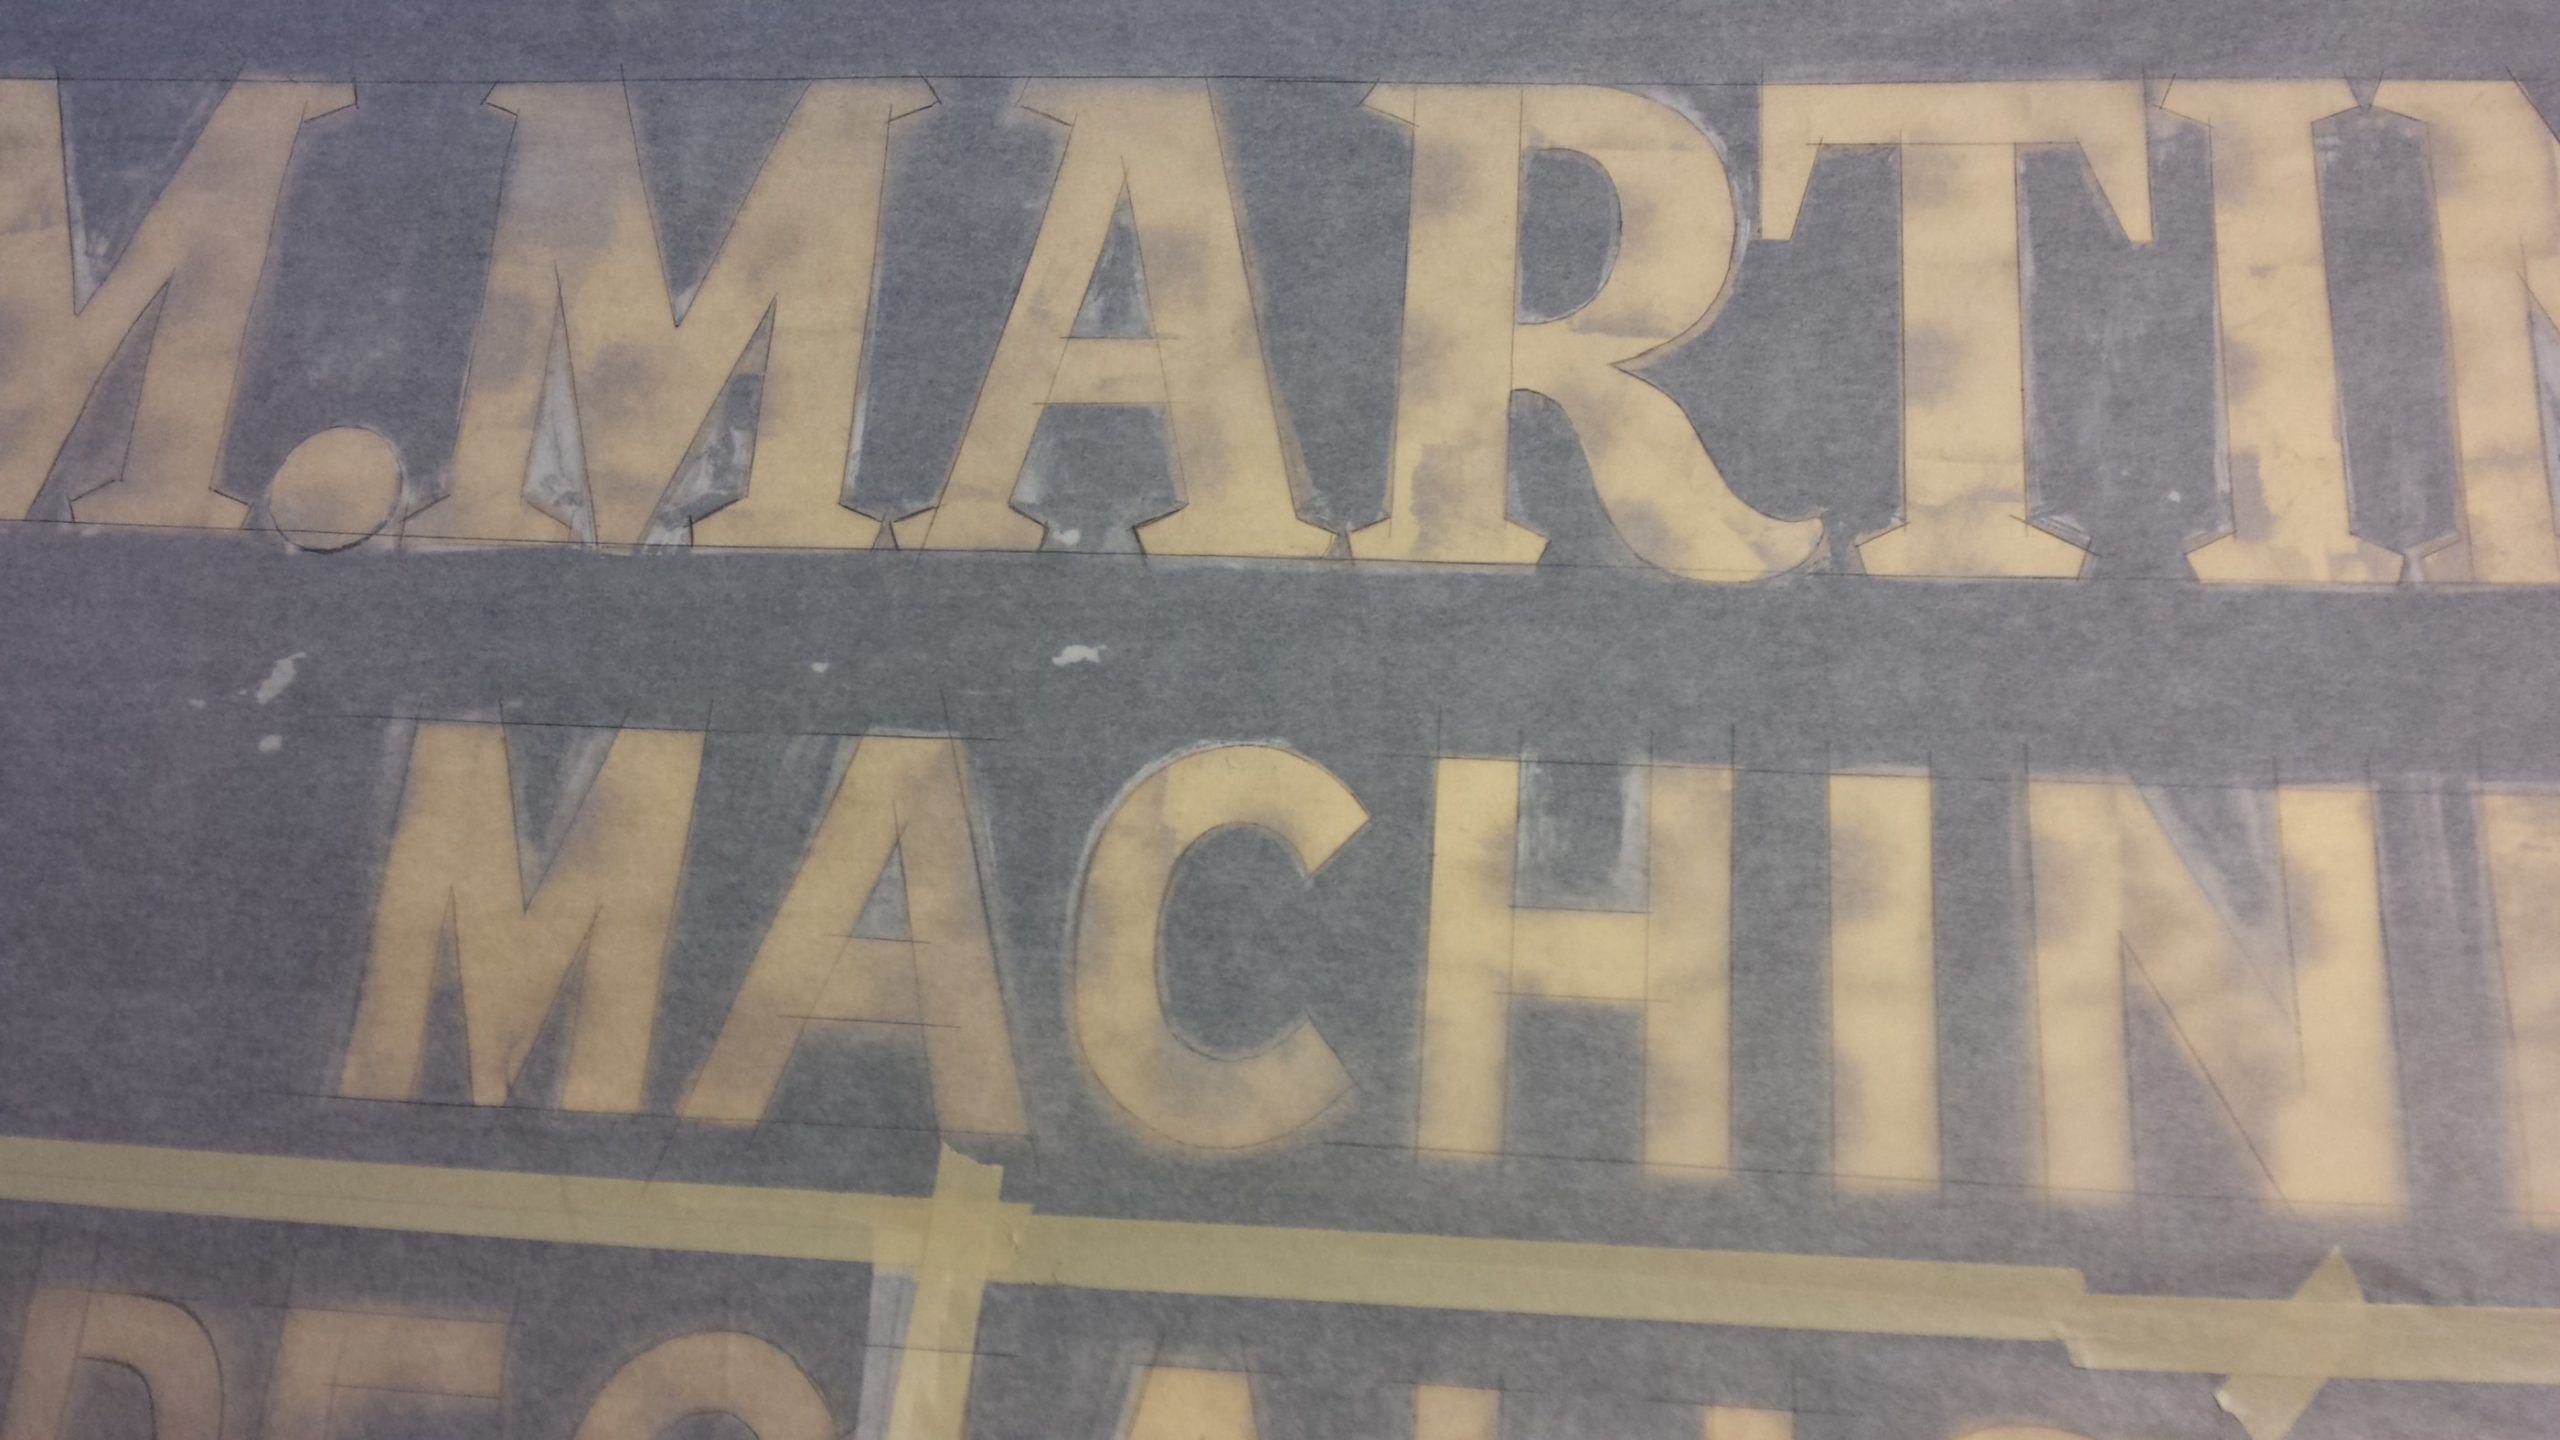
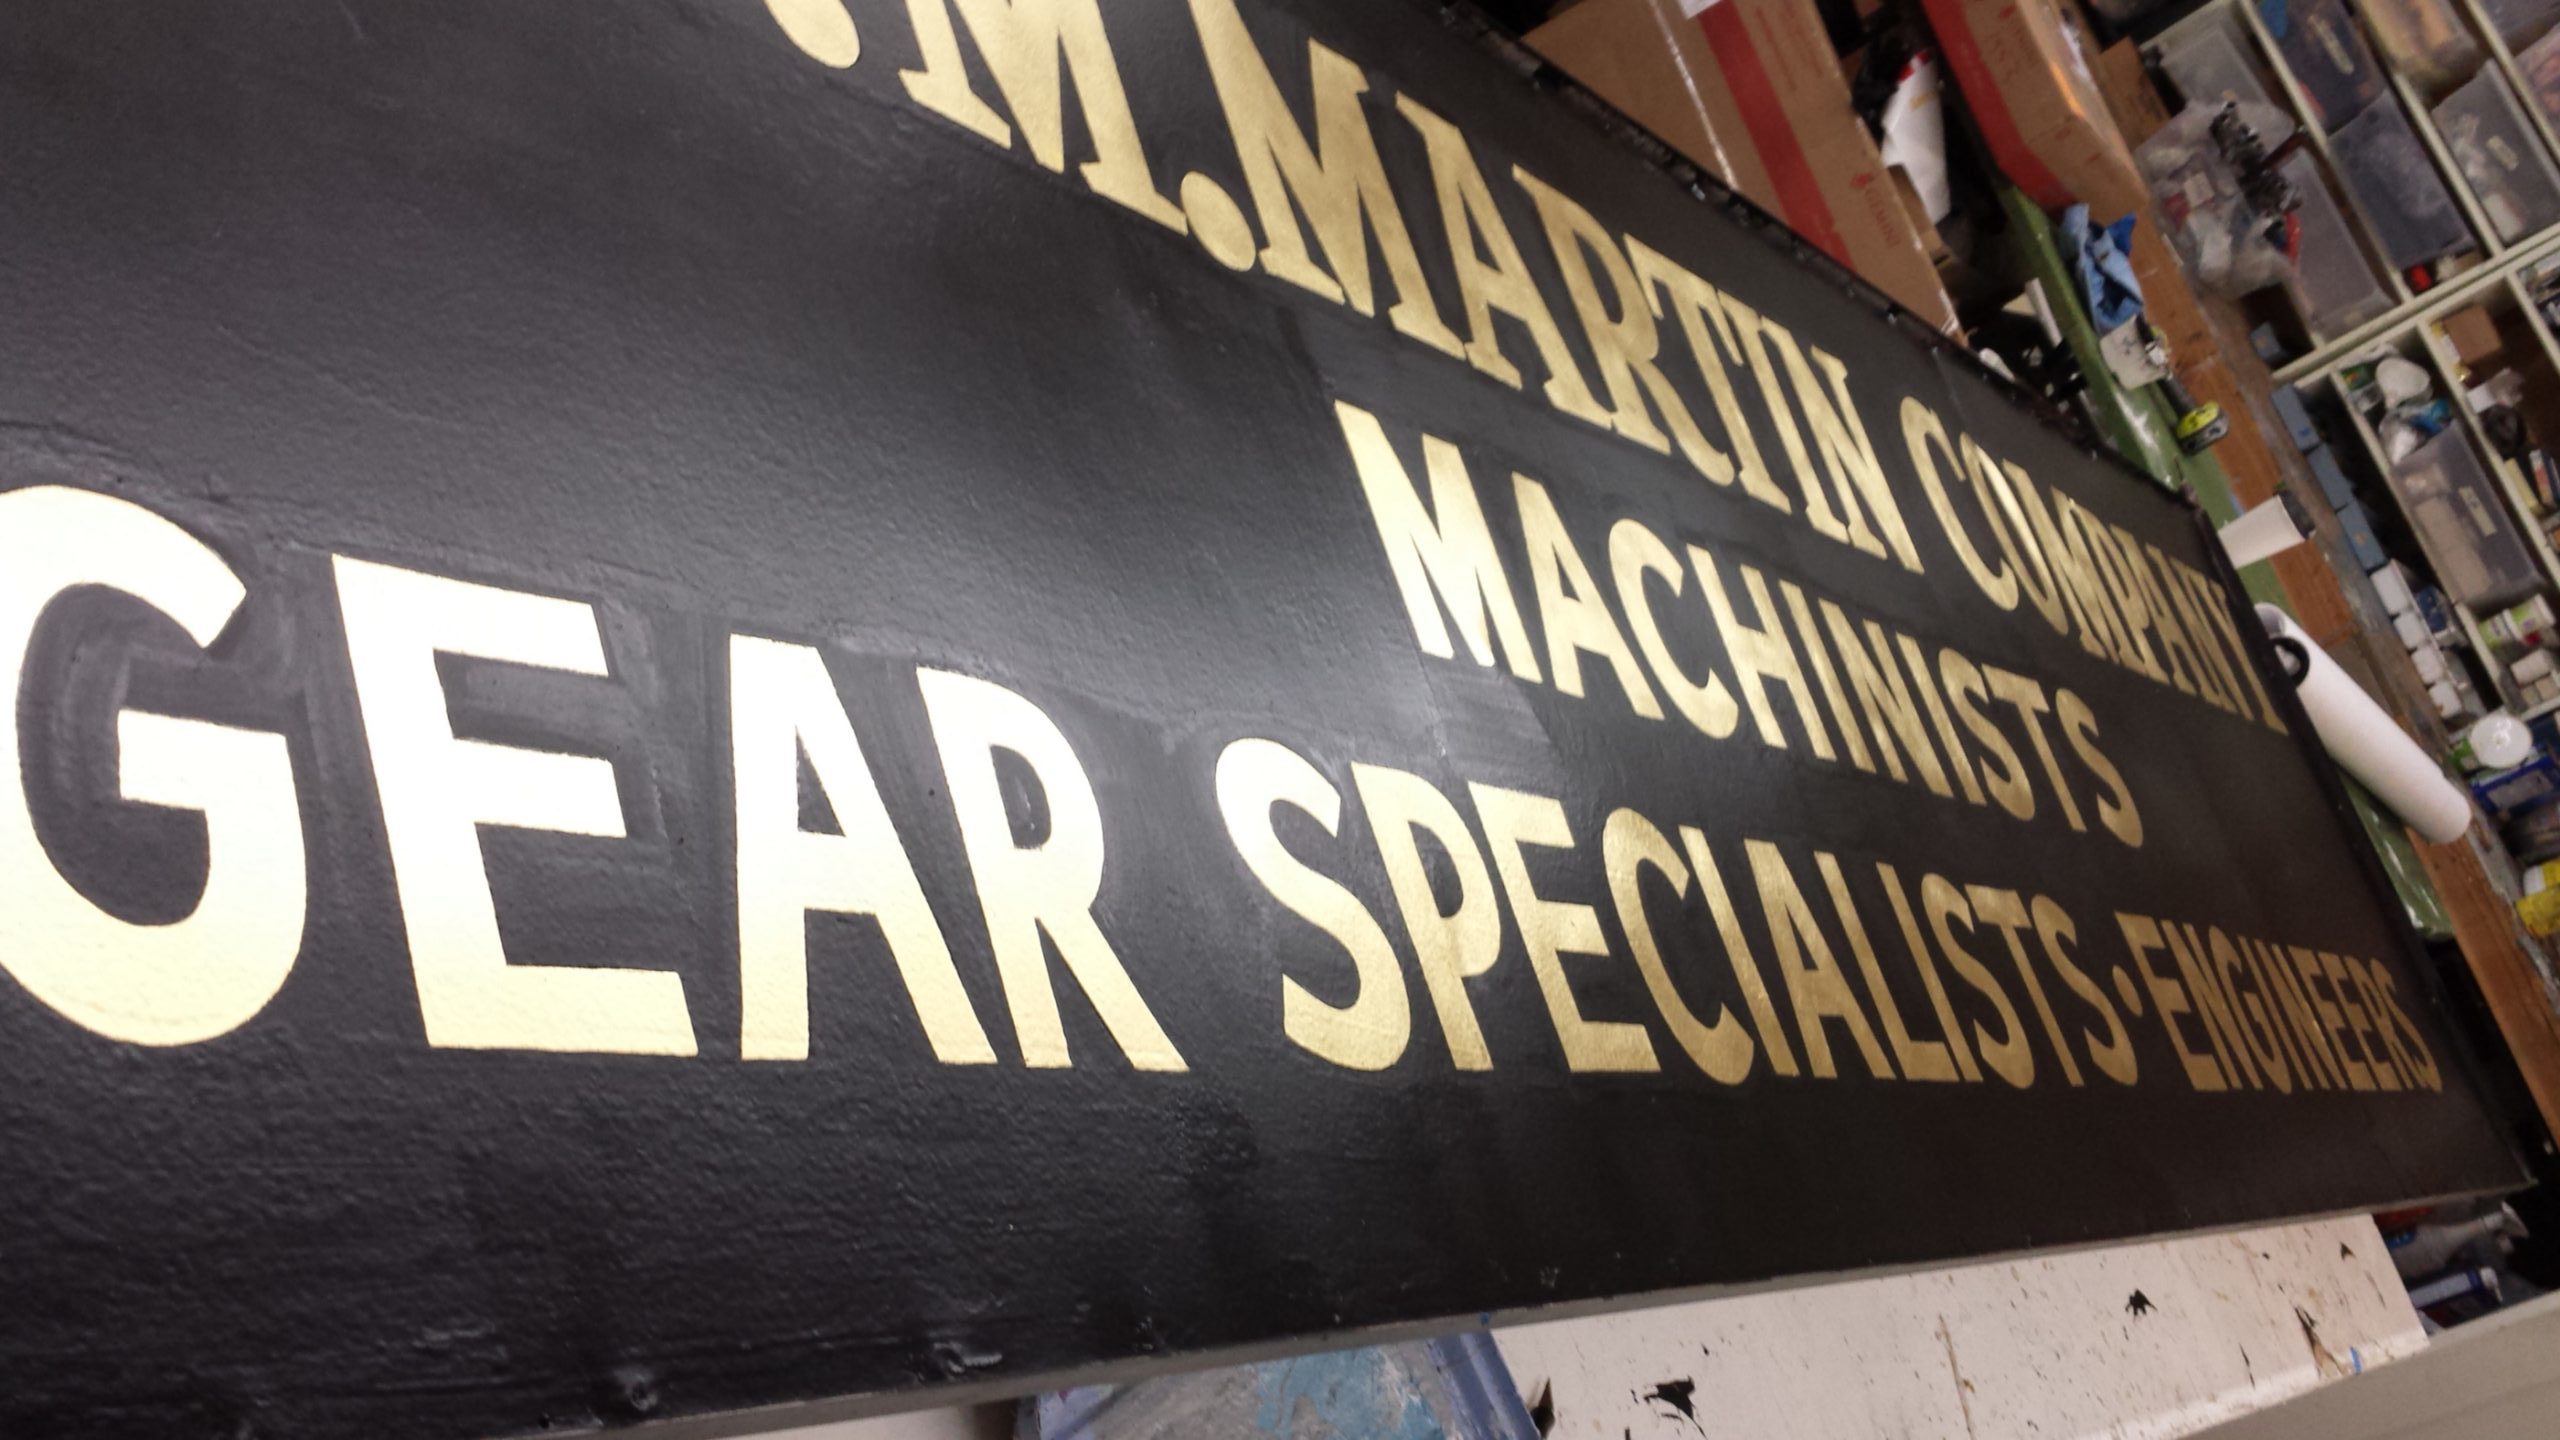
Geo. M. Martin Co. sign
I made a tracing of the sign as I attempted to address a few inconsistencies leftover from the 2 or 3 re-lettering jobs this sign had survived in 75 years or so. Some of the stroke widths and serifs were a bit too random and cried out for some careful adjustments that I made as I traced the original. I elected to paint the entire background right over the gold so that the black would look even and clean. I used satin black Rustoleum that looked great but created some challenges later because the subtle sheen made touch-ups seem obvious. The 23k lettering was applied with 12-hour slow oil-size, and W&B patent gold leaf.
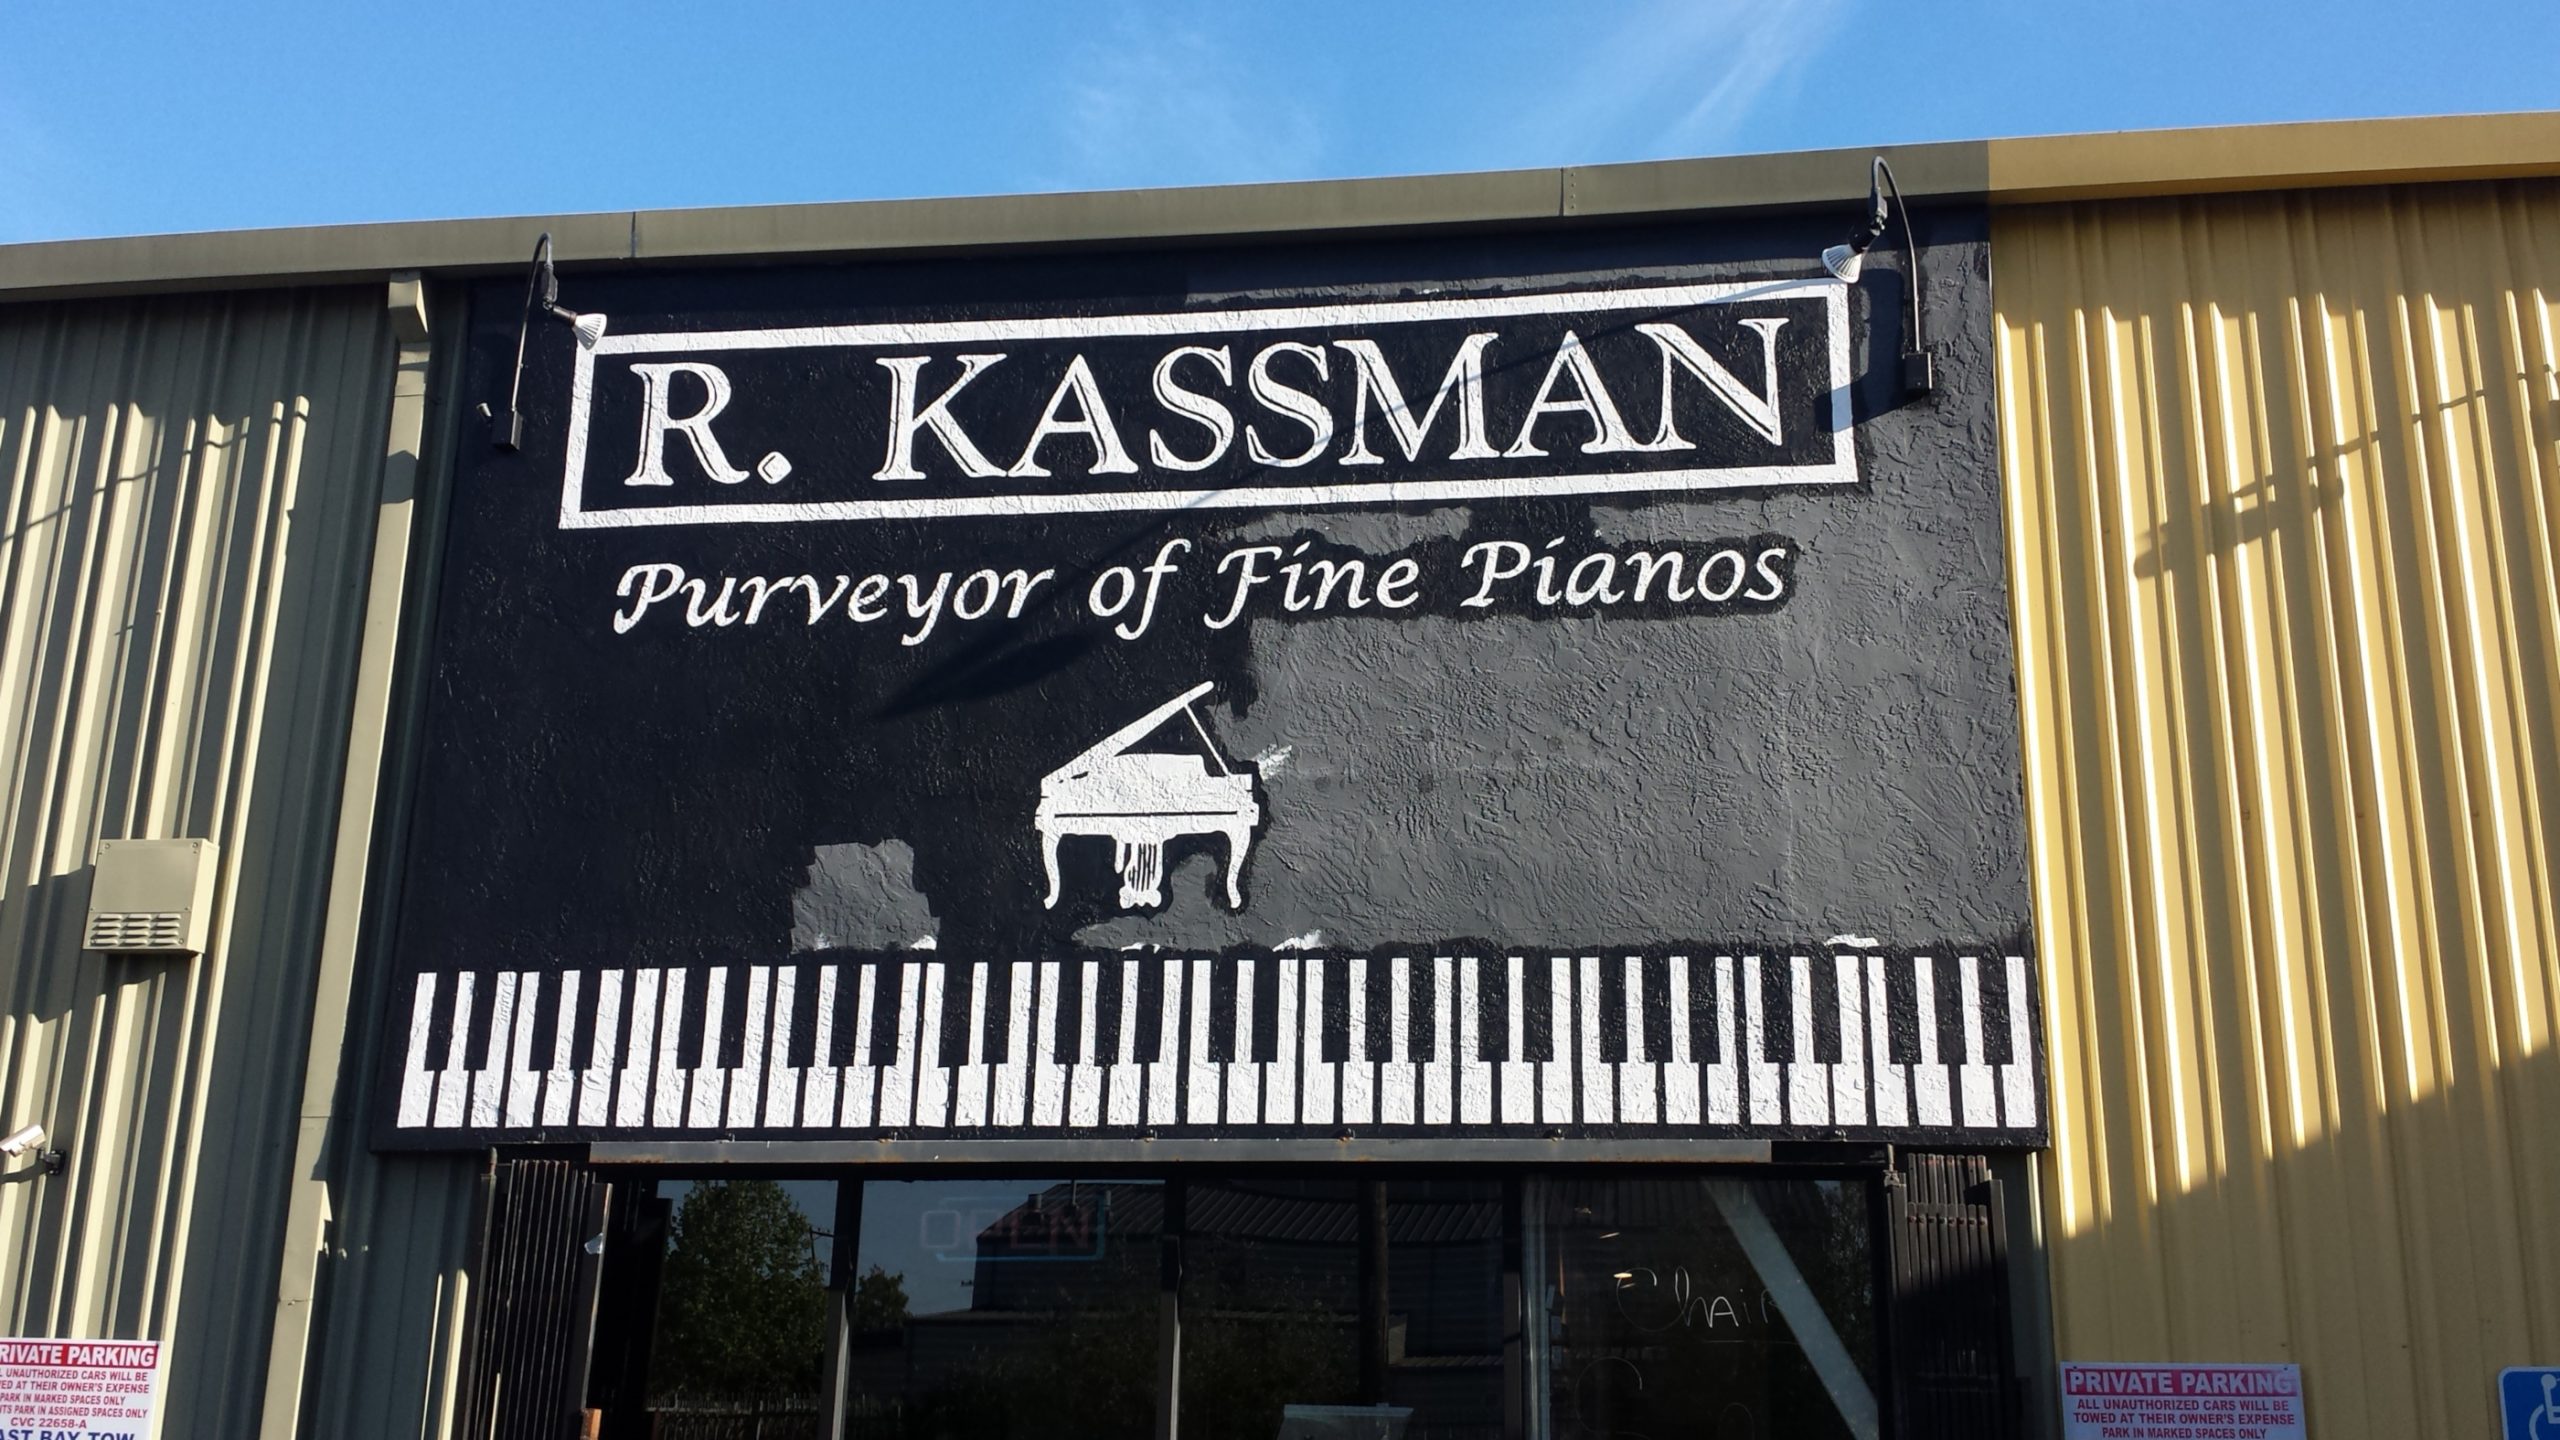
Kassman Pianos sign
I opted to repaint the white and the black “side-by-side” because there was a lot of damage to the original art due to scraping. It would have been nice to prime the entire wall and repaint it white. If I did it that way I then would have had a debate about whether it was better to trace the entire sign or re-plot the art from scratch. It happens that the original file was lost because I subcontracted the job way back when. So I committed for better or worse to selectively redrawing the obscured parts as I applied the latex primer and white Benjamin Moore topcoat. The side-by-side method might not be the fastest way to do it but it kept the existing white very clean while limiting extra steps.

Electric Time Co. sign
It was a challenge to apply Mathew’s catalyzed paint for the first time in such a place! The paint was fairly easy to apply with the brush and roll additive. I was expecting it to be more difficult but it was similar to applying old-fashioned oil enamel. I wore gloves and wore a respirator at all times. Cleaning up with acetone as opposed to mineral spirits was essential. There were doubtless some technical details I overlooked but the quality level was still dependent on how much time I spent scraping away the old corroded paint. Simply put I needed to be patient and look very closely while scraping. This was a real “preparation is 60% of the job” type project.
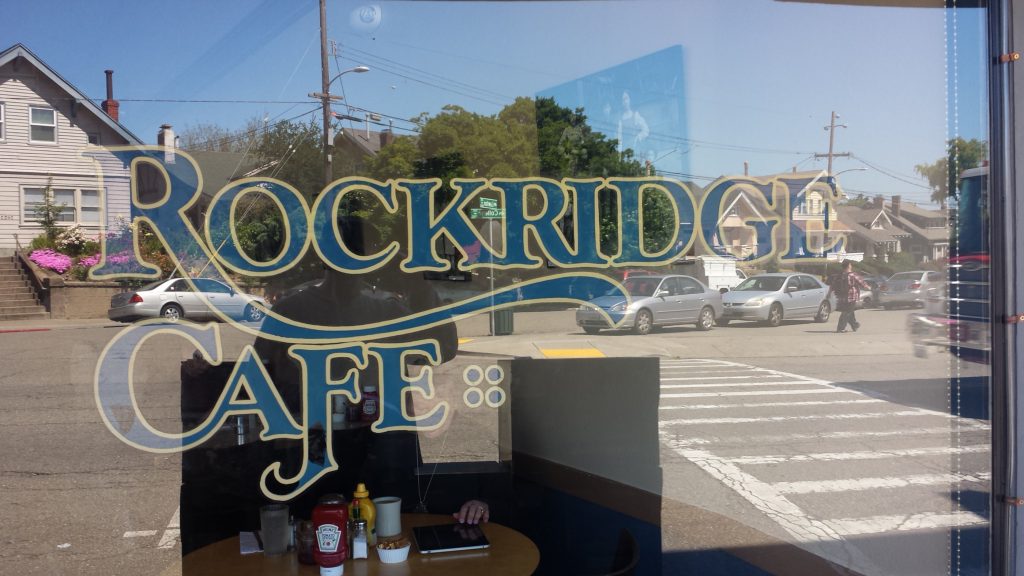
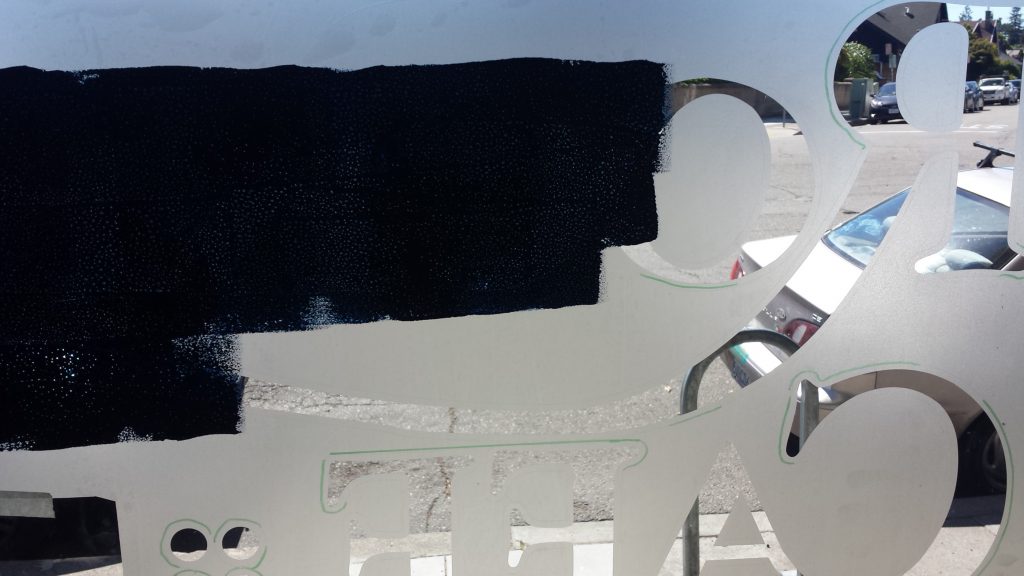
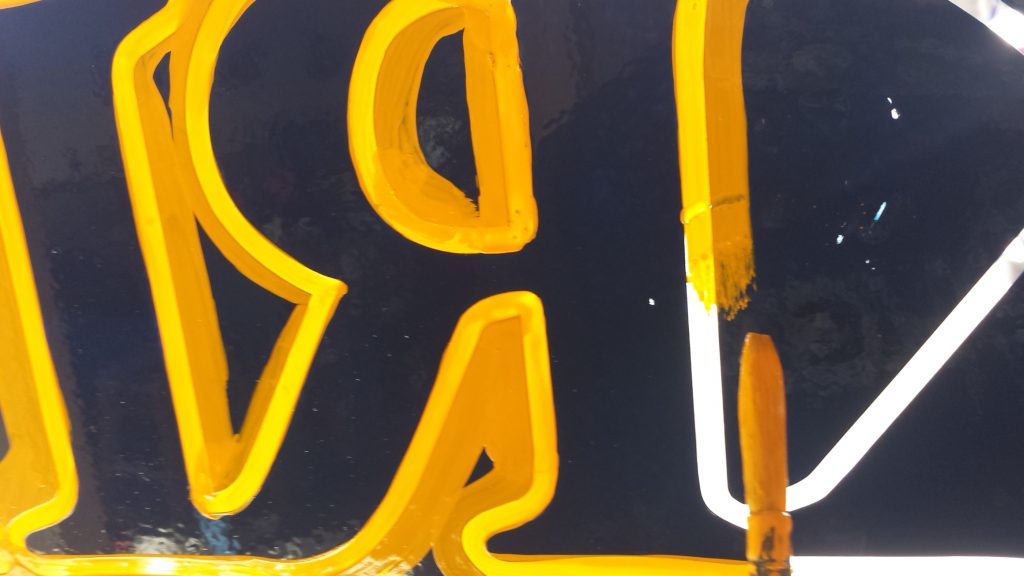
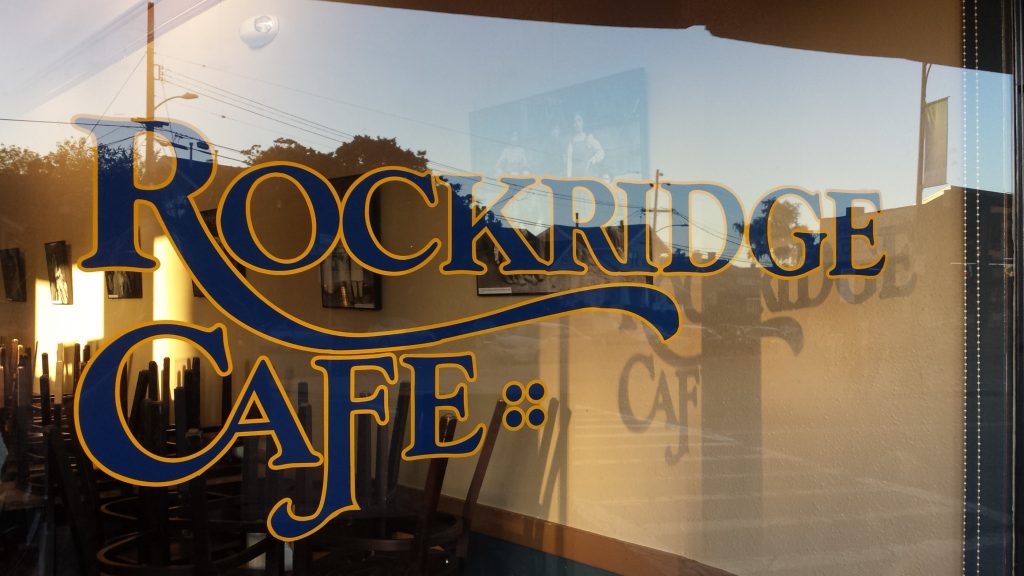
Rockridge Café sign
The original window was probably hand-painted while following a paper sketch on the outside of the window. The original art would likely have been projected onto paper first to create this guide. The client still had the original printed logo so I chose to scan it and replicate it as a vector file because there were two windows with the same design. This way I could cut a low-tack paint mask with an accurate outline that was very efficient to execute twice. I had an interesting time matching the original blue that I was sure had to be a stock 1Shot color. After putting samples of 155 reflex blue and 156 brilliant blue directly on the glass I wasn’t satisfied until I tried the rarely used 158 dark blue.
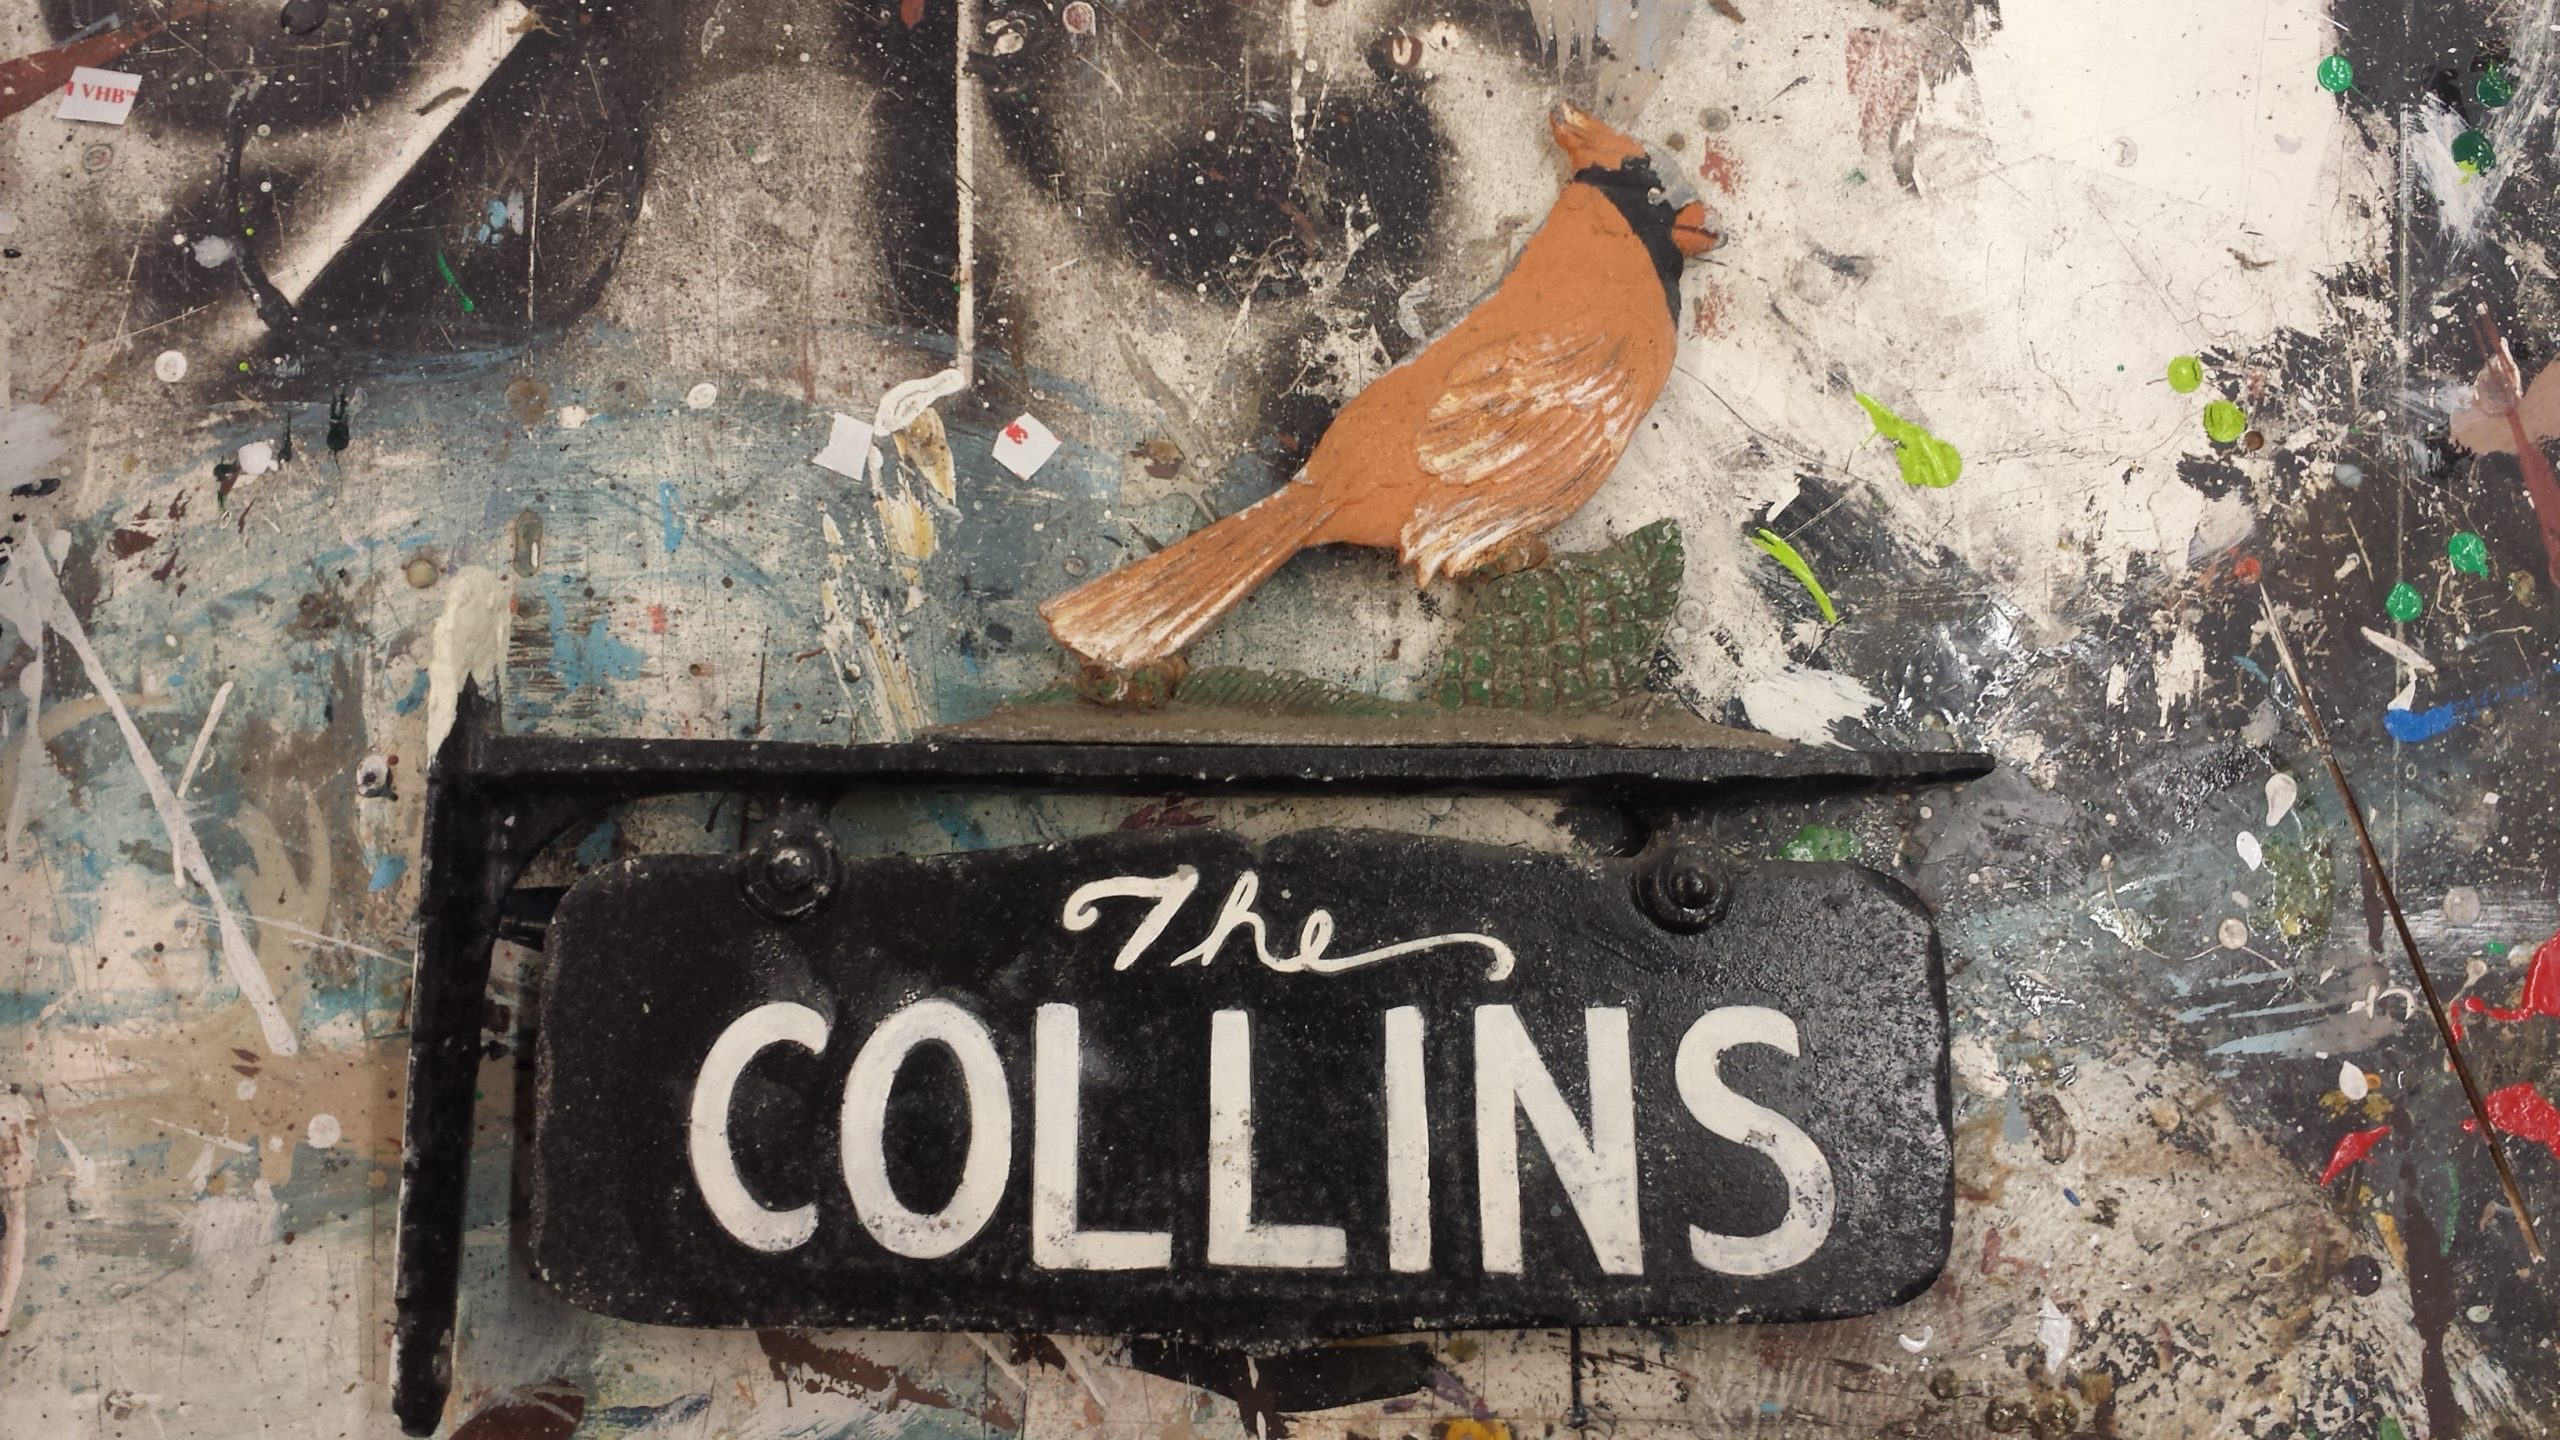
The Collins sign
I couldn’t resist sharing this fun little project. First, I took before pictures for reference. Then I did a tracing of the lettering before painting the entire sign background black. I created the pounce pattern directly from the tracing paper sketch with my Electro-Pounce machine. I transferred the image through the paper with white pounce powder and did all the painting with 1Shot.