A Time-Saving DPI Tip for Laser Engravers
Depending on the project, adjusting the DPI settings may be the answer you're looking for
Lowering raster DPI settings saves a lot of time. The DPI setting is in a direct, straight line relationship with the time the job takes to run. In general, if something takes 10 minutes to run at 600 DPI, it will take only five minutes at 300 DPI and just three minutes, 20 seconds at 200 DPI. But what effect does that have on the image quality, particularly a grayscale or photographic image?
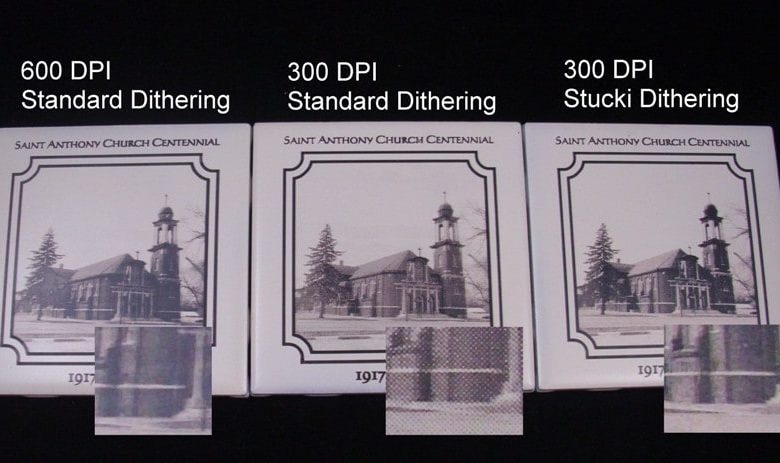
It’s common for rasters of photos and other grayscale graphics to be done at 600 DPI. I do these at 300 DPI in half the time. In order to get a good image, however, there are some adjustments to make to compensate for the lower DPI. To demonstrate, I ran a set of images on painted tiles (see the image above).
First, you need to increase the power, otherwise the image will not be dark enough. Low DPI, however, will result in an image where the dots, upon closer inspection, are readily evident. You can soften that dot pattern by using a dithering pattern in your print driver. In this case, Stucki dithering was used. At 300 DPI, the dithering pattern made the dots virtually disappear. It created a nearly identical image to the 600 DPI image but in half the time. I usually do one or two dozen of these tiles at a time, so the time savings can be significant.